Category Archives: cooking

Mint Brownies

When I make brownies I usually use a box mix, whatever brand is cheapest,  sometimes it’s fudge brownie mix and sometimes it’s dark chocolate, but rather than just plain old brownies, I try to turn them into something special. In the past I’ve done this  by adding nuts, raisins or marsh mallows, or adding a peanut butter/ powdered sugar combination, or sometimes melting chocolate chips on top. Last week I decided to try something new.

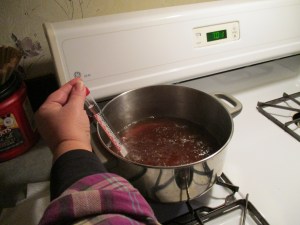
I decided to make mint brownies. Instead of running to the internet for a recipe, like I would normally do when I want to try a new recipe, I went to my stash of dried herbs. Among the herbs that we grew and dried this year were both spearmint and chocolate mint. For brownies I decided to use chocolate mint. Using my fingers I crushed up some of the mint leaves until they were like powder. I then added about a teaspoon of the crushed mint to the dark chocolate brownie batter. Other than that I follow the directions on the box.

While the brownies were baking, my husband came in the kitchen and spotted the empty brownie box. “Yum” he said.

“But I added a surprise,” I said teasingly.

“I guess I’ll have to wait,” he pretended to sulk.

Then the detective in him took over and within a couple minutes I saw him sniffing around, “What’s that I smell?” he asked.

“What does it smell like?” I asked, testing his investigative skills.

“Mint,” he said with a bit of question in he voice.

I had hoped to gage his reaction when he tasted the brownies, but I felt forced to reveal the secret, “I made mint brownies.”

We waited until after dinner to try the brownies. The flavor was all that I hoped for. My husband compared them to Thin Mint Girl Scout cookies, and the flavor reminded me very much of Andes mints, those irresistible little chocolate mints wrapped in the green foil paper.

So if you are wondering how to use some of the mint that is threatening to take over your garden this is a simple recipe that will give you a great appreciation for your mint. If you are not yet growing your own mint then you may find it tempting when you hear that mint is fairly easy to grow. It requires at least a partially sunny area and moist but not overly wet soil. I have read that it can be grown as an indoor plant, it can be grown as a potted patio plant or grown in any garden. Some people may be reluctant to plant mint as it is know to be invasive. One option that is recommended is to put the mint plant in a deep pot and then plant the pot and all to restrict mint to certain area. My recommendation, if you want to restrict mint growth, is to harvest the outer edges of the plant by the roots, or dig up a portion or several portions of the mint plant and give it to a friend or several friends. You could also present them with this simple recipe.

1 box brownie mix

1 teaspoon dried mint leaved (crushed into powder)

Mix brownies as instructed on package then mix in mint leaves. Bake as instructed on brownie package.

🙂 Enjoy!!!


For Garlic Lovers

I am a bit afraid that things are getting somewhat confusing on my blog since I’ve recently written about soap and sap, but I still feel the need to add this post about a soup that I made recently. To be clear this is definitely a recipe to eat but I would not recommend bathing with it 🙂 .

The soup which I might call cream of potato with mushroom and garlic was loosely based on this recipe  http://allrecipes.com/recipe/13131/cream-of-garlic-soup/ . I’m really not sure how much you have to change a recipe before it can become your own, but I am fairly sure that the original recipe would be good as well. I didn’t precisely measure most of the ingredients so I’ll just share with you the changes that I made to this recipe.

I started with three medium size bulbs of garlic, I peeled each clove and minced it in the garlic press, this was at least 3/4 of a cup maybe more. I heated the olive oil in a pan and then added the minced garlic to the hot olive oil and turned off the heat. I had also peeled, cubed and boiled three good size potatoes. Instead of white wine (in the original recipe) I increased the amount of chicken broth to about 3 1/2 cups. I added the garlic/olive oil to the chicken broth. I drained and mashed the potatoes. I then began using a mixer to beat the potatoes and slowly adding the broth. If you decide to use the mixer like I did, instead of a blender that is recommended in the original recipe, it is important to add the broth slowly because at some point the mixture might become so thin that it begins to splatter. Take it from me, you really don’t want to find yourself washing it off the counter, walls,  your shirt and anywhere else it happens to land. When the mixture did get too thin to use the mixer I found that I was able to stir in the rest of the broth. I put this mixture on the stove over medium heat, stirred in about 3 cups of half and half and added about one teaspoon of salt.

While that was cooking I washed, sliced and sautéed about 12 ounces of fresh mushrooms. I then added them to the soup. I let this cook over low heat for about an hour, stirring every now and then to make sure it was not scorching.

As my title says this soup is for garlic lovers. It does have a very strong garlic flavor. Yumm!  I am not sure that I would like it as much without the mushrooms and it might even be better with cheese melted on top.

As garlic farmers we are interested in all things garlic, so I invite you to share how you like to use garlic. Do you use it medicinally? Do you have a favorite recipe? Please feel free to comment on this page.


Remember The Recipe

I made a dish for dinner the other night, and as I often do, I did it without using a recipe. My husband liked it so much he asked me if I remembered the recipe. My answer was yes, but that’s not to say that I will always remember or be able to recall the recipe. I thought I would write here so I will know where to find it.

My goal was to use up a chicken breast that was leftover from the previous nights dinner. I also thought I wanted to make a Mexican style dish.

So in a 2 quart casserole dish I layered the following:

1 can refried beans

1 can whole kernel corn

1 cup cooked white rice

1 can chopped green chili peppers

1 cooked and cubed chicken breast

I then poured 1 can of green chili enchilada sauce over it

I topped it with a mix of shredded cheddar and shredded Colby jack cheese

I put it in the oven and baked at 300 until it was warmed through probably about a half hour. I severed it with tortilla chips. I spiced mine up by adding salsa and my husband enjoyed his with parmesan cheese sprinkled on top.

This simple recipe made a nice dinner and was easily reheated for lunch the next day as well.


Making Maple Syrup

The warm temperatures on Friday and Saturday were great for sap flow, so by the end of the day Saturday my husband had collected approximately 10 gallons or 40 quarts of sap. While collecting the sap from the sap buckets into plastic 5 gallon pails he filtered the sap through a honey filter that sits in the top of the 5 gallon bucket. This removed any solids that found their way into the sap. Overnight temperatures were cool enough to store the sap outside without it spoiling.

Yesterday morning he set out for the farm with the equipment he needed for cooking the sap. I didn’t get pictures of this part of the process yet, but hopefully I will as we collect and cook more sap. For equipment he took  a 30 quart stainless steel pot for cooking the syrup and a long handle stainless steel spoon for stirring. He also took a second pot that the hot syrup would be transferred to in order to bring it home. He packed a lunch for himself and some treats for Scout and Trooper.

Since we don’t have a sugar shack or sap house for processing the sap indoors, it was a blessing that the weather was favorable for keeping an outdoor fire going. In preparation for this my husband had constructed a special fire pit, in a high and dry location, and split several wheel barrels full of fire wood. He began his syrup making mission by getting the fire going around 10 A.M. with a goal of having some finished product by days end. Keeping the fire burning and the pot boiling were his main objectives. He first thought that boiling small amounts at a time (filling the pot 1/4 full) would speed up the process, but he quickly learned that each time he would add more cold sap the temperature would drop so dramatically that it would take 10-12 minutes to return to a boil. Realizing the whole pot was hot, he decided to fill he pot closer to the top and maintain the boil while adding only smaller amounts of sap as it boiled down. He said it took about two hours before it came to a rolling boil.

In mid afternoon he made a quick trip back to the house to bring Scout and Trooper (who apparently just wanted to lay in the van) and to grab some hot dogs that he could cook over the fire for dinner. At this point he was anticipating that it could be as late as 8 P.M. before he was done cooking down the sap.

Reality was that around 6 P.M., a long  eight hours after he began, and just in time for the chickens to be closed in their coop for the night, the sap had boiled down enough that the rest of the process could be done in the kitchen.

When he returned home we poured the cooked-down sap into a much smaller pan.

IMG_0690
Well On It’s Way To Becoming Syrup

We heated it for a few minutes before deciding this would be a good time to filter it. We had decided to use a juice (or jelly) bag, that I had on hand for filtering the “sand”(a byproduct of boiling sap) out of the syrup. This seemed to work well. We then returned the sap to a boil and watched closely as it continued to boil down. My husband also told me to take some bacon out of the freezer to cook with tomorrows waffles for breakfast.

Once it seemed to be thickening I put in a candy thermometer. It needed to be brought up to 219 degrees  fahrenheit or 7 degrees above the boiling point of water.

IMG_0692
Watching The Temperature Closely

While I watched the thermometer, my husband used a spatula dipped in the syrup to check for sheeting – the syrup forms a sheet on the spatula instead of running off in droplets.

IMG_0694
Woo Hoo! It’s Syrup!

When the syrup was sheeting on the spatula and the temperature reached 219 degrees, which happened about the same time, we poured the syrup into sterilized ball jars.

IMG_0696
A Little More Than 1 1/2 Pints of Syrup

Of course we had been tasting our product along the way, and I can honestly say that, while I don’t have a long history of tasting pure maple syrup, this is the best maple syrup that I have ever tasted.

This mornings breakfast menu included bacon and blueberry waffles, (with frozen blueberries from last springs harvest and our farm fresh egg), and of course our own maple syrup. Yumm!

http://andersonsmaplesyrup.com/index.php?page=nutritionalinformation  This link has some really good nutritional information about real maple syrup.

While we don’t call it a bucket list, making maple syrup has certainly been on our to-do list for quite a long time and we are thrilled that we have done it. 🙂

Since the weather has cooled again the sap is not flowing, this weird weather pattern has only left us wondering when the next sap will flow and how much syrup we might end up with this year. But in the mean time we have realized why real maple syrup costs so much.

Don’t Try This

I decided to make my husband a special dessert today for Valentines Day. Well to be honest, I would have made it for him any day, just because I love him and he loves desserts. I was inspired by the Foxfire Book http://www.foxfire.org/thefoxfirebooks.aspx   that I was reading last night. When I read about fried pies, I got to thinking that they would probably be similar to Hostess Fruit Pies. My husband likes those little pies a lot, so I was pretty excited thinking that I could make him some.

Since the directions in the book were very vague, I did a internet search this morning and found this recipe http://thepioneerwoman.com/cooking/fried-fruit-pies/   I don’t really know why I bothered, because I already knew what I was going to do.

I took a bag of frozen mixed berries out of the freezer along with half a bag of frozen blueberries. I like to say these were all homegrown, but our berry crops did not do quite that well last year. I also took two store bought pie crusts out of the freezer. I put the berries in a pan, added about 2/3 cup of sugar and a couple tablespoons of cornstarch, and put them over low heat to cook.

IMG_0652
Mixed Berries for Pie Filling

I cooked the berries until they thickened up.

IMG_0653
Mixed Berries for Pie Filling

While the berries were cooking I took the pie crusts out of their pans and rolled them out.

IMG_0654
Pie Crusts

I decide that I was going to fry these in lard, so I started heating the lard in to pan.

IMG_0655
Melting the Lard

Once I got the pie crust rolled out so it was pretty flat and somewhat rectangle shaped, I cut it into wide strips and spooned some pie filling on it. I folded it over and pressed the edges to seal them.

IMG_0656
Pie Filling on the Pastry

Once the lard got to 350 degrees I dropping my pastry in with great anticipation. Instead of watching my pie turn a lovely shade of brown, this is what I saw.

IMG_0657
Doesn’t Look Much Like Pie

The pastry just disintegrated, and I was left with small particles of pastry and pieces of fruit frying in hot grease. While I wanted to cry, I am not that easily defeated. I got out a baking stone and preheated the oven. I filled the rest of the pastries and put them on the stone.

IMG_0658
Ready To Go Into The Oven

I baked them for about a half hour at  350.

IMG_0659
Out Of The Oven

I then put on a light glaze made out of powdered sugar and water. The end product was more like toaster pastry. My husband, who also like toaster pastries, said these were really good. When I saw him eating a second one I was convinced.

While the pastries were baking I did a little detective to find out why frying these was such a failure. I knew it must be something with the ingredients, so I read the ingredients on the package for the pie crust. It was basically made of flour, water and lard. I realized that there was nothing to hold the combination together. No egg. Sure enough when I went back to the recipe that I had viewed this morning, on The Pioneer Woman website, it included egg.

Well one would hope that I would learn a lesson from this, and that I would start following actual recipes  instead of just doing what I think will work. I wish I could say that is true. Maybe I will, sometimes, but I do so enjoy experimenting.

I think the real lessons for me is to have a back-up plan. It also shows me how much my husband loves me (not that I had any doubt about that), he not only tolerates my weird, quirky ways of doing things, he encourages them. He is my biggest fan.

Oh, and if case you are wondering, I’m sure the chickens will enjoy the fried pastry crumbles and fruit, so they will not go to waste.