Monthly Archives: March 2019

Learning To Ferment Foods – Sourdough Bread Baking

I was beginning to think I was never going to get this post written and  some of you may have been wondering as well. So without further ado let’s return to the “Sourdough Mystery Tour” (as one of my readers dubbed it.)  If you have missed my previous sourdough posts you can find them here and here. While I have been baking sourdough bread at least once a week since the second or third week in January I had yet to get a loaf that I was completely happy with. It seems it has taken longer than I expected for Trixie (my sourdough starter) and I to get acquainted. I am ecstatic to tell you that, while it is not perfect, the last loaf I baked was darned GOOD!


Rather than make you painfully read about each of my not so good loaf (pictured above) stories, I decided to just highlight some of the things that I have learned along the way.

The Recipe: I started with this recipe for basic white bread and have continued to use the same recipe throughout.  A couple of things that I think are important to mention about this are:

  • It is best to feed the starter several hours before making the bread. This will assure that the starter is active and will give better rise during the proofing time.
  • The amount of water in the recipe should be taken as a estimation only, as it is dependent of hydration level of the starter. If a starter is super thick (less hydrated) the recipe will require more water than a starter that is thinner (more hydrated). It is best to add the water in small amounts and mix it in until the dough is the proper consistency.

Proofing Time and Temperature: Proofing is the time that the dough will take to rise. During this time the sour flavor also develops.

  • The amount of time it takes the dough to double in size is largely dependent on the temperature. Since our house is cooler (between 65 and 68 degrees F) this time of year it has been taking 12 or more hours for the dough to proof. I am sure this amount of time will be shorter during spring and summer when the weather is warmer.

Baking: How to bake the bread so that the inside was not doughy but the outside was not burned or rock hard was my biggest challenge. I eventually learned that the bread needs to be baked in moist heat. Here are the methods I used to create moisture in the oven.

  • Placing a cast iron skillet in the bottom of the oven and adding water to it. This seemed to work to some degree but as I mentioned I was not getting the results I hoped for.
  • Baking the bread in a cast iron Dutch oven was recommended but I do not own a cast oven Dutch oven (at least one designed to use in the oven).
  • Eventually I realized that I had something that might work as well as a Dutch oven. It is a stoneware roasting pan. It is made by Pampered Chef. I have had this dish combination for probably 25 years and while I occasionally use the pieces as individual baking pans I can’t remember ever using the two together as a roaster.
  • Stoneware,  like cast iron, can withstand the high temperatures required for baking sourdough bread.
  • It is necessary to preheat the baking dish along with the oven before baking the bread.
  • Having the lid on the baking dish creates steam as the moisture cooks out of the bread.


Voila!

This is the results of baking in my stoneware roasting pan. The inside was fully cooked and wonderfully chewy. The outside was crusty and a little too dark for my liking so I will still be experimenting with reducing baking times and temperatures until I get it right.

Planning: While making the bread doesn’t require a lot of direct contact it does require that certain things be done according to a timeline. So far this is what has worked for me.

  • First thing in the morning (between 6:00 and 7:00 a.m.) feed Trixie.
  • Wait at least 3 hours but probably no more than 5 hours to mix up the bread (between 10 a.m. and 12 noon).
  • Allow bread to proof until at least double in size. Since this has been taking 12 or more hours the bread may not be ready to bake until I am ready to go to bed. If it has doubled in size I before I go to bed I put it in the refrigerator to slow it down over night. If it has not doubled in size I leave it on the counter to continue proofing overnight.
  • The following morning I preheat the oven with my stone roasting pan with lid in it for about 40 minutes.
  • I then remove the roasting pan and lid and place parchment paper in the bottom of the pan, sprinkle corn meal, then place the bread in it.
  • I cut a slit in the top of the bread. I put the lid on the casserole dish and put it in the oven I check the bread for doneness at about 45 minutes. If it looks done I then test it with a thermometer. If the temperature is at least 208 degrees F the bread is done.

In the past I have had a hard time justifying the expense of purchasing sourdough bread and while I will forgo that expense by making my own this experience has given me a whole new appreciation for these artisan breads and great respect for those who create them.

Before I close I will leave you with a link for a recipe for sourdough cinnamon rolls that I made at my husbands request because they turned out really well.

Thanks for reading and please share your thoughts in the comments section below.

Welcome Spring

This post is dedicated to my friend and fellow blogger Linda who blogs at Walkin’, Writin’ Wit and Whimsy. Linda, who takes readers along as she walks at various parks in South East Michigan and introduces us to the furry and feathered friends she meets along the way, has been as eager as I have for the arrival of spring. On occasion her posts reference classic songs – oldies but goodies –  leaving me with an ear worm for the day. As we welcome spring, Linda, I thought I’d return the favor.

So let me tell ya ’bout the –

BIRDS

Sunday morning as I walked out the door on my way to open up the chicken coop for the day I was greeted by the song of a robin. It is a sound I have become quite familiar with over the past few years as each spring a robin nests in the maple tree outside our bedroom window. He or she starts singing each morning long before the sun comes up, (sometimes as early as 3:30 a.m.) and long before my husband and I are ready to awaken. If the early bird catches the worm then this is one well fed robin.

In Michigan it is said that robins are a sure sign of spring but the truth is that some robins stay in Michigan throughout the winter. Robins that migrate south for the winter are doing so because of the limited food supply available this time of year, not because of the cold temperatures. During the winter those that stay will eat fruit and berries that are left on the trees/bushes.

As I arrived at the farm to open the chicken coop two robins flew swiftly past me. 🙂

Red winged black birds are also said to be a sign of spring.


IMG_4803.JPG

I spotted this one as Trooper and I walked the back field yesterday.

Our hens have been enjoying the weather and egg laying has increased – we are now averaging about 12 eggs a day from our 23 hens.

IMG_4800

Spring is also the time of year when baby chicks show up in the farm stores. Each year that I have been blogging I have shown pictures of adorable little chicks that will be raised on our farm. Thus far we have only raised egg layer but this year is a little different. These will not be laying hens.

IMG_4799
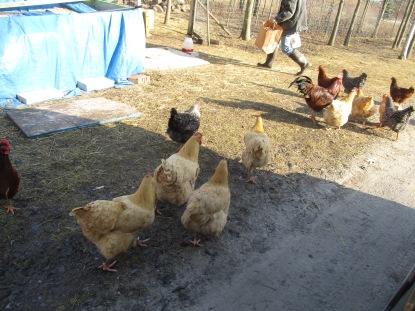
It’s ok to say “awe, they’re cute” – just don’t get attached because they won’t be with us long. (That note is as much for me as it is for you).

and the BEES
Several days last week temperatures warmed enough for the bees to come out for a cleansing flight. We had just one hive going into winter and were relieved to see that they are still alive. It is not warm enough to open the hive yet and since nothing is in bloom they are still dependent on their winter food stores.

and the FLOWERS

Even more promising than seeing robins were the daffodils that have begun to emerge from their winter sleep.

IMG_4793

Soon we will be seeing their smiling yellow blossoms at various places throughout the farm. 🙂

and the TREES:

We decided not to make maple syrup this year but if  you are interested in how we do that you can check out my posts from previous syrup seasons 2018, 2017 , 2016 and 2016. Based on temperatures that we have had last week and this week I suspect that had we tapped our trees this year we would be cooking syrup this week.

In the past few years it has been my observation that the first trees to bud in our area are the poplar trees. Their flowers, that actually look more like caterpillars, provide resin that is collected by honey bees and used to make propolis.

The maples seem to bud out next and while this triggers the end of the syrup season it is good for the bees as the flowers of the maple trees seem to be their first source of food in the spring.

and the Moon Up Above

Last night my husband mentioned that the moon was close to being full. This morning, before daybreak, the sky was clear and the moon was bright. This year spring is being ushered in by the full moon.

IMG_4805


and a Little Thing Called Mud

IMG_4792

As the snow melts and the ground thaws there is no avoiding it. When you live in the country mud is more than a “little thing”. Water + dirt = MUD. Lots of mud. You learn to deal with it. For us that means wearing a pair of rubber boots and rinsing off our boots and the boys paws with a garden hose before we go into the house.

Over the past 8 years we have learned that starting the year with this kind of moisture in the ground is more of a benefit than a nuisance. By mid June we often find ourselves in a dry spell and are using the pond water to keep our gardens alive.


If there is one this that is certain about spring in Michigan it is that the weather is extremely uncertain. Currently our day time temperatures are getting above freezing while the nights drop back below freezing. Today as I look at the 10 day forecast it shows that trend will continue for about the next week. Tomorrow when I look at the forecast that might change. It’s not surprising to have snow storms and freezing temperatures well into April and even May. On the other hand summer weather might show up at anytime and be here to stay. For better or worse the calendar says spring is here.

WELCOME SPRING! (Happy Dance 🙂 )

What is your favorite season?


Baking With Sourdough

Now that I have mastered the art  science mystery of baking with sourdough I have to tell you about it. LOL!! I couldn’t even type that with a straight face. The truth is I have nowhere near mastered baking bread with sourdough, and my post about my trials (and errors) of making sourdough bread is still a work in progress.

Fortunately there is more to sourdough than just making bread. What I do have for you today are two recipes that I have made with sourdough that are really good.

The first one is sourdough banana bread. I made this once following the recipe as written but added a half cup or so of blue berries. It turned out good but a bit dry. The second time that I made it I added one more mashed banana and of course added the blue berries. It turned out perfect. 🙂

The second recipe I made today. It is this recipe for sourdough chocolate cake. I made a few changes to this recipe as well – I used melted butter instead of  vegetable oil; I used unsweetened dark chocolate cocoa; and I did not add the espresso powder.

I also decided not to make the frosting that goes with this cake recipe. In my laziness I decided just to put some store bought vanilla frosting on it. However, in his great wisdom, my husband suggested we taste the cake without frosting. Well let me tell you, it is moist (almost brownie-like) with a rich chocolate flavor and even had a little crispiness on the top. Delicious!!! There was absolutely no need to add frosting or anything else to this cake.

IMG_4782


As you can tell Trixie is earning her keep and we are most pleased to have her as part of the family.

IMG_4776

Now it’s your turn – have you ever had sourdough desserts? Do you have a favorite?

Aloe

IMG_2356

While I was making a batch of aloe soap this week I remembered this article I had written in 2017. I didn’t have many readers at that time so I thought it might be a good idea to repost it. Incidently my aloe soap recipe has changed since I wrote this and now includes yogurt. To learn more about my handcrafted soaps or for information on purchasing them see my Products Page

Aloe

If you’re going to have any house plant, and you should, (check out this link to learn why) you should at least have aloe.

Aloe is easy to grow. While some articles that I have read say that it should be placed by a sunny window, I find that it does quite well in the corner of my dining room where it does not get direct sunlight. It does not require a lot of attention. I usually give it  drink of water every 10 – 14 days and this is quite sufficient. I have discovered that it also enjoys coffee, so every 3rd or 4th watering I dilute some of the coffee that is leftover from that morning and use it to water the aloe.  The plants really seem to brighten up after having their morning coffee. I do have to be careful, when using coffee to water the plants, not to get any on the aloe leaves because the coffee will damage the leaves. I only pour the coffee on the soil.

I think everyone should have at least one aloe plant in their home, not only are they helpful for the indoor environment, but they act as first aid in the case of burns. Whether it be a sunburn or accidently touching something hot, simply snip an aloe leaf, peel back the outer part and apply the sticky, oozing gel directly to the burn for quick relief. I also gifted an aloe plant to a neighbor who was having radiation treatments as the Doctor had advised that she use an aloe cream on the radiation burns. We do not deal with other skin conditions such as eczema or psoriasis but if we did I would certainly try aloe before seeking help from pharmaceuticals.

The most common way I use aloe nowadays is as an ingredient in my soap. My aloe soap is probably my favorite of all the different soaps I make. I don’t know that any of the healing properties of aloe remain after it is processed into soap, but it has a luxurious lather and just feels so good on the skin.

Do you have any house plants?