Monthly Archives: January 2017

Soap Of The Week

In a recent post I mentioned that I was planning on making one batch of soap per week. After receiving a call from a customer last week I knew what kind of soap I would be making this week.

The phone call started with the customer asking me how many bars of soap I make when I make a batch. I explained that each tray holds 16 bars and I usually make two trays at a time. She said, “next time you make my soap I want a whole tray.” She explained that her “other half”, as she calls him, ran out of his commercially made soap, so she had him try her soap. He liked it. “I’ve been trying to get him to use homemade soap,” she said, but he would only use a specific brand.

The soap I make for her is one of the simplest soaps I make. She called me last summer and told me her soap maker was no longer going to be making soap for her. She explained that she had horrible reactions when using commercial and homemade soaps and her previous soap maker had made a special recipe for her. She wasn’t sure what ingredient she was reacting to, nor was she sure what the ingredients her previous soap maker was using. She only knew it contained lard. Could I make her a soap, she asked. Since I do like experimenting, and I do like problem solving, this would be fun.

I had her describe the soap she was currently using. When she said it was very soft and “snot like” when wet, and it did not lather, I decided it was not necessarily a recipe I needed or wanted to duplicate. Since I know the two most common oils used in both commercial and handcrafted soap are coconut oil and palm oil, I figured she was probably reacting to one of these. I do not use palm oil in my soaps, so I asked her to try one of mine. After several days of use she said she did break out in a rash.

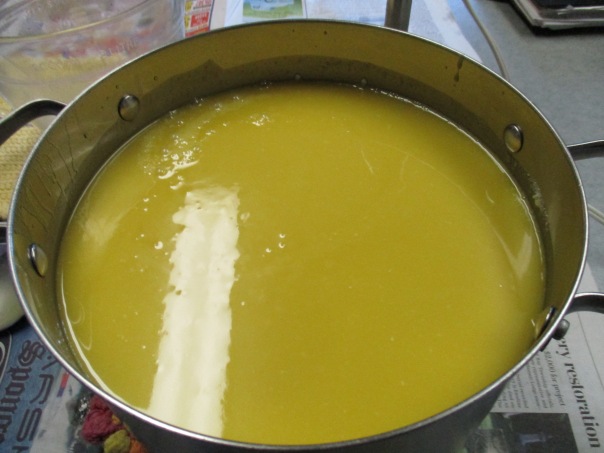
Even though it is a soap making rule of thumb to combine three or more oils or fats to make a nice bar of soap, it’s a rule that I have been breaking since early on in my soap making practice. I have made, and continue to make, very nice soaps using recipes with one, two or three oils/fats. I suspected it was coconut oil that my customer was reacting to, but decided to play it safe by using just the one oil/fat that I knew she could use. I made a soap with just one fat and three total ingredients – lard, water and lye – a recipe I had not made before.

The soap was ready six weeks later and after my husband and I each tried it, I delivered it to my customer. My personal impression was – a hard bar of soap, some creamy lather, felt good on the skin (no snot), and rinsed off nicely. Custom made, yet simple, this soap has now become “her soap” or maybe I should say “their soap”. This is the recipe I made this week, and although I haven’t named it yet I will be adding it to my store when this batch is ready (about 6 weeks).


A Year In Growing Garlic (Part IV)

It has always been my intention to give a mid-winter garlic growing update, and I thought it would say something like this. “This time of year the garlic does not need our attention. It is dormant in the ground waiting for temperatures to warm so it can resume it’s growth cycle.” That is the way it should be.

Unfortunately, at least a far as growing garlic is concerned, we are not experiencing a normal Michigan winter where temperatures are below freezing and precipitation comes in the form of snow and stays on the ground until the warmth and sunshine of spring melts it away. Winter started out with good snowfalls coming before Christmas. In early January we had some days of single digit temperatures and wind-chills even lower, and while we were uncomfortable, I had no concerns about the garlic.  Then the weather changed, we started getting warmer days. Any snow that had accumulated melted, and any precipitation that we have gotten has come in the form of rain or freezing rain. In the past 10 days our daytime high temperatures have been above freezing and nighttime lows have only been at the freezing point on a few of those days. The sunshine has been scarce, most of the days the sky has been gray or the fog has been so thick that, even though it is not recorded as precipitation, it is certainly adding moisture to the environment. As a result the ground has been wet and muddy.

Earlier this week when we noticed water sitting on top of the ground in the isles between the garlic rows we decided to check the condition of the garlic field. It was distressing to find that the ground was completely saturated. Stepping in the garlic field resulted in sinking well above our ankles in the mud. We had great concerns about the garlic being so wet. Can it tolerate these conditions and if so for how long?  At that point we cleared the drainage routes so more water was able to run off, and we prayed that we did not lose the crop. We were encouraged when my husband pushed back some of the straw mulch and saw some green garlic shoots. A least at this point those plants are still alive.

Yesterday’s mix of rain and snow did not help matters any, but I am encouraged when I look at our 10 day forecast that shows temperatures, beginning today, only getting as high as the freezing mark on most days. I believe what we really need right now is for the ground to freeze, for the sun to shine, and for precipitation not to fall. Since we can’t control the weather we will continue to pray and realize that there is a lot of risk involved in farming.

In the mean time I have been experimenting with another way of growing and eating garlic.

Green garlic is the aerial, or above ground, part of the garlic plant. It is edible just as green onion or chives are. It is best eaten when the greens are young and tender. It definitely  has the garlic flavor when eaten raw but the flavor mellows quickly when it is cooked.

Growing green garlic can be as simple as planting some garlic cloves, give them plenty of sun and keep them watered (although not over watered) then cut the greens when they are young and tender. They will probably grow back a couple of times but eventually the plant will die off. Green garlic can be planted outdoors pretty much anytime of the year that the ground is suitable for planting. Depending on temperatures expect to see it sprouting in 4-8 weeks.

I am using a different approach to growing green garlic. I am growing green garlic indoors, in pots.

img_2196
Green Garlic Planted From Bulbils – the pot on the right has been cut and is growing back.


And rather than plant small cloves in the pots, I planted bulbils.

img_2198
Garlic Bulbils

Although I have read that they are not true seeds, Garlic bulbils are  produced by the garlic scape of hard neck garlic plants. If the scape is left on the plant to mature it produces a flower which then forms the bulbils. Each year we allow some scapes to mature and produce bulbils. I am certain that bulbils could be eaten just like garlic cloves except that they are covered with a tough skin that seems impossible to remove.

In the past I have planted bulbils in strategic places, as companion plants, in attempts to ward of critters . When left in the ground they act just like lilies, coming up in the spring dying off in the fall and coming back bigger the following spring. If they were dug up in the fall they would have produced a round or a single clove of garlic. If that clove is then replanted it will produce multiple cloves the following year. Depending on the variety it may take 2-5 years to produce an average size garlic bulb. Given this information you may see why I think growing green garlic is the best use for bulbils.

Green garlic is said to have the same health benefits as garlic cloves. From the plants I have growing I have chopped it and mixed it with butter to make garlic bread, I have added it to salads and chopped some to put it an omelet. Occasionally, I break off a sprig or two and just eat it. Growing your own green garlic is a great way to assure that you always have fresh, locally grown garlic on hand.


Spinning, Crocheting, Soap and Strawberry Wine

Just a quick update – I am attempting to use the spinning wheel for short periods nearly every day, but I can’t say that it has “clicked” yet. I can’t seem to get the bobbin to take up the twisted fibers, though yesterday it did for a very, very, brief period. I’ve read this is a common problem for new spinners. I know my fiber is getting over twisted. I have watched many videos and they all make it look pretty easy. They advise to treadle slower and tighten the tension, but they don’t show repeated trial and errors until they get it right. While a video like that might be reassuring to the new, struggling spinner (me) I don’t suppose I (or anyone) would want to sit through it. So I’ll just keep trying, and like I said before I let you know when it “clicks”.

I have continued to do a lot of crocheting, and knowing that I can create things out of yarn keeps me motivated to learn to make (spin) yarn.

img_2207

I didn’t make the purple slippers for any particular reason, but an extra pair of slippers is always a good thing on hand. It’s a pretty simple pattern that I don’t even have to read anymore. So I can whip these up pretty quickly. I found a free pattern on-line for the hat on the left. When it was finished, and I tried it on, I discovered it was a little small for me. Upon hearing this my husband tried it on. He really liked it and adopted it for his own. I’m currently making another one using the same pattern but with a larger hook. While talking to my sister recently she told me that “ponytail” or “messy bun” hats were becoming very popular. After looking at some patterns I decided to make one. Rather than print out a pattern, I decided to use a stitch that I like and see if I could make one up. The results are the grey hat on the right. It fits me pretty good. Yes – this will definitely work when wearing my hair in a ponytail.

I’ve also been catching up on making soap. One of the nice things about making soap is that this can be done during the time of year when other activities (specifically outdoor activities) can’t be done. After the holidays my supplies were getting low, so my plan is to make one batch per week until I get caught up. I currently have Pumpkin Spice (ready in 3 weeks), Aloe (ready in about 4 weeks) and Coconut Soap (ready in about 5 weeks) curing.

IMG_0377
Coconut Soap Ready to Pour in the Mold


Since we still have a lot of strawberries in the freezer from this years crop I decided that I could use 3 quarts to experiment with making a batch of wine. I first read some recipes online. Since I didn’t follow any of them precisely I won’t source them, and since I don’t yet know how my wine will turn out I’m not going to give you my recipe either. I defrosted the strawberries then mashed them. I added sugar, then boiling water. After this had cooled I added my yeast. I stirred it daily and I could smell and taste that it was becoming alcohol. Yesterday, after about a week in the crock, I strained the mash and put the wine in a bottle with an airlock for the process to continue.  It will probably be a few weeks before that is complete. After that it should probably age for several months, but if we really like it that probably won’t happen.


My New Endeavor

Well did you take a guess?

img_2195

Were you right?

img_2193

Learning to spin is something I’ve been thinking about doing for several years. Shortly before Christmas when I began looking at spinning wheels my husband said “go for it”. He told me to find what I wanted and we would buy it.

I passed on what I thought was a good deal for a used wheel on Etsy, mostly because we like shopping local and supporting small businesses when possible.

I learned that a spinning and weaving shop in our area was having a big New Years Day sale so my husband and I decided to check it out. http://heritagespinning.com/ We looked at several previously owned wheels before discovering this beautiful new wheel that was marked down nearly 50%. Both Joan who owns the shop, and Cherie (sorry if I spelled it wrong) who teaches spinning classes, were very helpful and informative. I decided at this point to learn what I can on my own, but I might take some classes in the future.

I expect this to be a challenge for me since it requires my foot to do one thing while my hands are doing something completely different. I think it will be slow going because I am not really a coordinated person; I’m horrible at dancing and at any type of sports, and I never learned to play a musical instrument. I did learn to crochet, although I learned that at a much younger age, and I have gotten pretty good at using the tractor to move dirt with the bucket, so there is hope. I have read that it is a matter of developing the “muscle memory” https://en.wikipedia.org/wiki/Muscle_memory  so what I need to do is practice and eventually it will click.

I’ll be sure to let you know when it does.