We are wrapping up 2016-2017 garlic season and at the same time preparing for the next planting so this will be my final post in this series. I’ll start where I left off. We began harvesting garlic in mid July and although we had stopped watering the garlic two weeks prior to that, as is recommended, the soil was saturated from the rains that finally came.
Though larger garlic producers may have other methods, harvesting garlic for us means digging each individual bulb by hand. My favorite tool for digging garlic is this shovel with a narrow blade, a short shaft and a D-grip. It is a comfortable height for digging the garlic and the long but narrow blade can get close to each bulb and dig deep enough to loosen the soil under the roots. We bought a second, similar shovel this spring so my husband, who did most of the digging, would have one as well.

My husband and I started together digging the garlic but before we got our first hundred bulbs out of the ground I needed to shift gears. I began laying the garlic on racks so that the bulbs were exposed to the air in order for the dirt to dry, while he continued digging.
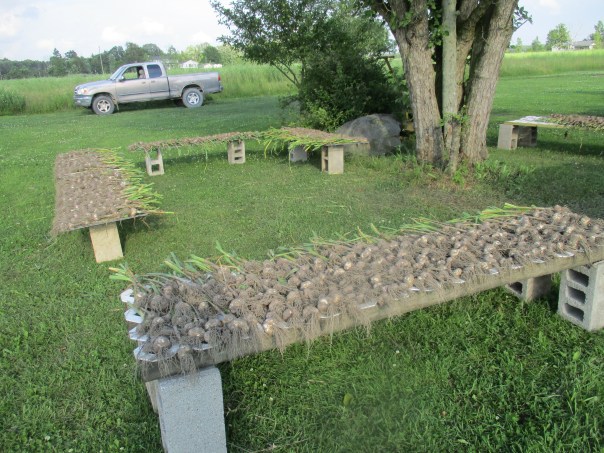
When we ran out of room on the racks my husband began tying the garlic in bundles and hanging them from the fence posts. They still had good air exposure this way.


and when we needed even more room he set up this system on the trailer hooked to the tractor which he could then park in the shade until we could get to them to brush and bundle them.

The garlic coming out of the ground this year was very wet as the rains came just when we didn’t want them too. Once the dirt on the bulbs had dried it was time to remove it.
I have discovered that the easiest way to remove the dried dirt clumps from the roots and bulbs by hand is to wear garden gloves and just rub it off the bulb and roots. In the past years I would where cotton gloves and usually ended going through a several pair of them, ending up with hole in the right glove and a left glove that was still intact. (Yes I am right handed.) This year we used leather garden gloves and they held up much better.
After we rubbed off all of the dirt that was loose enough to come off we used twine to tie them into bundles of 10-25 bulbs so they could dry or cure. The garlic needs to cure in a dry, area with good air flow and out of direct sunlight for the next three weeks or so. The large bundles were hung from rafters to dry and smaller bundles were dried of shelves.
Since many factors contribute to how quickly the garlic will cure I would check different varieties, when I needed garlic for a meal, to see how they were coming along. To check them I would snip a bulb from its stem, clip the roots and peel it. When the bulb is cured all of the layers of peel inside should be completely dry and papery.
It was about three and a half weeks after we first began digging the garlic that some of the garlic was cured and I started the final cleaning. The finale cleaning prepares the garlic to be sold or stored. It involves clipping the dried leaves and stems as well as the roots. It also involves removing any dirt that still remains.
If you are growing garlic just for personal use there is really no hurry to do this. In fact leaving the stems and roots intact and even a little dirt on the bulbs, right up to the time you want to use it, will probably prolong the life of the garlic.
These are the tools I prefer to use for clipping and cleaning.

On our first day of clipping and cleaning I was blessed to have my sister Jamie, and cousin Abby here to help. Abby is a farmer too and is always eager to help out if I say I need a hand, and while Jamie may not claim the title of farmer, she has done her share of farming related activities. Things such as growing her own vegetables and fruits, raising her own chickens and now she can add cleaning garlic to the list.
Working as a team seems much more efficient than each person doing their own pile of bulbs, so I clipped while Jamie and Abby cleaned. We all gabbed and the time flew by. I was even more grateful when they offered to come back to help one day the following week.
When I refer to clipping I am talking about removing both the leaf end of the garlic and the root end from the bulb. At the leaf end I usually cut 1/4 to 1/2 inch above the top of the bulb being carful not to clip the tips of any of the cloves. On the root end I clip as close to the bulb as possible but some of the roots still remain. It is my understanding that any garlic that is imported into the United States must have the entire root plate removed but garlic that is grown in the US can be sold with roots still attached. I am not sure why this is but since it is easier to just clip the roots down that is what we do.
As for the final cleaning we start by brushing each bulb with the scrub brush. Sometimes this is sufficient to remove the dirt and make the bulb look presentable. Sometimes the outer wrapper is dirt stained and one layer needs to be removed. Our goal is to get the bulb as clean as possible while keeping much of the outer wrapper in tact.
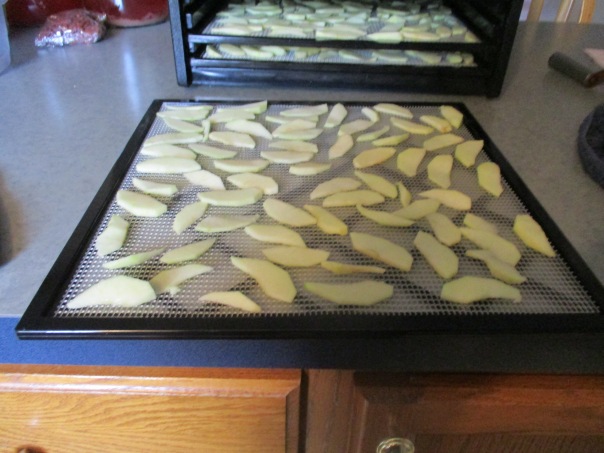
While cleaning the bulb I also give them a quick inspection for quality and sort them by size. To inspect the bulb I feel for firmness. Each outer clove should be firm. I also look for bulbs that may have been accidently sliced or dented while being dug and bulbs that do not have the outer wrapper in tact. Any bulb that does not pass inspection is set aside along with the very small bulbs. These will be used in my kitchen or dehydrated for powder. For sorting by size I am first looking for next years seed. Approximately the largest 15% of this years crop will be saved to replant in October.
Since we don’t punch a time clock I really don’t know how many hours my husband and I put into clipping and cleaning the 5000+ bulbs we grew this year, but I can say it was a long and monotonous process and I am thrilled that it is done.
I hope you have enjoyed following us through this year in growing garlic and if you haven’t been following along but would like to find out what you have missed you can find the whole series here https://donteatitsoap.com/a-year-in-growing-garlic/ . If you have any garlic related questions or comments be sure to leave them in the comments section below and I will be happy to respond.
I will conclude this post by responding to some of the things people have said or asked about growing garlic.
Comment: “Garlic is easy to grow.”
My Response: We have had much success in growing garlic but since I have had many people tell me that they tried growing it without success I am not sure that it is so easy. I do agree that given the right planting time, the right weather and soil conditions and the proper TLC garlic is easy to grow, but this seems as if it could apply to most crops.
I do find that people who make this statement are growing garlic only for personal use, and as a garlic farmer I need to add that while each step in the garlic growing process is easy enough that it could be performed by a 10 or 12 year old, growing 1000’s of garlic bulbs becomes both time and labor intensive.
Comment: I didn’t know that there were different kinds of garlic.
Response: I’ve read that there are as many as 600 different varieties.
Comment: I like the ones with the red coloring.
Response: There are many different varieties that have red or purple coloring on the skin. My varieties may be different then ones you have had before.
Question: “Does garlic really keep vampires away?”
My Response: – “I assume that it does since our farm and home are completely vampire free,” or if garlic is present at the time of questioning I say, “look around, do you see any vampires?”
Additional Statement: “No vampires were harmed in the growing of this garlic.” I guess I just needed to satisfy any potential readers who belong to Vampire Rights Coalitions and such.
Thanks for reading. 🙂