Monthly Archives: August 2019

More Pies

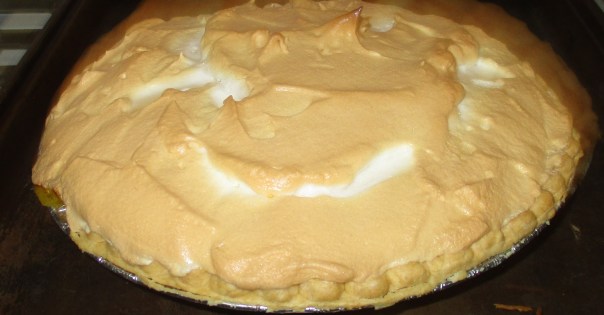
My husband loves when I make homemade desserts and I love my husband, so shortly after we finished our blueberry pie it was time to make another pie. This time I decided on lemon meringue.  As I got out my Betty Crocker cookbook to find a recipe I was feeling sort of down because I was not using any of our home grown fruit for this pie. After reading the recipe I realized that even though we can’t grow lemons here in Michigan, the eggs that are used both in the lemon filling and the meringue topping came from our chickens. That made me feel better. 🙂

IMG_5491 (2)

We then had a break from pies for a couple of weeks because the weather got pretty hot. Sometimes it is just too hot to do any baking, especially when we turn on the air conditioning.

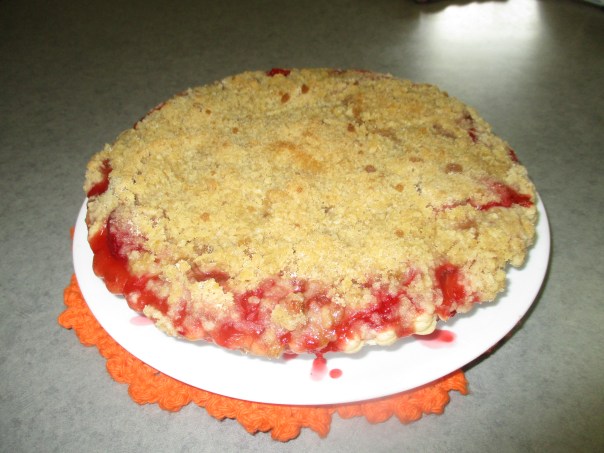
Thursday, after the cold front came through and it was cool enough to open the windows, I decided it was time to make another pie. This time it was strawberry-rhubarb, one that  a couple of readers mentioned as being a favorite. I didn’t think I would be making this kind of pie this year because our rhubarb nearly drowned this spring. Thanks to my husband performing lifesaving maneuvers (digging it up and moving the roots to dryer ground) it is still alive, but it has not produced stalks big enough to harvest this year.

A couple of weeks ago my husband mentioned that Karen, our next door neighbor, had some rhubarb that was ready to be harvested. She had already picked all that she was going to use and said I should come and pick what I wanted. The next day, before I got a chance to get over there, Karen was knocking at my door holding two big bunches of rhubarb with the leaves already trimmed off. You gotta love neighbors like that! I gave her a couple of quarts of our strawberries that I had frozen and we were both happy campers.

I cut up the rhubarb and put it in the freezer… until yesterday when I was ready to bake my pie. There are many recipes for strawberry-rhubarb pie out there, but since I am not a huge fan of pie crust (I usually don’t eat that thick outer edge) I decided to make one with a crumb topping.

IMG_5599

It is now evident that Autumn is quickly approaching and with that we have high hopes for both homemade apple and pumpkin pies. 🙂 I’ll keep you posted.

Do you have a favorite Autumn food?


A Starving Artist

Yesterday morning I was enjoying my morning coffee on the deck when I noticed that an anonymous arachnidian artist had turned our deck railing into his/her art gallery. As the sun attempted to break through the fog the lighting made for lovely viewing of this artwork.

As I photographed the five webs woven between deck spindles the artist was nowhere to be seen.

IMG_5496


IMG_5495


IMG_5494


IMG_5493


IMG_5492

While I might view these as works of art, to their creators they are a means of survival – their “bread and butter” so to speak.

In the evening I decided to see if the webs had served their purpose. Were there any bugs caught in the webs? Would the “starving artist” eat tonight? I was surprised to see that only one web remained. Upon closer observation I noticed the artist, an “Itsy Bitsy” spider, not much bigger than a fruit fly, was moving in imperfect circles between two deck spindles. The evening lighting was such that the web was invisible, but I assumed that Itsy Bitsy was creating another web.

After searchng for answers as to what may have happened to the other four webs I realized that I may have been wrong on two accounts. According to this article  https://indianapublicmedia.org/amomentofscience/spiders-recycling/ spiders sometimes eat their own webs. Perhaps that is what I witnessed in the evening, and if so this is not likely a starving artist.

Did you know that spiders eat their webs?

Working With Bees Wax Blocks

This post goes hand in hand with my post about Filtering Bees Wax and may bee helpful for anyone considering making their own balms, salves, furniture polish or anything else that uses bees wax. If you have never considered it, you might wonder why you would want to make your own skin care products with so many commercially made products available. The answer is ingredients. Have you ever looked at the ingredients in the skin care products you use. If not, I challenge you to do so. If you took up that challenge, I also challenge you to find out what those ingredients are and if there are any health risks associated with their use. Here is a website that may help https://www.ewg.org/skindeep/. When you make your own products you have total control over the ingredients and thus can make healthier choices.

I am not going to teach you to make your own products because it’s been already been done. There are hundreds, or more likely thousands, of recipes, tutorials and videos on the web that will teach you how to do it. The one thing I am going to teach you is a trick that I have not seen mentioned in any of them. I often come across recipes online calling for bees wax pastilles (small flakes or beads of wax). Other times I see instructions telling me to grate the bees wax block using a cheese grater. This gives you pieces similar in size to pastilles. Since bees wax is very hard it also may give you bloody knuckles (ouch!).

Now if you have shopped for bees wax you may have found that pastilles are more costly than blocks of bees wax, and if you are processing bees wax from your own hives then you are certainly not going to want to purchase pastilles anyway.

Let me save you the aggravation and potential scars that result from trying to grate bees wax.

Here is the method I use –

There are a few things you will need:

  • A scale (I use my digital kitchen scale)
  • A hammer
  • A zip lock bag
  • A freezer

First make sure the ingredients for the recipe you are using are measured by weight rather than volume. If you find a recipe that you like that lists ingredients in teaspoons or tablespoons convert it to weights using the same proportions of each ingredient. For example if a recipe calls for one tablespoon of bees wax and three tablespoons of coconut oil you could use 1 ounce of bees wax and three ounces of coconut oil (if you would like to convert ounces to grams click here). Not only will this make using bees wax easier, it will give you more accurate measurements.

Now that you have done the hard part (math) I will tell you the secret to getting a block of wax into small pieces to so you can measure small amounts. Put the bees wax block in plastic a zip lock bag then put it in the freezer. Leave it in the freezer for a couple of hours or until it is really frozen. Take it out of the freezer, make sure the bag is closed tightly and does not have a lot of air in it. Place it on a hard surface (I usually take it outside and put it on the deck). Now smash it with a hammer (many times if needed). The bees wax will shatter into smaller pieces that you can weight to get the amount you need.

When measuring your ingredient start with weighing the bees wax. If your pieces weigh a little bit over the amount required then adjust your other ingredients accordingly Using the above example if your bees wax weighted 1.2 ounces you would need 3.6 ounces of coconut oil.

Thanks for reading and if you have questions please leave them in the comments section below.