Monthly Archives: September 2016

I Brake For Bees


I told my husband that I need a t-shirt that says “I brake for bees” but probably more appropriate would be a bumper sticker pasted on the back of our riding lawn tractor.

This may be something only another beekeeper can understand, and even among beekeepers I might be in the minority. It wasn’t something that I thought about before I realized I was doing it, but as I mow the lawn at the farm I often see honey bees foraging on the dandelion or clover blossoms. My natural reaction is to yield them the right of way. Of course having wrote the check to purchase packages of bees, along with reaping the rewards of their labors, I have a great understanding of their value. Now it may or may not be the case that they will move out of the way of the mower just like the chickens and dogs move out of the way of vehicles at the last minute, but I am just not certain.

Few other creatures get this kind of consideration but among them are frogs, toads and snakes.

This past summer, my husband, who is totally on the same page with me as he has been known to get off the mower and move a toad to a safe place before continuing to mow, and I decided to restrict our mowing to the later evening hours after the bees were mostly back to the hive. It may be crazy, but I consider this a small sacrifice to help keep our hives healthy and strong.

img_1650


A Year in Growing Garlic (Part I)

IMG_3897

Since I’ve recently had a lot of people ask me questions about growing garlic I thought I would take you through a year in garlic growing. Growing garlic is pretty much a year round cycle and we have already begun our preparations for next years crop. Preparations actually started while I was cleaning the crop that we harvested this year. As I clipped and cleaned each bulb after they had dried, I also selected and set aside the bulbs that will be used as seed for next years crop.

Seed garlic is usually the largest bulbs that we harvest but even smaller bulbs may make the cut if they have large cloves. When planted, larger cloves (assuming the right growing conditions) will produce larger bulbs. I saved around 50 pounds of garlic for seed but we have since decided that we wanted to increase our production even more so I ordered another 20 lbs. There are many online sources for seed garlic and I do order my seed from one of these. Finding a source of locally grown garlic for seed may be advantageous, however, since  garlic seems to take a couple of seasons to acclimate, and a garlic that is already used to your growing climate may perform better in the first season. Buying seed garlic can be costly, but considering you will save next years seed from the crop that you grow it should only need to be a one time purchase. I’ve seen prices anywhere from $17 to $25 a pound. At first glance you may you may think you have found a good deal but if you see seed garlic for $8 check the amount of garlic you are getting. It may only be 1/4 pound. I even saw one online source selling 2 bulbs for $9.

This is also the time of year that we prepare the ground for the garlic. The claim is that garlic will grow in any type of soil but will perform best in a well drained loam. Over the past few years we have found that garlic will indeed grow in soil that is heavy on the clay side but we have lost sections of garlic that were planted in low areas that did not drain well. So checking your drainage before planting is a good idea. We use this time between plantings to condition and nourish the soil.  Our ground was tilled in early August, shortly after this years crop was harvested. At this time the straw that was used for mulch and any weeds that had grown up were worked into the soil, adding organic matter that is needed to help loosen the soil. Other ways to condition the soil include planting a cover crop that can be cut before planting the garlic, adding compost to the soil, or adding rotted manure to the soil. In different years we have utilized these different methods. We also tend to the area by mowing any plants that come up, whether they are weeds or cover crop, before they go to seed. The mowed clippings remain on the ground as a green manure and the would be seeds do not mature to grow up in next years garlic bed.

It is recommended that garlic be planted about 6 weeks  before the ground freezes. This gives the roots time to begin to grow but the garlic should not sprout above ground. Our target date for planting  this year is October 15th or 16th but we will be watching the weather forecasts as we approach those dates and may have to modify our plans if much rain is in the forecast. During last winter with warm temperatures and continual freeze and thaw cycles the garlic did sprout and the leaves suffered some freeze damage. I had great concerns about how this would effect the crop. What we discover upon harvesting was that while the hardneck varieties that are normally grown in northern climates such as ours produced decent size bulbs, the softneck varieties which are normally grown in warmer climates produced larger bulbs.

If you too are going to grow garlic this year, follow along.  I plan on writing posts on each step along the way, so we can do this together. Please feel free to ask questions and share your experiences.


Tomatoes, Grapes and A Chicken Update

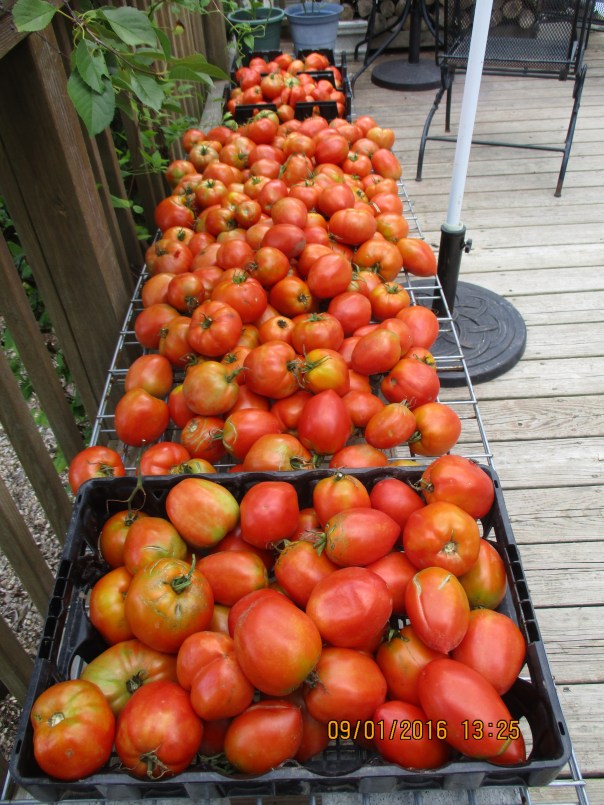
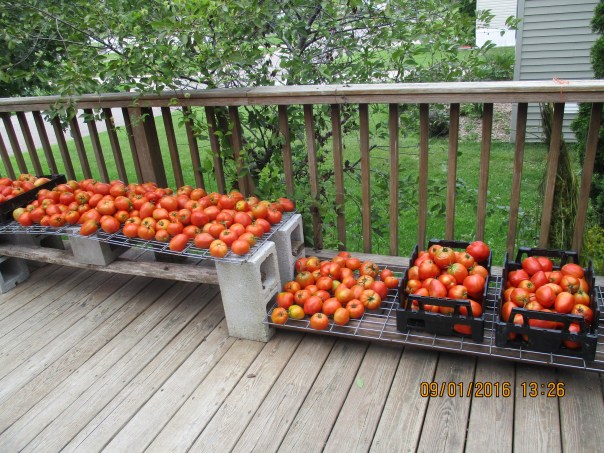
Having such an abundant tomato crop this year dictated that I switch gears and use other methods to preserve them. I just couldn’t see such a beautiful gift from God and the hard work that my husband went through go to waste. So with time being my major consideration I decided to turn the tomatoes into juice. The reason I normally don’t make  tomato juice is because we never really drink tomato juice. Knowing that I can always turn the juice into sauce at a later date I decided this was the way to go.

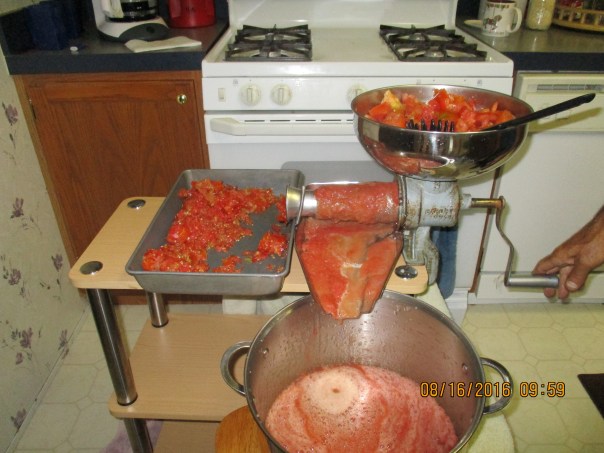
Despite the hot summer temperatures last week we decided to turn off the A/C and turn the house into a sauna. On Wednesday I put up 25 quarts of tomato juice.

img_1817 Followed by another 4 quarts and 17 pints on Friday. Upon tasting the juice on Wednesday my husband and I each discovered the wonderful flavor of fresh tomatoes. I expect we will be adding tomato juice to our diet and perhaps even an occasional Bloody Mary 🙂

On Saturday with several crates of tomatoes still begging for my attention I just didn’t feel like another full day of canning, so I pulled another trick out of my sleeve. I have never dehydrated tomatoes before nor have I bought them, but this seemed a good option.

img_1818

I washed and cored the tomatoes and sliced them as evenly as I could.

img_1819

I was surprised at how many my 9 tray dehydrator held. I set the temperature between 125 and 135 and the timer for 8 hours. When I checked them at the 8 hour mark they still had away to go so I left them on over night and when I checked them around 7:00 the next morning they were prefect.

img_1839

I stored them in zip lock  bags for future use.


Saturday was also our day for picking grapes. It seemed a now-or-never situation as the birds were quickly eating more than their share

img_1846

img_1836

We picked what was left of our concord grapes.

We then decided to pick some of the wild grapes my husband had recently discovered.

IMG_1779

img_1830

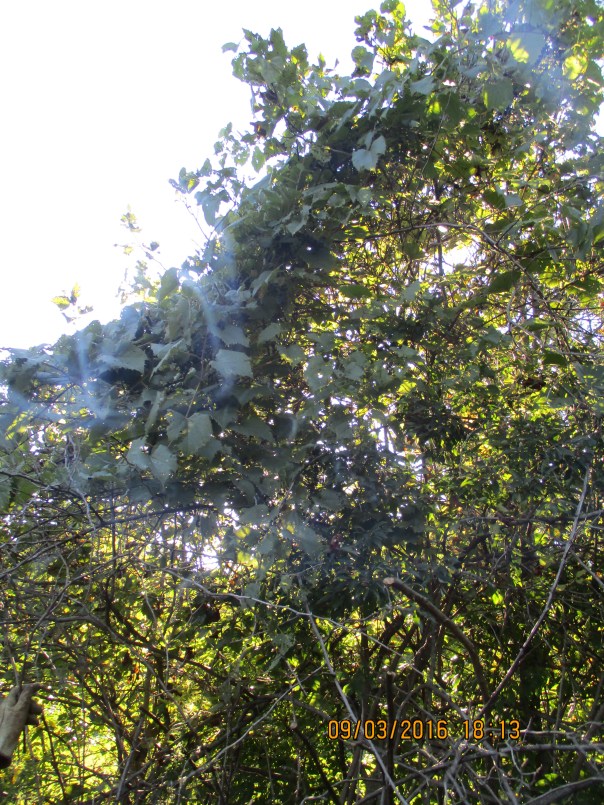
This wild grape vine was loaded with grapes, but picking them would be more challenging than the grapes in our grape arbor.img_1827

We took the tractor to the site and my husband climbed into the bucket. I operated the controls, lifting and tipping the bucket as he directed me. I’m no stranger to operating the tractor controls. I first learned to do this over 5 years ago when we bought the tractor and over the years I have gained much experience. We have a series of hand signals that he uses to direct me when to raise or lower the bucket or tip it up or down. With him in the bucket I paid close attention to his directions.

I thought about how much he trusts me, and I was careful to keep my foot on the brake and my hands away from the controls while he was picking. When he signaled me to raise or tip the bucket I did it slowly, cautiously.

img_1833

Reaching the grapes was complicated further by the rose bush that climbs this tree along with the grapevine. After being stabbed by thorns a couple times he decided to leave the rest of these grapes for the birds.

img_1837

After cleaning the grapes, I put them all together in a pan to cook them up for juice. After cooking and mashing them I filtered them using a mesh strainer lined with cheese cloth.

img_1838

After I had done this I realized that I could have used my Nutribullet to juice them and then strain them. Hopefully I’ll remember that method next year. From past experience I knew that the grape juice was concentrated so I added a cup or so of water. I heated the juice to about 190 degrees, I’m not sure why because I was going to freeze it instead of can it. I decided to sweeten it with honey instead of sugar so I let it cool to about 90 degrees before adding the honey. I stirred in about 1/2 cup of our raw honey before pouring the juice into 5 wide mouth ,pint size, jars. I left extra space beyond what I would normally leave if I were canning the juice. I put 4 jars in the freezer and one in the fridge, to enjoy with our breakfast.


Lastly I thought I’d give a chicken update.

img_1843

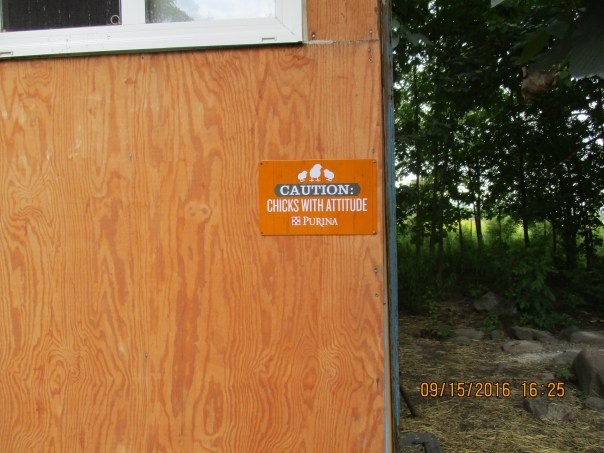
My husband posted this sign on the coop. We find it quite appropriate.

As usual they were out and about on Saturday. First looking for what (scraps or treats) we might have brought them (that’s the whaja bring me attitude) then happily wandering around, pecking and scratching as they love to do.

It seems as if all of the young hens (8 buff orpingtons and 6 barred rocks) have started laying as our daily egg production is now around 18 eggs.

The barred rocks are an interesting breed that my husband keeps joking are part guinea hen.


Some of them have started roosting in the tree or on top of the coop at night instead of going inside the coop with the rest of the flock. Yes, they have attitude.


img_1844

One of our old Buffs has been broody for what seems like the whole summer. If you have ever known a broody hen then you know attitude. Since we didn’t want anymore chicks we kept taking the eggs from her. We finally decided to leave her one egg, thinking that if it hatches she will then be a happy momma and stop taking up nest space. We marked the egg with an x and leave that egg with her. I guess we will know before too long if this works.


Buying Our Garlic

We are pleased, we are excited, and we are thrilled to announce that you can now purchase our Michigan grown garlic at Nino Salvaggio’s  Saint Clair Shores, Michigan location and Vince and Joes locations in Shelby Township, Michigan and Clinton Township, Michigan. It is also available at Water To Go in Richmond, Michigan and Pure Michigan Country Market on 10th Street in Port Huron, Michigan.

Nino Salvaggio’s is selling our S&H Silver and Red Toch varieties, while Vince and Joe’s is selling Chesnok Red and Music Garlic. Water to go carries Chesnok Red, S&H Silver and Red Toch, and Pure Michigan carries Chesnok Red, S&H Silver, Red Toch, Music and Spanish Roja.

We would like to send out a big thank you to all of these retailers for helping us get our garlic in the hands of those who love it. If you shop at one of these retailers you, too, might want to let them know that you appreciate their efforts to support local farmers while making quality products available to the customers.

Pulling Out All The Stops or Pots

What a busy few weeks we have had. Among the many things we have been doing (some of which will become future blog posts) we have been harvesting and preserving a very bountiful tomato crop. IMG_1751

IMG_1752

At this point I’d estimate that my husband has harvested between 600 and 700 pounds of tomatoes. Our main goal is in growing tomatoes is preserve enough to get us through the year, with excess being offered to family and friends. This years crop has more than exceeded our goal.

Now when I say preserving I don’t just mean canning tomatoes or making juice. Our tomatoes get turned into tomato sauce and then combined with (mostly homegrown) herbs to make spaghetti sauce. This is what we use, so this is what I make. Turning tomatoes into sauce takes a lot longer than canning whole tomatoes or juice. The tomatoes have been coming in so fast that I haven’t been able to keep up, so I have cut up a lot of them and froze them in gallon bags. They will be turned into sauce at a later date. I have also froze some of the tomato sauce and saved it until I have enough to fill up my seven quart canner.

I have a couple of people ask me about making sauce, so while I am no expert, I will share some things I have learned about making tomato sauce.

First of all it is best to start with a meaty tomato. The Amish paste tomatoes that we have been growing for a couple of years are a great variety for making sauce, as they are a large tomato and have more pulp inside than juice.

Next there are many ways of separating the skins and seeds from the rest of the tomato. In the past I have attempted removing seeds by cutting them out, blanching tomatoes to remove skins then blending tomatoes in the blender and leaving seeds in, and using a $20 food mill that I bought at a big box store. None of these methods are wrong, but the easiest way I have found is to use this tomato juicer that was given to me by my father-in-law. While it is an old piece of equipment, it is a good one.

IMG_1688

I discover that our (modern) counter tops would not accommodate the clamp that this (old) piece of equipment uses to secure it in place. Fortunately I had a small shelf that would work. When I use the juicer I remove the core of the tomato, then cut them in fairly small (1-2″) pieces. I fill the bowl, or hopper, on the top and as I turn the crank the pieces feed down inside where the juice and pulp are squeezed out. I have my largest kettle placed below the tray to catch the goodies. The skin and seeds continue out the end and will be enjoyed later by the chickens. Usually I stop when I run out of tomatoes or I fill up this (14 quart I think) kettle.

IMG_1799

Sunday, in an effort to get more done, I decided to pull out all the stops, or should I say pull out all the pots, and cook as much as I could at one time. The goal in making a nice sauce is to cook the water out of it. I have found that to get a thick sauce I have to reduce the amount in the pan by nearly 2/3rds. So if I start with 12 quarts of juice I will end up with 4 quarts of sauce. This is a long process and takes patience. I start with the heat up on a medium-high setting but as the water cooks off I gradually reduce the heat since it is more likely to scorch when it is thicker.

Fortunately once the sauce is cooking it does not need constant attention, so while I would not leave home with it cooking on the stove, I can still accomplish other things while the sauce is cooking. The sauce needs to be stirred every once in a while and this is how I measure it’s progress. Before I stir it I look at the top to observe the top layer. It will look like water. If this layer is more than 1/4 inch I will probably keep cooking. Then as I stir I observe how thick the sauce is. Judging when the sauce is done is really about personal preference. If you like a thinner sauce that will be absorbed into undercooked pasta or rice then reducing the sauce by just over 1/2 the amount you begin with might be more appropriate, but to get a thick sauce that will sit on top of a pile of pasta you will probably need to reduce it to 1/3 of what you start with.

One thing to be aware of is that all this cooking with produce a lot of heat and steam, so on a cool day cooking up the sauce might help heat up the house, but on a hot summer day it can turn the place into a sauna. Making tomato sauce with the air conditioning on just doesn’t happen at our house.

Beyond the necessity of having the room to cook up all the sauce, pulling out all the pots taught me something.  While the big kettle took over seven hours to cook down to my satisfaction, each of the smaller pots took only 3 1/2 hours. So doing several small batches at the same time is a major time saver.

Once the sauce is done there are several things to do with it. It can be used immediately in any recipe; it can be refrigerated for a couple of days to use in recipes; it can be frozen (make sure you leave room for expansion in the freezer container); or it can be canned. I’m not going to give the instructions for canning, but instead I will refer you to ball canning website since their recipes and instructions have been safety tested. http://www.freshpreserving.com/basic-tomato-sauce—ball-auto-canner-recipes-br1402.html