Monthly Archives: July 2016

A Berry Good Year

Strawberries aren’t the only berry that we have an abundance of this year. Home grown cherries, blueberries, and currants have also found their way into our diets.

Although our cherry tree suffered quite a large fruit drop, and we split the crop about 50/50 with the robins in the neighborhood, I was able to harvest enough to make a cherry crisp and today’s dessert, a cherry pie.

Once our blueberries started to ripen they were disappearing faster than we could pick them. The robins have an advantage of being able to sit on the fence and wait until each berry turns just the right shade and then pluck it from their stem and enjoy it as a meal. We on the other hand show up once a day to pick whatever berries might be ripe, then save them in the refrigerator or freezer until we have enough for a meal. Thus we decided early on that netting the bushes would be necessary if we wanted to harvest any blueberries.

IMG_1517

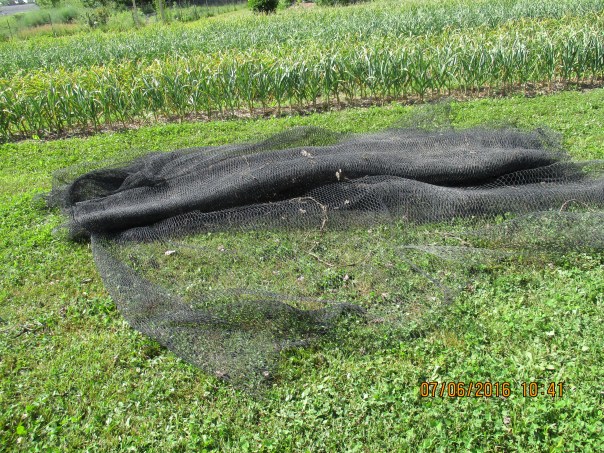
My husband pulled out this roll of netting that he found in somebodies trash a couple years ago. Last year we were happy to have this stored away, when we found it necessary to net the entire squash bed to save them from the deer. We have since fenced in the field gardens, so the deer eating squash, pumpkins, corn, etc. is not a concern. Cutting up the netting to protect our blueberries was a no-brainer.

The blueberry bushes are small enough that we could drape the netting over the whole bush.

IMG_1518

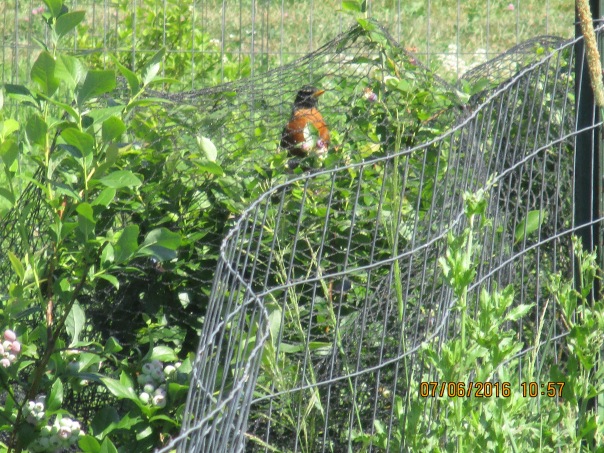
Even as I wrapped the bushes these thieving little robins attempted to steal our bounty.  Although it appears that this bird is trapped under the net, it is really sitting on the outside on the opposite side of the bush. IMG_1523

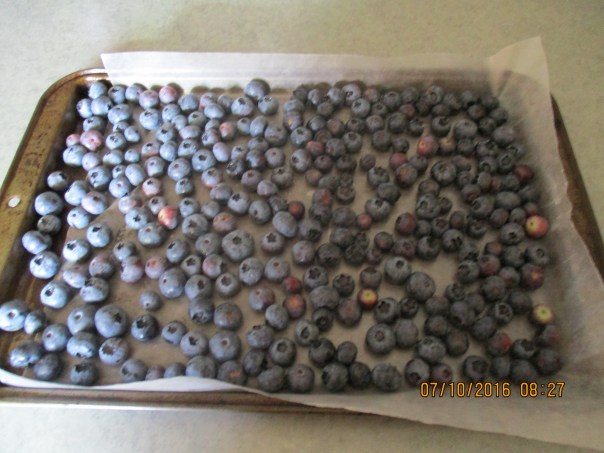
Since netting the bushes, we have picked and frozen nearly 4 quarts of blueberries and they are still coming on. There will be blueberry pancakes this year.

IMG_1556

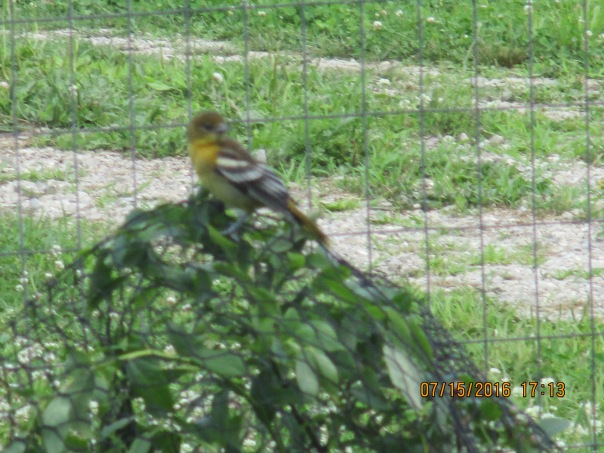
Unlike the robins that seemed to be deterred by the netting, there are a couple of these little birds that keep going at it. They are pretty clever, as they can find a small opening and are not afraid to go in under the net. I’m not sure what type of bird it is but I think it looks like a female Orchard Oriole. http://identify.whatbird.com/obj/564/_/Orchard_Oriole.aspx

You might not think of a couple quarts of cherries or blueberries as being an abundance but where the term really applies is currants.

IMG_1512


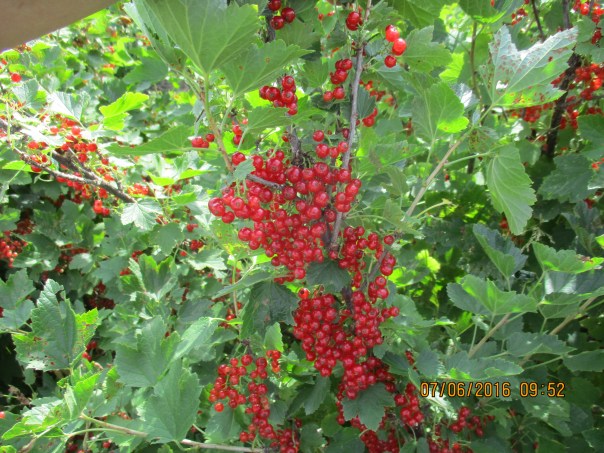
Right now we have two red and one white currant bushes that we are harvesting. We have harvested an estimated 12-15 lbs. Currants are not a very popular fruit in our area and I suspect the following reasons. Currants are very tart. Although they are very productive, they are a chore to pick. They are very seedy, and they are a chore to clean.

I also think that people are unaware of the nutrition they offer, http://www.livestrong.com/article/444249-what-are-the-benefits-of-red-currant/    most notable their vitamin C content, and I think that people don’t know what to do with them.

IMG_1554
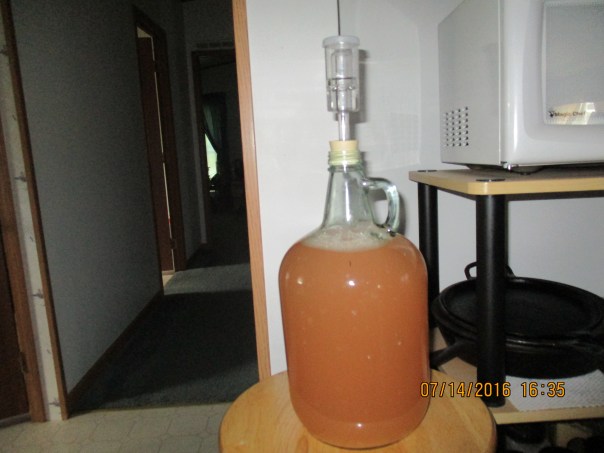
Since the currant wine I made last year was a hit, I started with making wine with white currants and strawberries.

I then made juice with the rest of the white currants and put it in the freezer. I have  also been making juice with the red currants that we have picked, but rather than cook the currants before mashing and straining the juice, I put the raw currants in my Nutri-bullet, blended them up, then strained them. (the chickens love the remaining seeds and pulp) I did this because heat kills the precious vitamin C. I sweeten this juice with honey and we have been enjoying this with our breakfast.

I also made a batch of currant jelly.

IMG_1555

Currants have enough pectin that it is not necessary to add any when making jelly. I ended up with 5 1/2 pints (or so I thought). When you make jelly, that does not require pectin added, testing the jelly for doneness can be tricky. Using a candy thermometer is not an accurate measure, as I found out. 24 hours after I made this jelly it still had not set up. I let it boil for quite a while after it reached 220 F  on the thermometer because it did not appear to be sheeting on the spoon yet, but I was also afraid of it burning.

So a few days later I poured all of the (almost) jelly back in the pan and cooked it down some more. This time I left the candy thermometer in the drawer and decided to use the spoon test, and watch for the jelly to “sheet” off the spoon.

IMG_1600

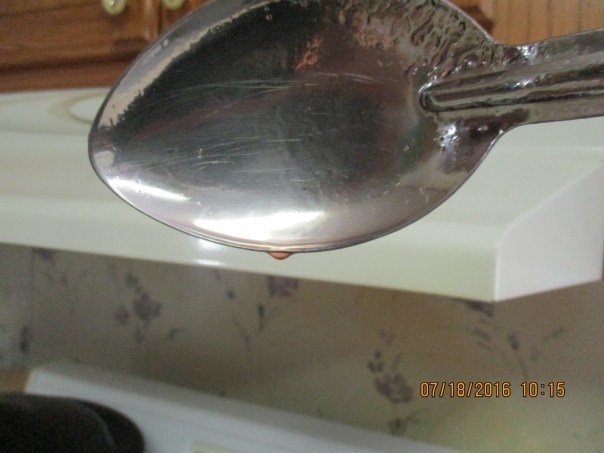
After I got it to a boil I started doing the spoon test. It was coming off the spoon it drops.

IMG_1607

As it boiled it became thicker and darker in color. It was still dropping from the spoon and I was still concerned about it burning or getting too sticky. So I was continually raising the spoon and letting it drop off. Doing this with my right hand and trying to snap pictures with my left (just as it was dropping from the spoon) was a bit of a challenge.

IMG_1623

At this point the drops were getting wider, more “sheet-like” so I let it go for a couple more minutes and then decided it was ready. I put it into jars, put the lids and rings on and gave it a 5 minute water bath.

IMG_1628

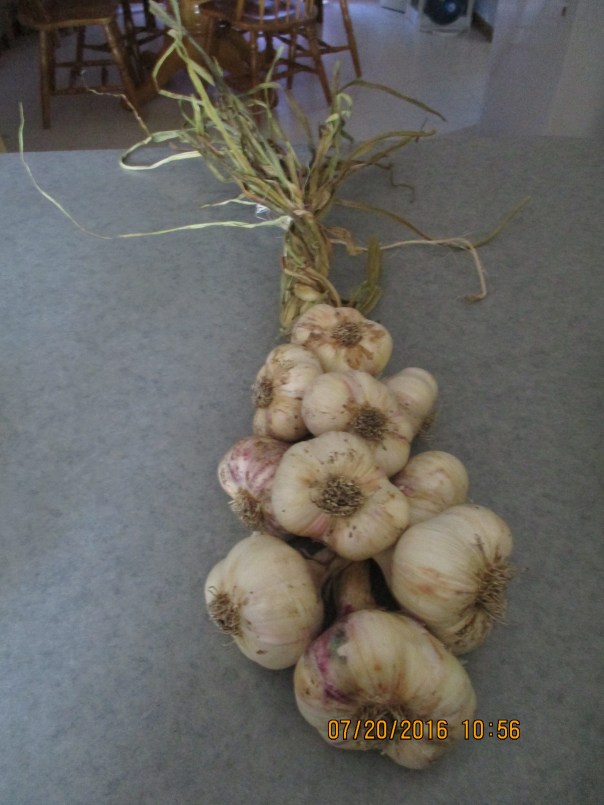
I ended up with 4 pints. After 24 hours they were much more jelly-like. I do think they could have cooked even longer though. I guess I should have follow the advice of one of the blogs I read that said,” when you think it’s ready, keep cooking it.”

I have certainly learned that there it an art to making jelly. I say “Kudos” to anyone who has mastered it, and while our jelly slides off  our PB&J sandwiches this year I will affirm my vow to get it better next year.


Garlic Braids

IMG_1631

I have decided to make some of the Red Toch garlic into braids. I can do the same with S&H Silver when it is ready. I have made a few with 10 bulbs but can do them in different sizes. If you are interested in a garlic braid send me an email at ruth20012001@yahoo.com (put “Garlic” in the subject line) and let me know what size and variety you would like and we can figure out how best for you to get it.

Garlic Harvest

Our garlic harvest started this morning. In case you are not a regular reader I have posted the links for the series I did last October about planting the garlic.

https://donteatitsoap.com/2015/10/08/this-is-a-lot-of-work/

https://donteatitsoap.com/2015/10/09/garlic-update-and-cold-and-flu-season/

https://donteatitsoap.com/2015/10/12/another-garlic-update/

https://donteatitsoap.com/2015/10/13/woo-hoo-the-2016-garlic-crop-is-planted/

I’ll admit I had concerns about the garlic throughout the winter but my husband continually reassured me that the garlic would be fine. The garlic sprouted before the freeze ever came and then winter brought continual freeze and thaw cycles. The young leaves on the garlic were frost bit.  In spring the garlic was already growing up through the straw mulch so there was no need to pull the straw away. We did give it a small dose of fertilizer.

IMG_1272

The month of June was very dry and required much watering along with weeding of the garlic.

While watering the plants I began noticing that some of the plants seemed substantially bigger than in past years. The last watering was done during the last week of June since it is recommended to stop watering two weeks before harvesting.

Like with last falls planting we saw no need to do marathon harvest. We decided to harvest one variety at a time.

The rains that finally arrived last week, and brought our ground moisture levels much closer to normal, were such a blessing. We were able to take a break from watering crops and actually took much of the weekend off. The moisture also softened up the ground so digging would be easier. On Friday I decided that we would begin digging the Red Toch garlic on Monday morning.

Kara (my daughter who recently graduated from college and needed some summer work)and I began this project around 9:00 A.M.

IMG_1534

This is my tool of choice for digging garlic. The long narrow blade is perfect for loosening the soil close to the individual plants and digging deep enough to loosen the roots. The handle is also at a comfortable height for me.

We worked as a team, while I loosened the soil around the plants, Kara picked them up and shook up the extra soil.

IMG_1527

I was immediately amazed at the size of the bulbs. We both used phrases  like “Wow “or “Look at that!” or “WOW!” several times. “Some of these are the size of small apples” I told her. Truthfully I believe that at least 90% of the bulbs we dug today were as big or bigger than the original seed garlic that I purchased 4 years ago.

IMG_1525

We stacked the garlic in trays to carry to todays outdoor drying station.

IMG_1537

We placed them on tarps and layered them so the bulb parts were exposed to the air, the purpose being to allow the rest of the soil that is stuck to them to dry so it can be brushed off. Todays cloudy skies also proved to be a blessing, because while I wanted the bulbs exposed to air I did not want them baking in the hot sun.

IMG_1532

Guess who showed up to help. Kara, who was not fond of all the worms and spiders she was seeing, was happy to see this girl.

IMG_1536

I don’t have an exact count, but there are somewhere between 800 and 900 hundred garlic plants that we dug this morning. It took us about two hours to get this much done. Once the soil dries and can be brushed from the bulbs they will be moved to indoor drying shelves for the next two to four weeks where the bulbs will continue to dry or cure.

While I am super excited about this bountiful harvest, I am assessing the growing season to determine what factors contributed. The first thing we did differently was change the location of the garlic bed. This plot, which in previous years had served as our main garden, was tilled last summer and then seeded with clover as a cover crop. Throughout the summer as the clover would grow up we would mow it down before it could go to seed. Just days before we planted garlic last fall the clover was tilled under. The soil in this plot was much more of a loam than a clay compared to our previous garlic beds.  The drainage in this area was also very good. The straw mulch aided in keeping the weeds down. For this particular variety the warmer winter temperatures were probably beneficial as Red Toch is a soft neck  garlic, and soft neck garlic are normally grown in the south or in warmer climates. I am certain that the early fertilizer as well as the watering and weeding throughout the month of June aided in the growth, but I also remember the simple prayer that we said after we planted our garlic last fall. “Lord please bless our efforts.”

Yes, I am sure that each of these factors has played a roll in producing such a extraordinary crop, and even though the entire crop is not yet harvested, our prayer today is, “Thank You, Lord”.


Chicken Fun

We often find our chickens providing us with great entertainment. Sometimes in the evening, before they are all inside, we will even sit down near the coop and watch, what we call, chicken TV.

IMG_1407

This is Honey. She is one of our oldest hens and has always loved my husband. This particular evening she was curious about what he had in his hand.

IMG_1411

She then decided she wanted to sit on his lap. When she pays attention to me she is usually pecking at my ring, my buttons, or my jeans.  Honey has and will always have a special place in our hearts.

This young buff decided my lap was a good place to sit. The Buff Orpingtons are definitely the most friendly breed we have.

IMG_1367

We have a group of Silver Wyandotte’s that like to visit the campsite around dinner time. They like to check out what is on the grill, and despite my warnings that someday that could be them, they keep showing up and begging for food.

IMG_1369
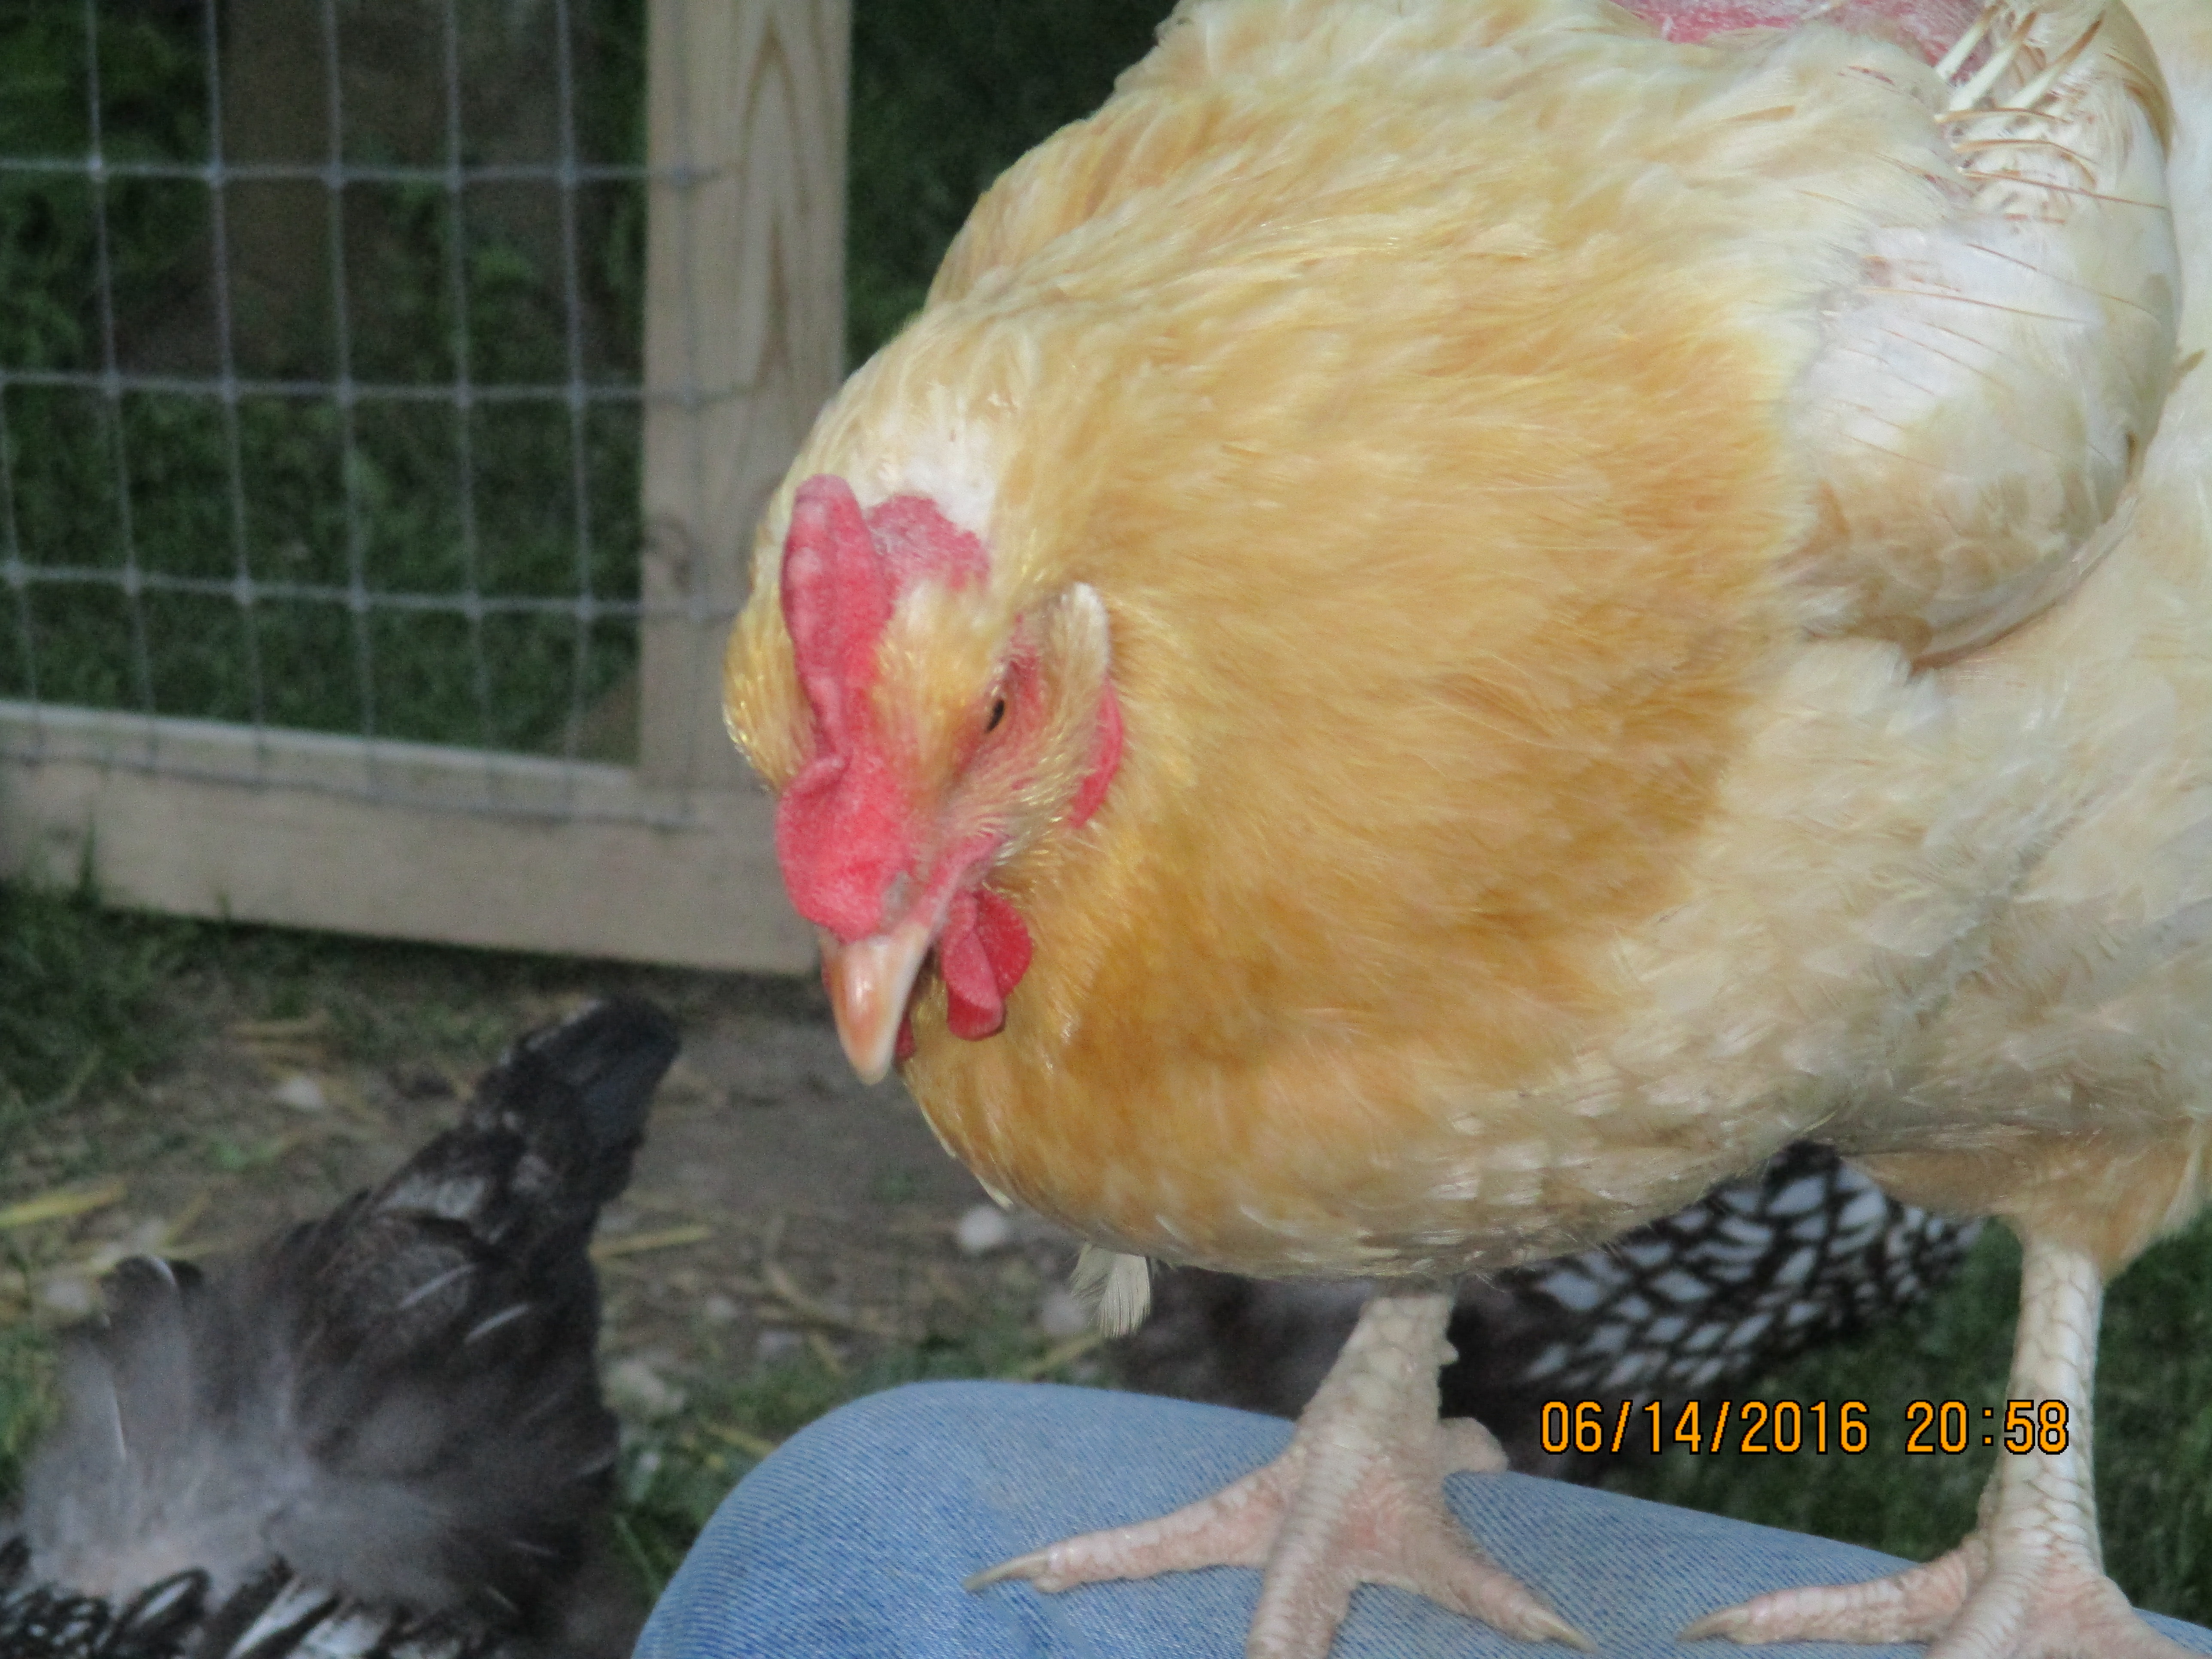
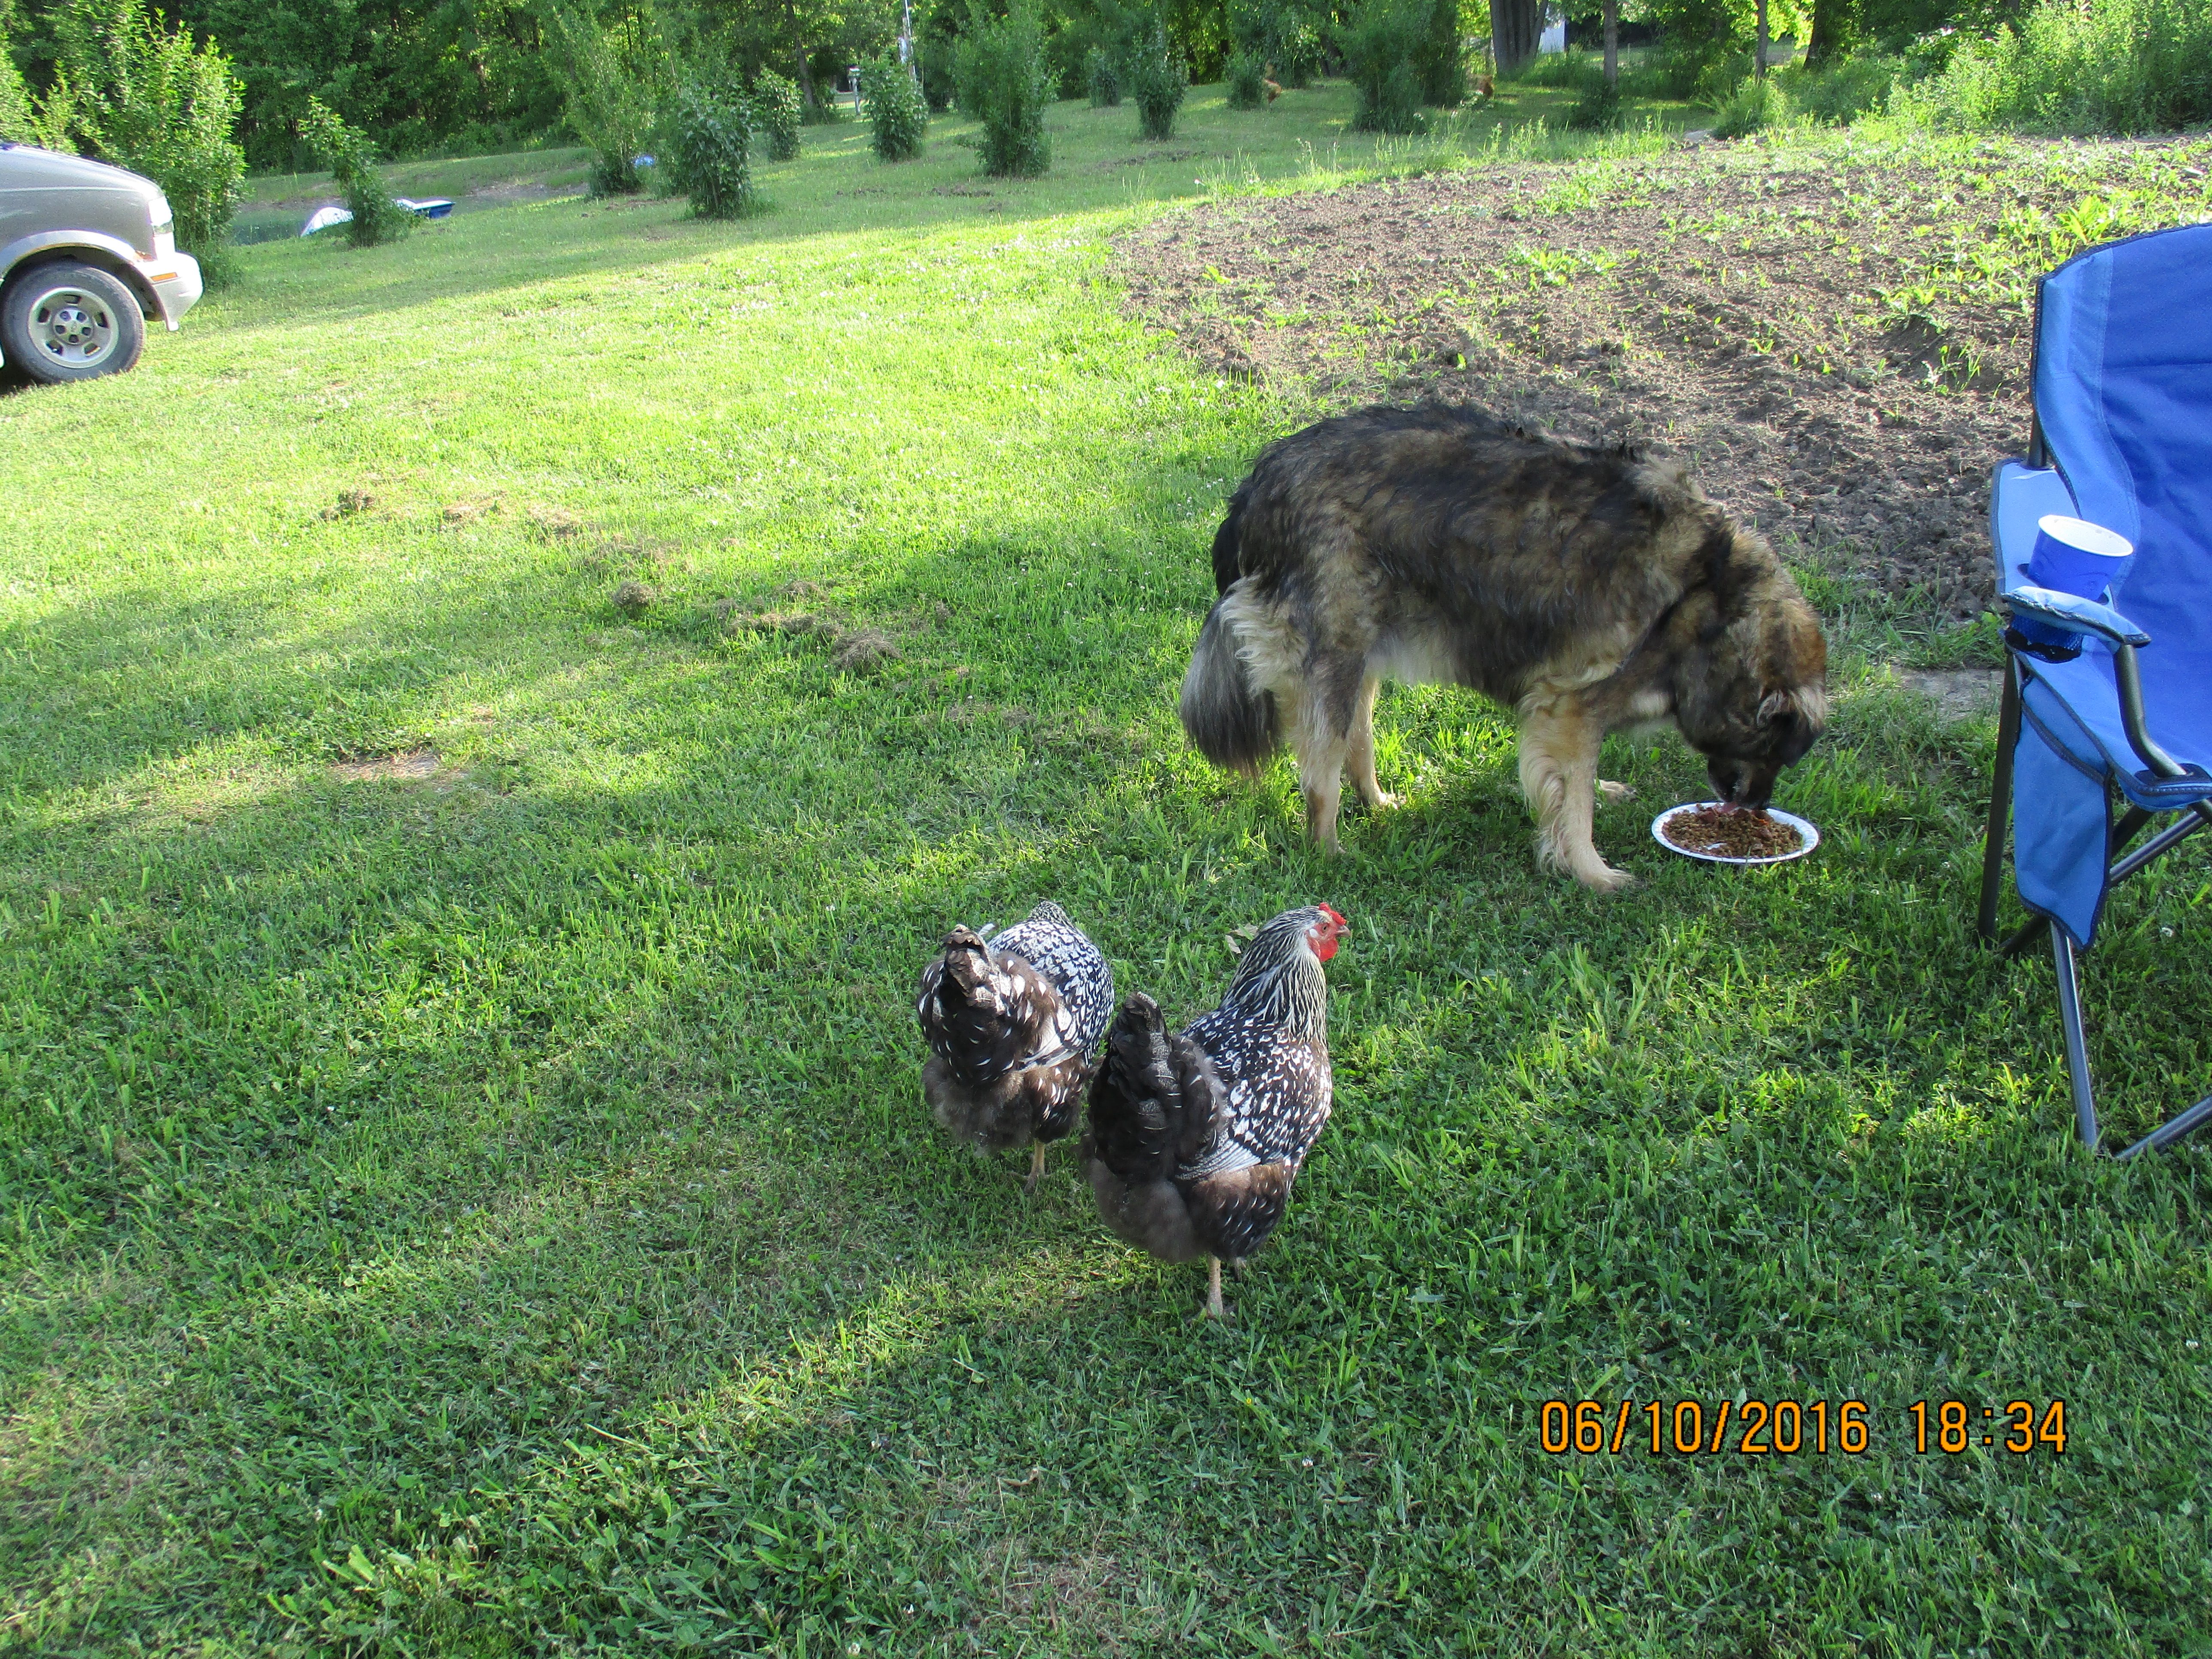
They are also interested in what the dogs are eating. If they get too close Trooper will pounce at them to scare them away. He doesn’t hurt them though and they just keep coming back. They have learned that they will often end up with some kind of “treats”.

IMG_1496

Anytime we do landscaping the chickens are sure to show up especially if it involves fresh topsoil. They love to peck and scratch and most of all dust themselves in the newly placed dirt.

Yesterday evening  as my husband and I were filling in this trench at least a dozen hens showed up to add the finishing touches. My husband would shovel the soil into the trench, pack it down, put another layer on top and rake it so it was even with the ground on either side. The chickens would then peck, scratch, and then nestle their little bodies down into the loose soil leaving nest shapes holes in the soil.

While we may not have the prettiest landscaping we do have happy chickens 🙂