Monthly Archives: November 2017

Getting Ready For Winter

Fall is a transitional period and much of our time recently has been spent getting ready for winter. Today I’m going to share just quick overview of some of the things we have been up to.

IMG_3400

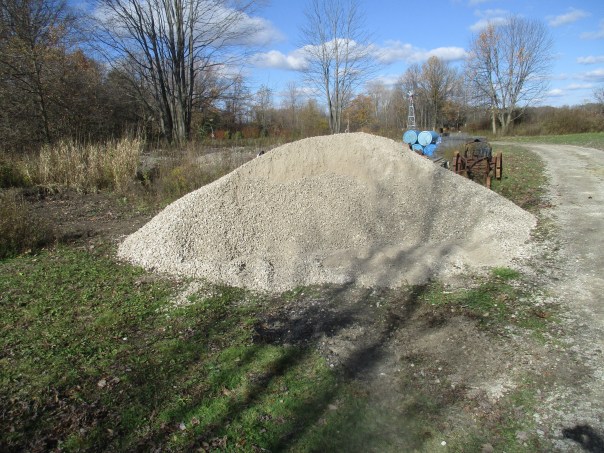
The driveway needed more gravel so my husband had 30 tons of 21 AA, also known as road gravel, delivered. 30 tons or 60,000 pounds doesn’t really look like a lot. It certainly didn’t cover our whole driveway but we were able to fix the bad spots.

IMG_3397

IMG_3401

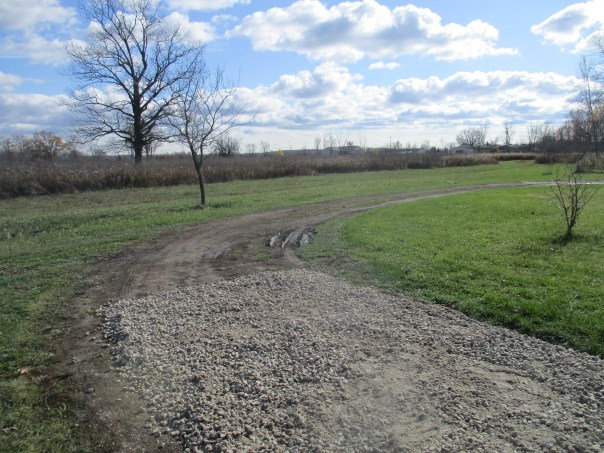
This job meant I got some tractor time as we worked together to get the stone spread.

IMG_3404

I LOVE Tractor Time!

Another thing that my husband put a lot of time into is getting all of the equipment winterized and stored. Over the last few years we have acquired quite a collection of motorized equipment. The tractor, lawn mowers, rototillers, chainsaw, power washer and more, all requiring maintenance in various forms.

IMG_1658

My husband had mentioned several times that he needed to put together a Preventative Maintenance Schedule, he also referred to it as a PMS, and I laughed. When I saw him winterizing the equipment I decided to make him a preventative maintenance schedule. Even though my computer skills are not that good I was able to make him a chart that can be used as both a reference document and working document for all of the equipment. As a reference document we can record the name and #’s of each piece of equipment, as well as fuel requirements, spark plug numbers, and numbers of other parts that need to get replaced on a regular basis. With all of this information in one place he doesn’t have to pull out the manual for each piece of equipment to find this information. As a working document he can record the dates that any maintenance is preformed on the equipment.

Here is a link for the PMS document that I made pms feel free to save it, print it, or change it, if you think it would be useful.


Stocking firewood for the winter is another task that we, but mostly my husband, have been putting a lot of time and effort into. For us this involves cutting down trees, mostly dead ash, then removing the limbs from the tree, cutting it into approximately 18 inch logs that will fit into our fireplace, then splitting and stacking the logs. Since the trees that we are cutting are dead we have found that they don’t need to be seasoned. They are already dry enough to split and burn.

One of the things that has always concerned me is watching my husband cut up logs with a chainsaw. First of all the bending is not good for his back, but mostly my concern is the way the logs tend to slip while they are in contact with the chainsaw. It just seems so dangerous. A while back I was reading an article in Countryside Magazine that talked about a sawbuck for holding the logs while they were being sawed. I had never heard of this before, so I did an internet search to see what I was missing. I came across this site http://www.firewood-for-life.com/sawbuck-plans.html that had complete plans, including a list of materials and detailed instructions, for making a sawbuck. It looked easy enough and quite affordable so I decided we were going to make one. I showed the plans to my husband and he agreed it was a good idea. He had a better idea. A few days later he showed up with a sawbuck. It was a different design from the one above, and it has definitely been used, but it meets his needs. Apparently when visiting a neighbor earlier this year he had noticed this piece of equipment. At my mention of his needing one he decided to inquire about the one he had spotted. When he asked the neighbor if he could rent or buy the sawbuck from him, the neighbor told him he could have it. 🙂 Sometimes all you have to do is ask.

IMG_0394

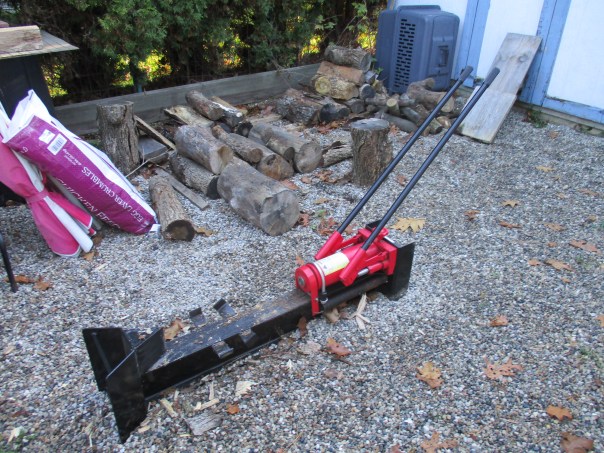
When I talk about firewood I always like to mention our log splitter. https://www.northerntool.com/shop/tools/product_200640136_200640136 I bought this log splitter several years ago when I wanted to be less dependent on my husband for splitting firewood. My husband had always used a maul to split the wood and had pretty much mastered the art. I, on the other hand, found using a maul a struggle. It took a lot of searching to find a log splitter that was not electric or gas powered and this is the only one that I came across. That’s why I like to tell people about it. Although it’s capabilities are limited to logs with a 6 1/2 inch diameter, it works for most of the logs we are trying to split.

Cutting fire wood is something we will continue to do throughout the fall and probably into the winter. If you burn wood for heat, you can never have too much firewood.

While tomorrow we will take the day off to celebrate our Thanksgiving Holiday with family, I wish all of my readers a Happy Thanksgiving, and if you are reading this but not celebrating the Thanksgiving Holiday I hope that you, too, have blessings to celebrate. 🙂

Little Miracles

You may remember back in September I put up this post about our precious grandson Jackson.

https://donteatitsoap.com/2017/09/09/baby-pictures/#comments

IMG_3424

Today I am thrilled to introduce you to Jackson’s baby sister, Adeline Grace.

IMG_3422

Adeline was born November 8. Not quite a full term pregnancy, at 36 weeks, she weighed 5 lbs., 15.6 oz.  She and mom are now home and doing well.

Thus far she is a good eater and a good sleeper

IMG_3426

and some of her expressions are adorable.

IMG_3428

We thank God for both of our little miracles.


Rendering Beef Tallow

Tallow is an ingredient that is commonly used in soap making and if you are buying commercially made soap, tallow is likely an ingredient. You won’t see tallow listed as such on the package. As an ingredient it will be listed as sodium tallowate, which is the name for soap that has been made by combining tallow with sodium hydroxide (lye).  This Wikipedia article explains other uses for tallow.  https://en.wikipedia.org/wiki/Tallow#Food

Unlike coconut oil, olive oil, lard and some of the other oils used in soap making, tallow is not readily available in most grocery stores. When I first began making soap I used oils that were readily available and while I could have ordered tallow online or perhaps sought it out at a butcher shop, I never did. It wasn’t until we started buying our beef from a local farmer that I began using tallow as an ingredient in some of my soap.

We had ordered a quarter of a cow. When I called the processing facility to tell them how I wanted our beef cut up, I asked if I could get some tallow as well. At that point I had not done all of my homework, I didn’t know that the fat that I wanted was called suet before it was rendered, so the lady did correct me. I did know that I would have to render the fat before it would be suitable for soap making.

When we picked up our meat order I found that the suet was a large chunk of fat wrapped in a large plastic bag. I put it in the freezer until I was ready to use it.

IMG_3390
Suet


I had read several tutorials and I realized that in rendering the suet into tallow the objective was to melt the fat in order to separate out any parts that were not pure fat.

I’ll share with you the method that I used and have continued to use ever since.

I started by taking the suet out of the freezer and letting it thaw for a while. It seems that it is easiest to cut while it is still cold but not frozen. I cut it into fairly small pieces. The smaller they are the faster they will melt or the less cooking time it will take. I put the suet pieces in my large stock pot and added enough water to cover it. I put it on the stove and brought it to a boil. Since I did not want the water to cook off I put a cover on it but I tilted the cover so that some of the steam could escape.

IMG_3391
Rendering Tallow

It took a few hours of boiling before most of the fat chunks were completely melted. At this point I dipped in with a sieve and took out some pieces of meat that would obviously not melt.

I then let it cool. Since outside temperatures were in the 40’s (Fahrenheit) and lower, I decided to let it cool outside overnight. The next day the tallow had hardened and floated to the top. The water and some remaining meat particles were in the bottom of the pan. I had to break through the layer of tallow to drain the water off. I did this outside because I didn’t want any tallow particles clogging up my drain.

When I removed the tallow from the pan the bottom was covered in a layer of mushy grey stuff. I scraped off this layer and discarded it. My tallow was not yet as clean as I wanted it so I put it back in the pan, covered it with water and repeated the process.

The tallow did not take nearly as long to melt as the suet did so my cooking time was greatly reduced. After letting the second rendering cool and harden, I again scraped the mushy stuff off the bottom and decided to repeat the process once again.

After the third rendering the tallow looked clean and pure. I placed it on a tray lined with paper towel to dry and patted the top and sides dry with paper towel as well.

IMG_3406
Tallow

I then cut it into chunks, but because it is very hard it cracks rather than cuts, and placed the chunks in a freezer bag. I then store the tallow in the freezer until I am ready to use it.

Tallow is not an essential oil for soap making, and I realize there are individuals who prefer not to use animal fats in their soaps, but tallow does make a hard bar of soap and adds a creaminess to the lather. For me the greatest advantage of tallow is that it can be locally sourced, unlike coconut oil, olive oil and many others that must travel hundreds, if not thousands, of miles to arrive at my home and be turned into soap.

🙂 Until next time…

It’s Rutting Season. Why You Should Care.

This afternoon as we were driving back from the farm we saw two deer run across the road. Fortunately they were far enough ahead of us that we didn’t have to slow down, but my husband said, “When you talk to the girls remind them that it is rutting season”.

The girls have heard this term before as every year since they have been driving we give them the warning. Rutting or mating season means an increase in deer activity. The deer are often running at full speed, a male chasing a female, and have no awareness of, or regard for, traffic in the area. So when we tell the girls that it is rutting season we warn them to be extra carful when driving.

What should they do to be extra careful?

  • Focus on driving. Do not allow yourself to become distracted by passengers, eating, cell phones or anything else.
  • Scan from right to left taking in as much of the area as you can.
  • Slow down, especially if you are in an area where you cannot see far off to the side of the road.
  • Use bright lights when driving at night if there is not oncoming traffic.
  • If a deer runs in front of you DON’T SWERVE. Swerving increases the risk of hitting oncoming traffic, trees or other objects, or even losing control and rolling the vehicle. It is better to slow your car down as much as possible to try to avoid, or at least lessen, the impact.

http://cultureofsafety.thesilverlining.com/driving/deer-vs-car-collisions

http://www.outdoorweekend.net/Articles-In-This-Issue-i-2013-10-01-216769.112113-PEAK-RUT.html

While these are practices that we should all use every time we drive, reality is we don’t, and sometimes it’s good to have a reminder.

Please drive safe.