I just wanted to let you all know, for those who as interested in my soap making series, I have added a “soap making” page. It can be be found by clicking “Soap Making” at the top of my page and includes all 5 posts in the series.
I have discovered that, for a couple of reasons, blogging from my recliner is not the best option for me. First of all, when I sit down and lean back with my feet out in front of me it tends to trigger a hidden switch somewhere in my body that causes my eyelids to get heavy. This is not something new; it used to happen years ago, when the kids were still at home, and we would have family movie night. Everyone would enjoy watching a movie together except mom who dozed, and possibly snored, through most of it.
The second problem is that when Ranger sees me sitting in my recliner it is an open invitation for cuddle time. He seems to think that my lap is better suited to a lapdog than a laptop so as soon as I sit down, he comes and puts his paws on my knees and pleads to come up.
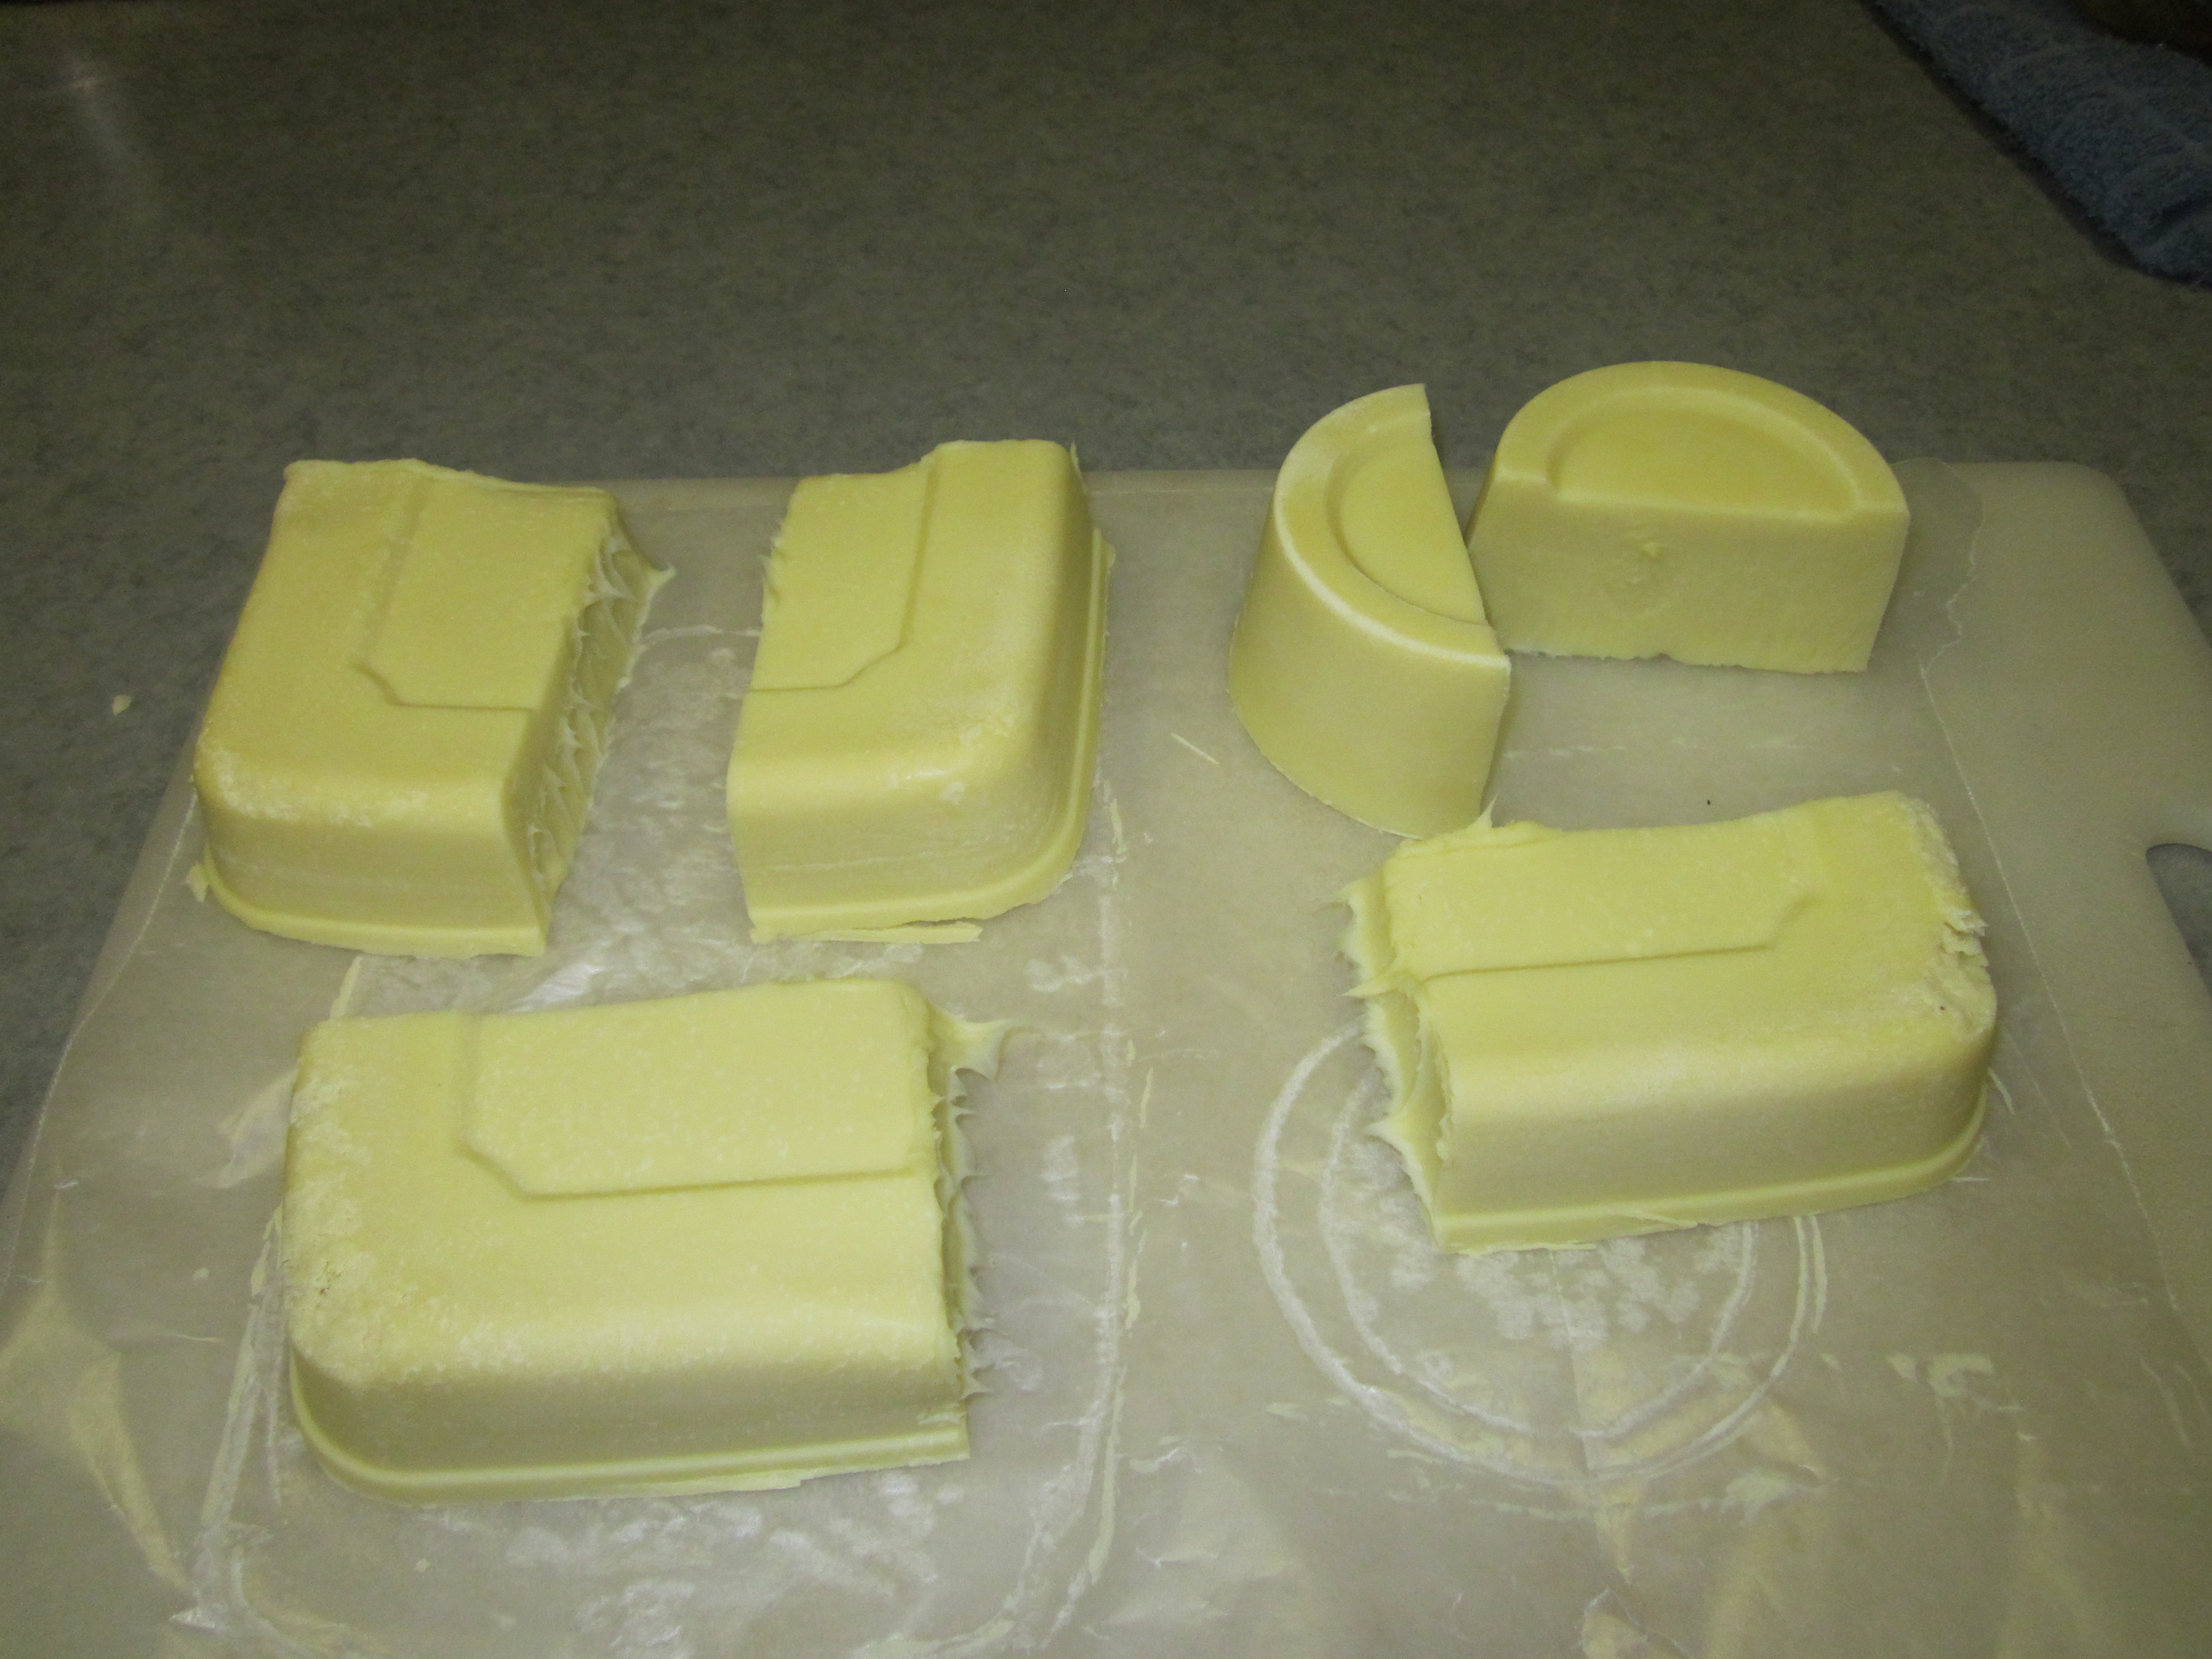
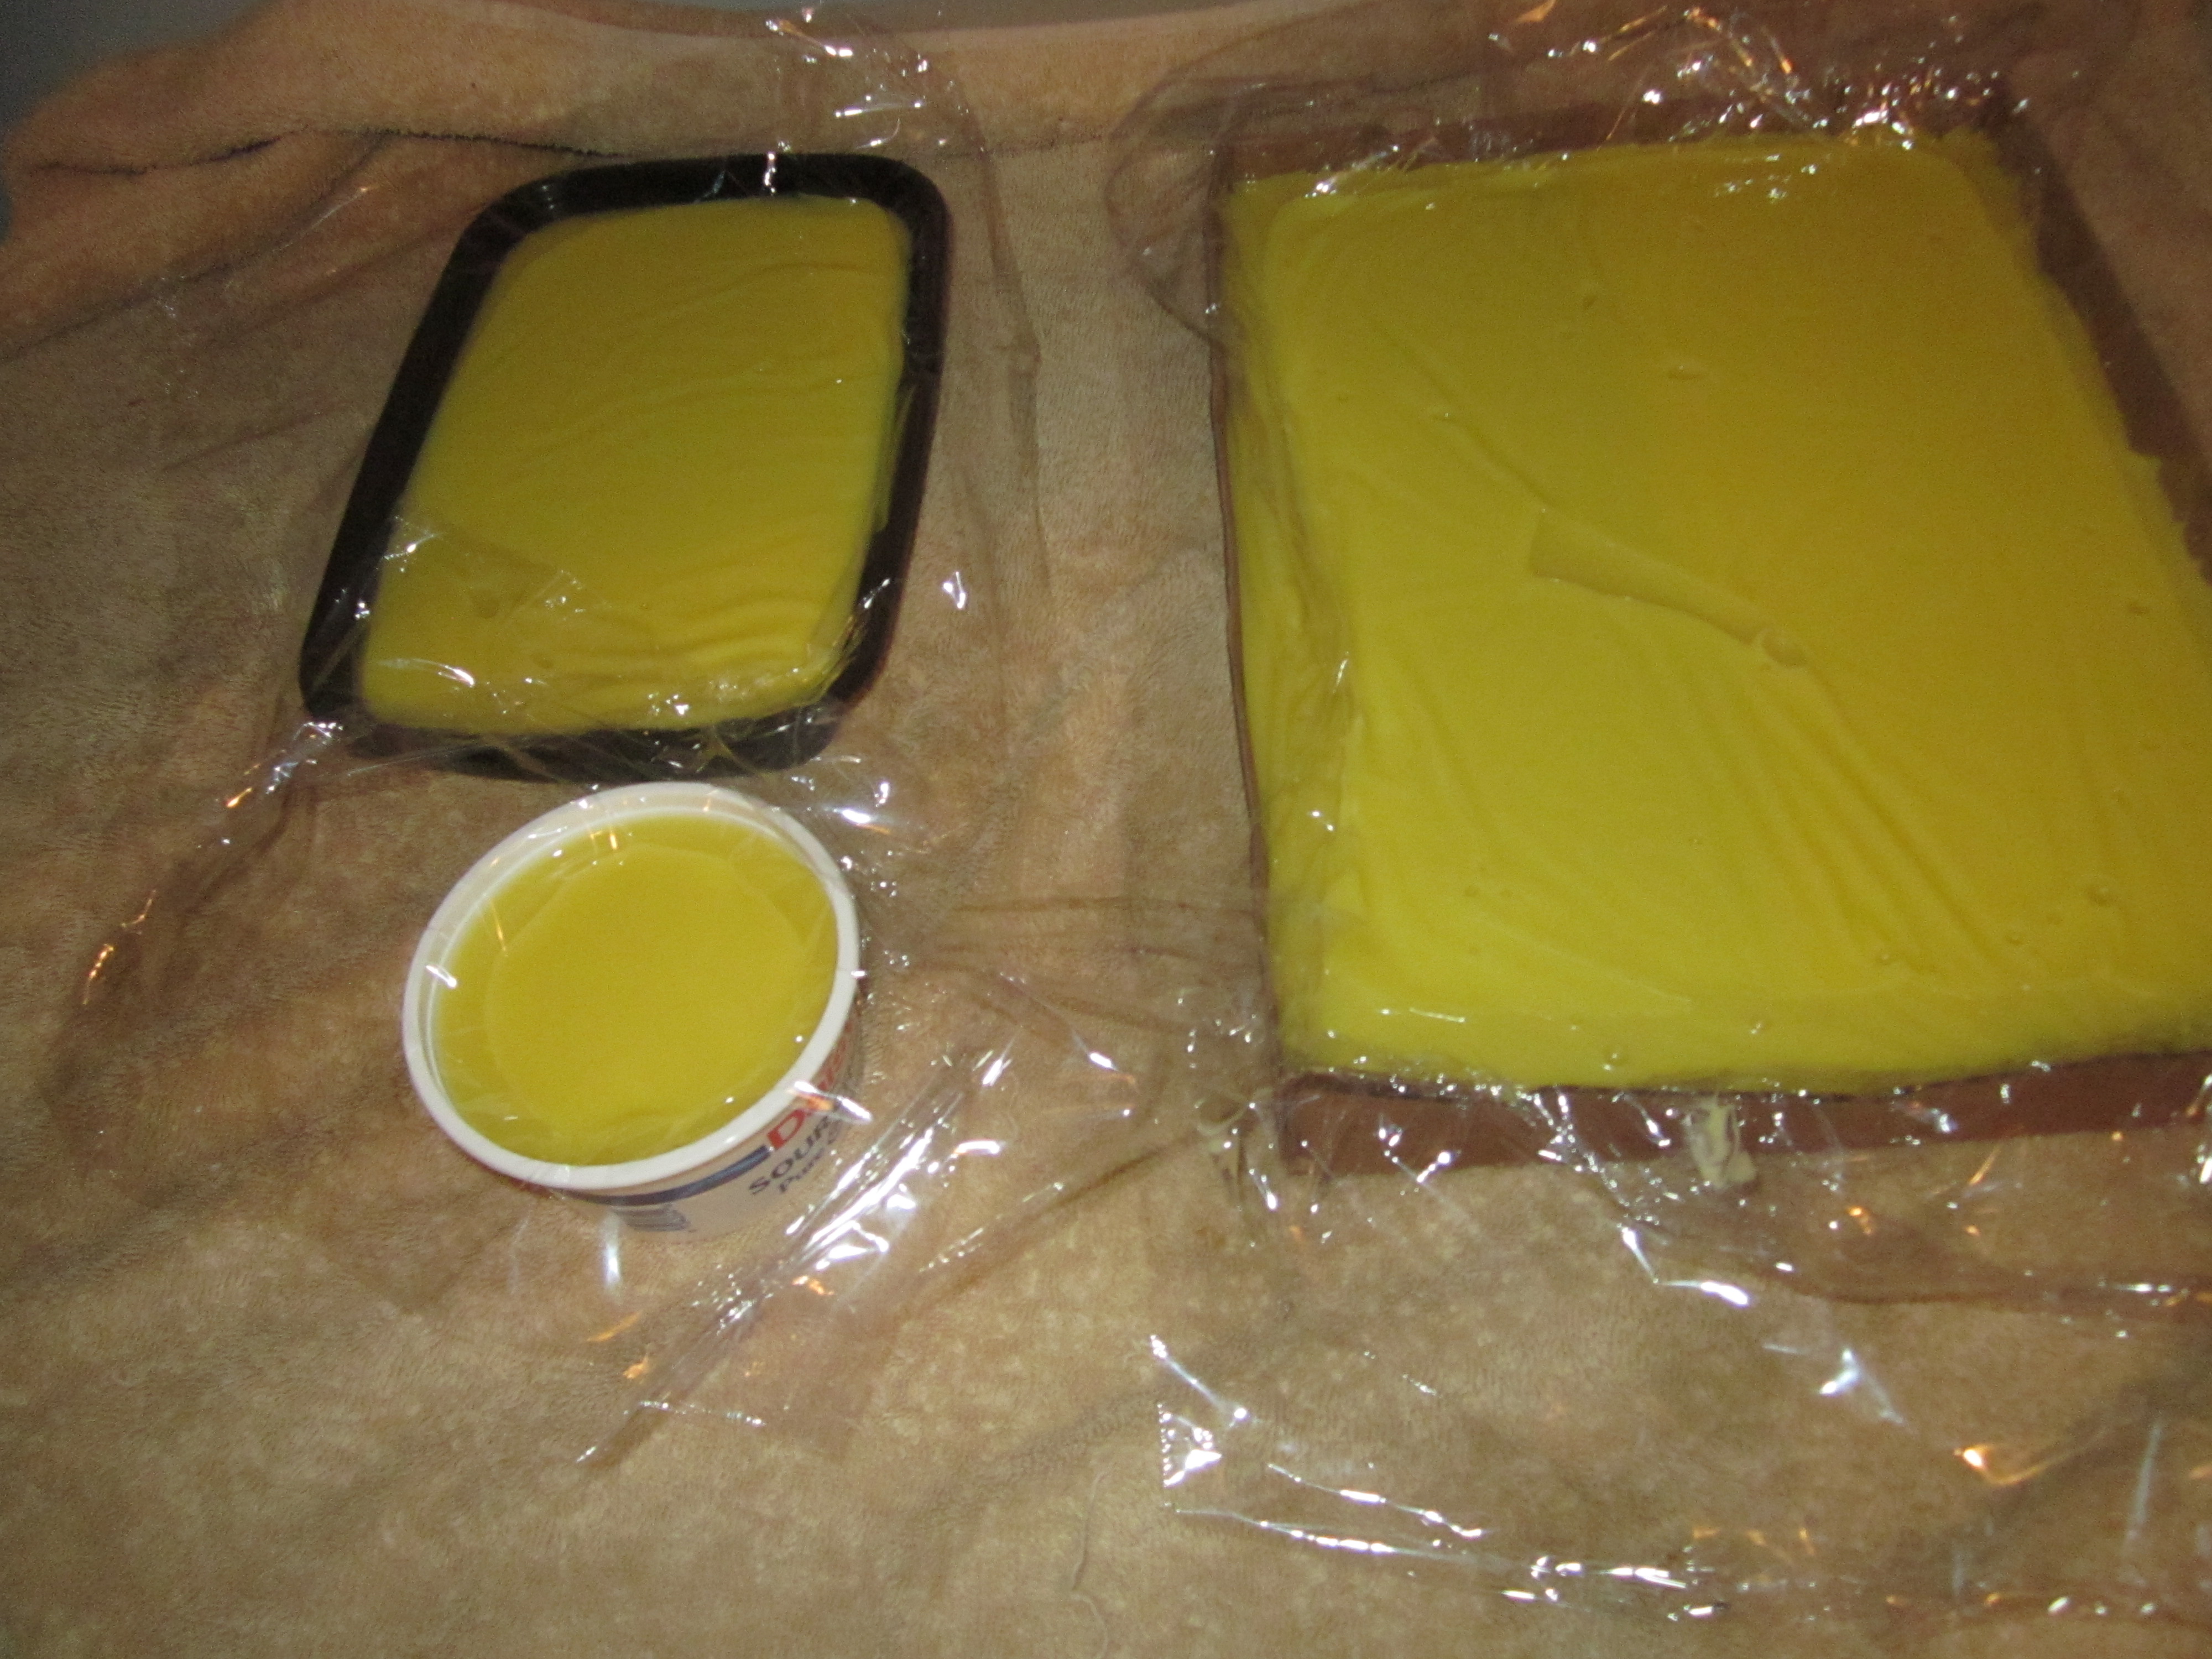
If you are like me, you will be eager to see how things are progressing so the day after you made the soap you will be lifting the towel and touching the soap with the plastic wrap on it to see if it has hardened up yet. That’s good. That is exactly what you need to do. If the soap is still soft enough that you can leave an indentation when you touch it then you might want to leave it for another day or two.
When I unmolded and cut this batch I got in a hurry and did not follow that advice. While my soap was solid it was still soft – about the texture of cream cheese.
The best way to remove the soap from the mold will depend on the type of mold you used. With these two plastic molds the soap may or may not simply pop out when you turn the mold upside-down and press on it. I find that it usually doesn’t so I put them in the freezer for an hour or so.
Once the soap is frozen it does pop out of the mold when you turn it upside-down and press on the bottom.
I then use a large knife to cut then into bars.
For the molds that were lined with plastic wrap you can simply turn the mold upside-down, and the soap will fall out of the mold.
You can then peel the plastic wrap off and cut the soap into bars.
You’ll notice that I did not get a clean cut because the soap was still soft when I cut it. This may not be an issue for you unless you want a professional look.
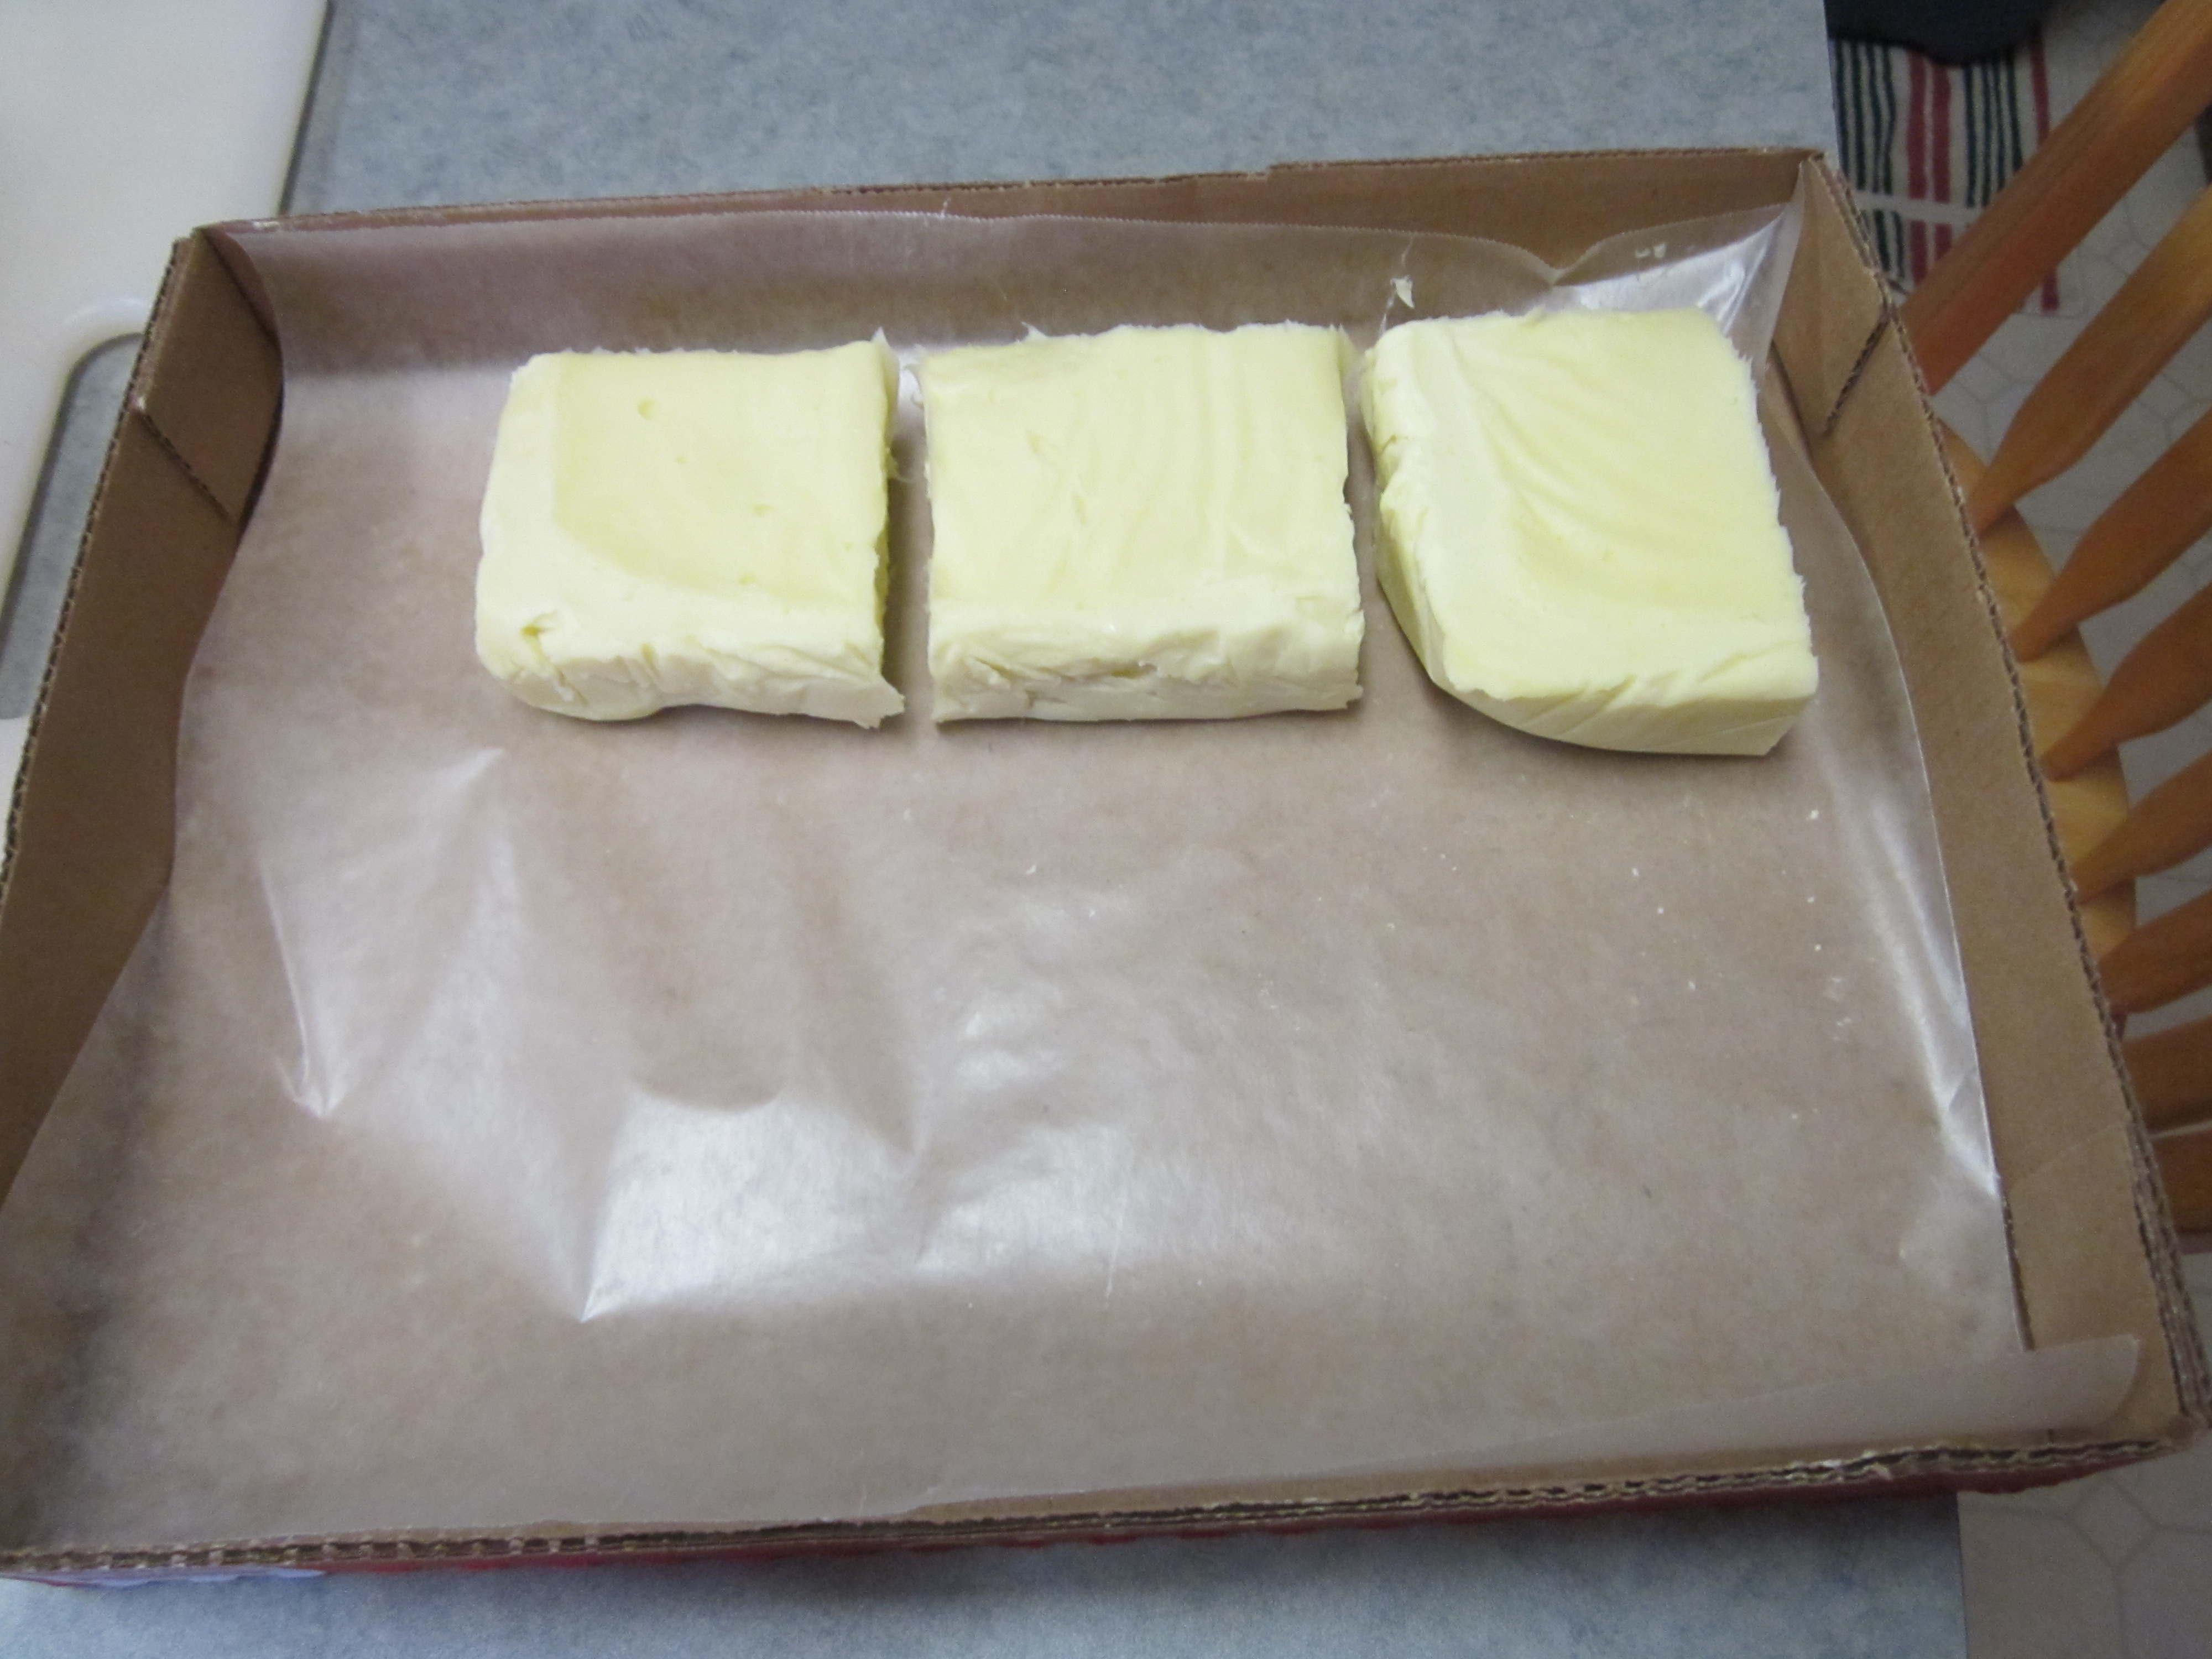
I then place the bars in a box lined with wax paper and put them on a shelf where they will continue to harden and cure as the ph. drops over the next 4-6 weeks. I turn them over once or twice a week so that they cure evenly.
To know when the soap is ready we just use it. I will usually wait about six weeks but my husband will sometimes try it out after four weeks. If the soap is not ready you might feel some tingling on the skin. Another option would be to use ph. test strips but I’m not sure how accurate they are, and I’ve never found them to be necessary.
Thanks for reading and once again please leave any questions you have in the comments section below.
Happy soaping!
P.S. I really love to hear about your soapmaking experiences please let me know how it goes.
If you are just joining this soapmaking series you can start at the beginning by reading these posts Part I, Part II and Part III.
There are just a few more things to consider before you actually begin making soap:
Distractions – you don’t want to have a lot of other things going on when you are making soap – especially when you are measuring ingredients. You really need to pay attention and make sure your measurements are accurate.
Safety Of Others – If there are other people or animals in the home you need to make sure they are aware of what you are doing and protect them from potential hazards. This is not an activity to do with young children and be sure that the cat is not crawling around on the counter where your lye water is cooling.
Timing – I find that how long it takes to make a batch of soap varies depending on how much soap I am making. For this recipe the large (four lb. batch) took me about 2 hours. If I double the recipe it takes about 3 hours. Making the small (1 lb. batch) might take 1 1/2 hours or less. Keep in mind that I am using an emersion blender for mixing the lye water with the oils. This speeds up the process exponentially. If I was going to hand stir the soap, I would plan on at least an extra hour – maybe more. You will also need to have some time in the next 24-48 hours to take the soap out of the mold(s). Lastly, as far as timing goes, you need to understand that this soap, made using the cold process, will not be ready to use for 4-6 weeks.
Space – Not only will you need some clear counter space to work you will need a somewhat out-of-the-way place to allow the soap to harden while in the mold(s). You will also need a place to allow the bars to set for about 4-6 weeks while the saponification process completes.
Reading this tutorial
This is quite a long post as I’ve tried to provide a lot of detail and pictures so you know what to expect and have a successful soapmaking experience. The first part of the post gives detailed instructions in regular font, photos and my commentary in italicized font. After that I give the soap recipe in two different batch sizes followed by (step-by step) instructions (no commentary). I encourage you to read through the entire post before you begin and leave any questions you have in the comments section below (I will answer your questions as soon as possible but it might take a day or so).
Now for the part you’ve been so patiently waiting for. Let’s make soap!
Olive Oil
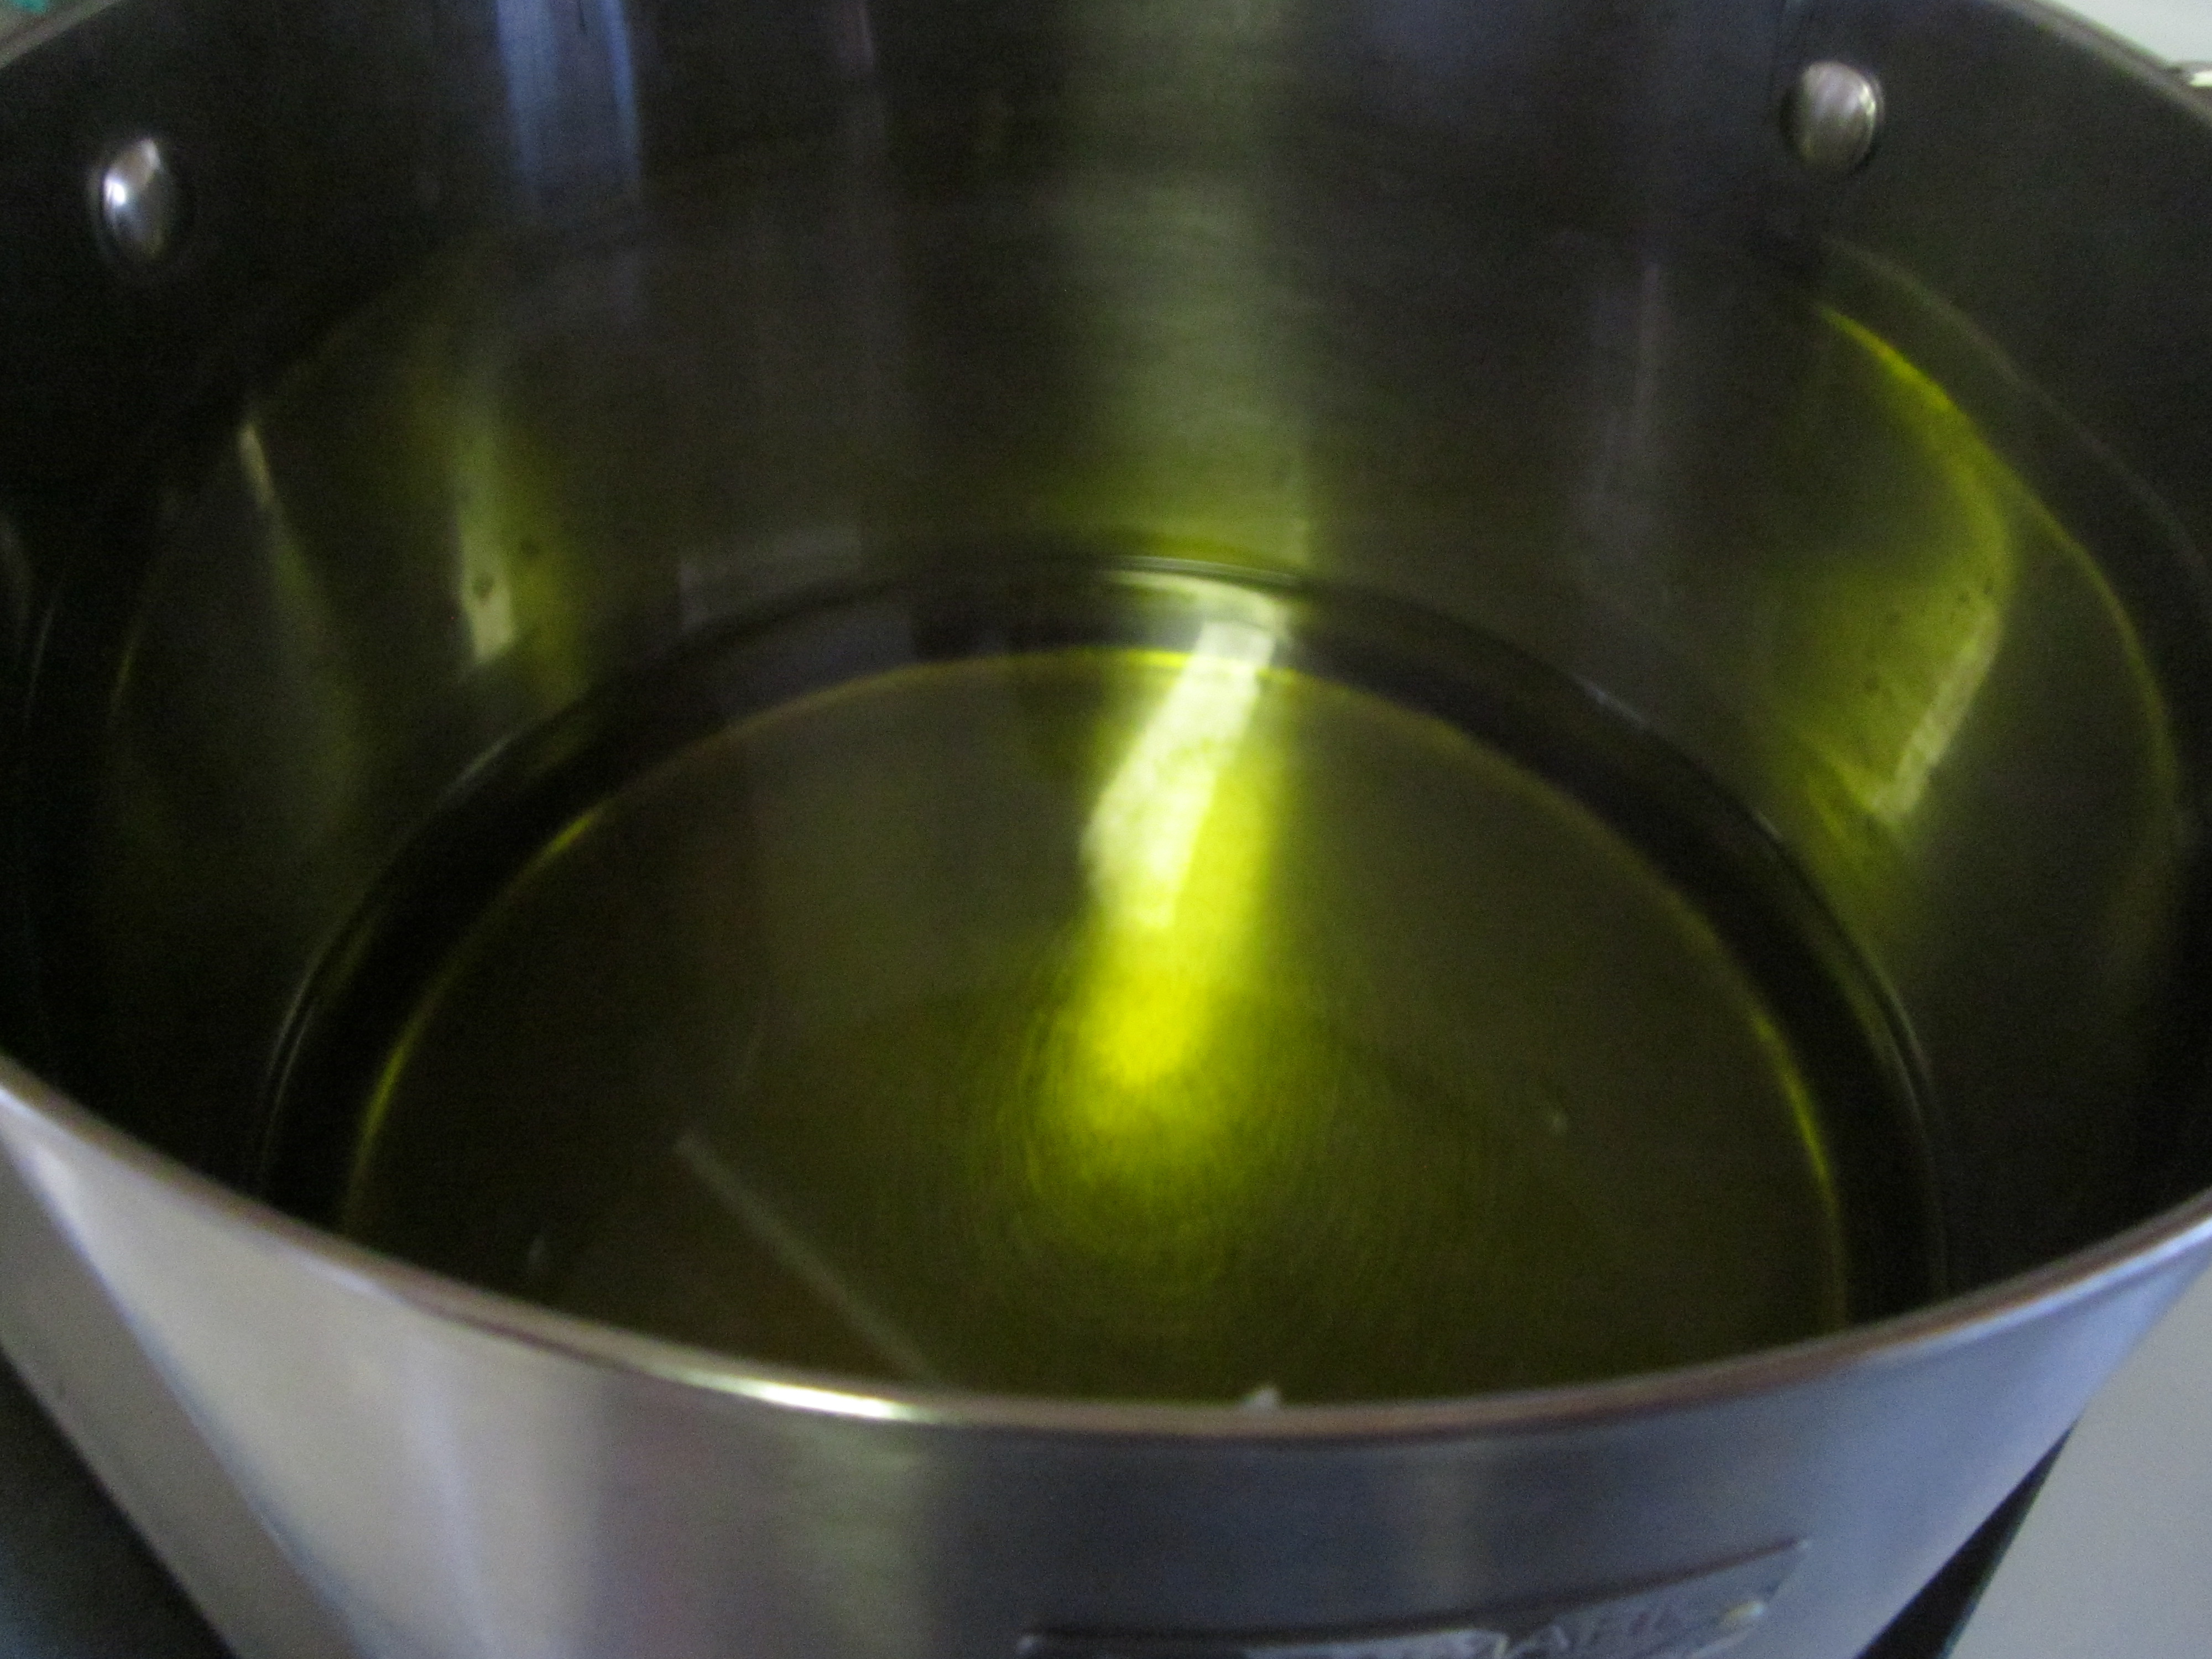
Start by measuring (weighing) the correct amount of each oil. The oils will need to be heated so as you measure each oil put it in you (stainless steel or enamel) pot.
While I don’t advise it you could heat/melt the oils in a microwave in which case you would put the mesured oils in a microwave safe dish.
** Keep in mind when weighing each ingredient you will first place the container on the scale, then set the scale to zero before putting the ingredient in the container.**
Coconut Oil 1 lb. 4oz.
Place the pot of oils on the stove over low heat.
Oils Melting
Put a thermometer in the pot to monitor the temperature of the oils.
While the oils are melting/heating weight the correct amount of water.
I usually use cold or room temperature water because when the lye is added it will heat up. Cold water keeps the temperature lower, and it will cool faster.
Water (1 lb. 8.1 oz)
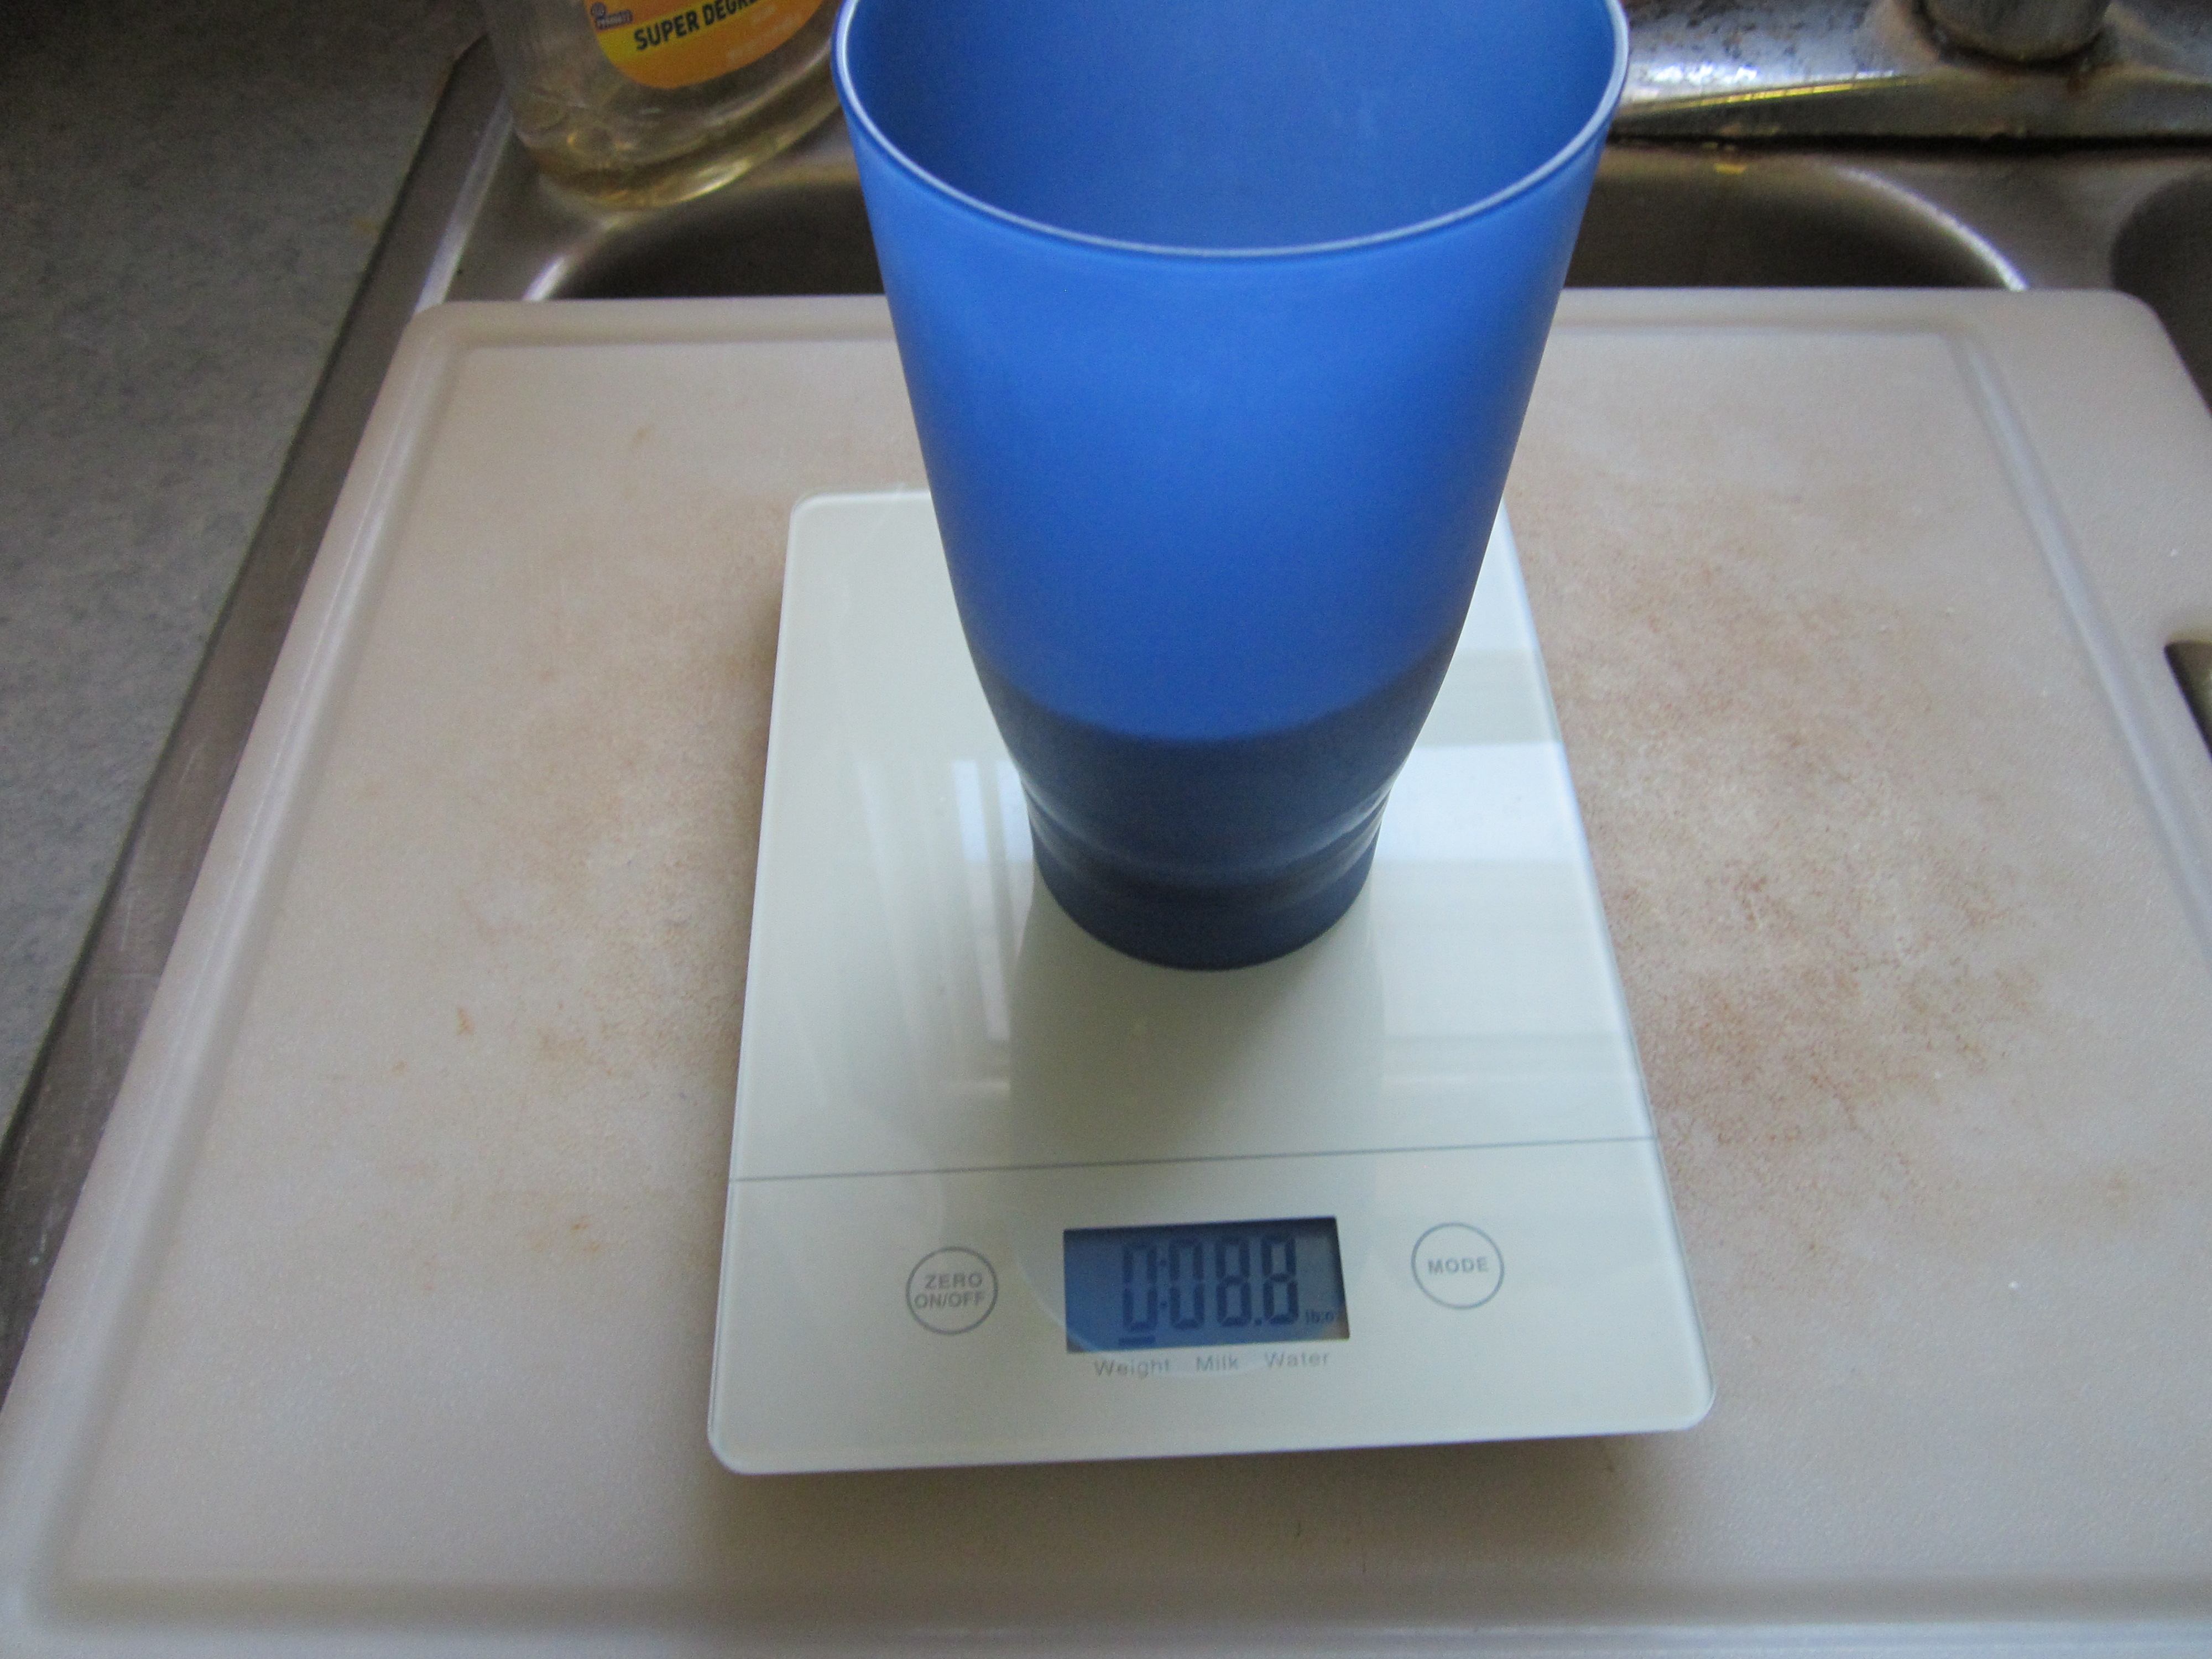
Since the next step is measuring lye you will want to put on your rubber or latex gloves and protective eyewear.
If you are concerned about lye beads or flakes escaping you could place a flat board across the sink and place your scale on the board. Thus any escapees will fall or can be dumped in the sink and washed down the drain.
Lye 8.8 oz.
Measure (weigh) the correct amount of lye.
Next you will be adding the lye to the water. As a safety measure you could place the container with water in it in the sink.
You should also do this in a well-ventilated area as you will notices fumes rise as the lye reacts with the water. I usually do it near an open window or near the kitchen exhaust fan. If yo are concerned about breathing the fumes you could also wear a mask (we all have them, right?).
Adding Lye to Water
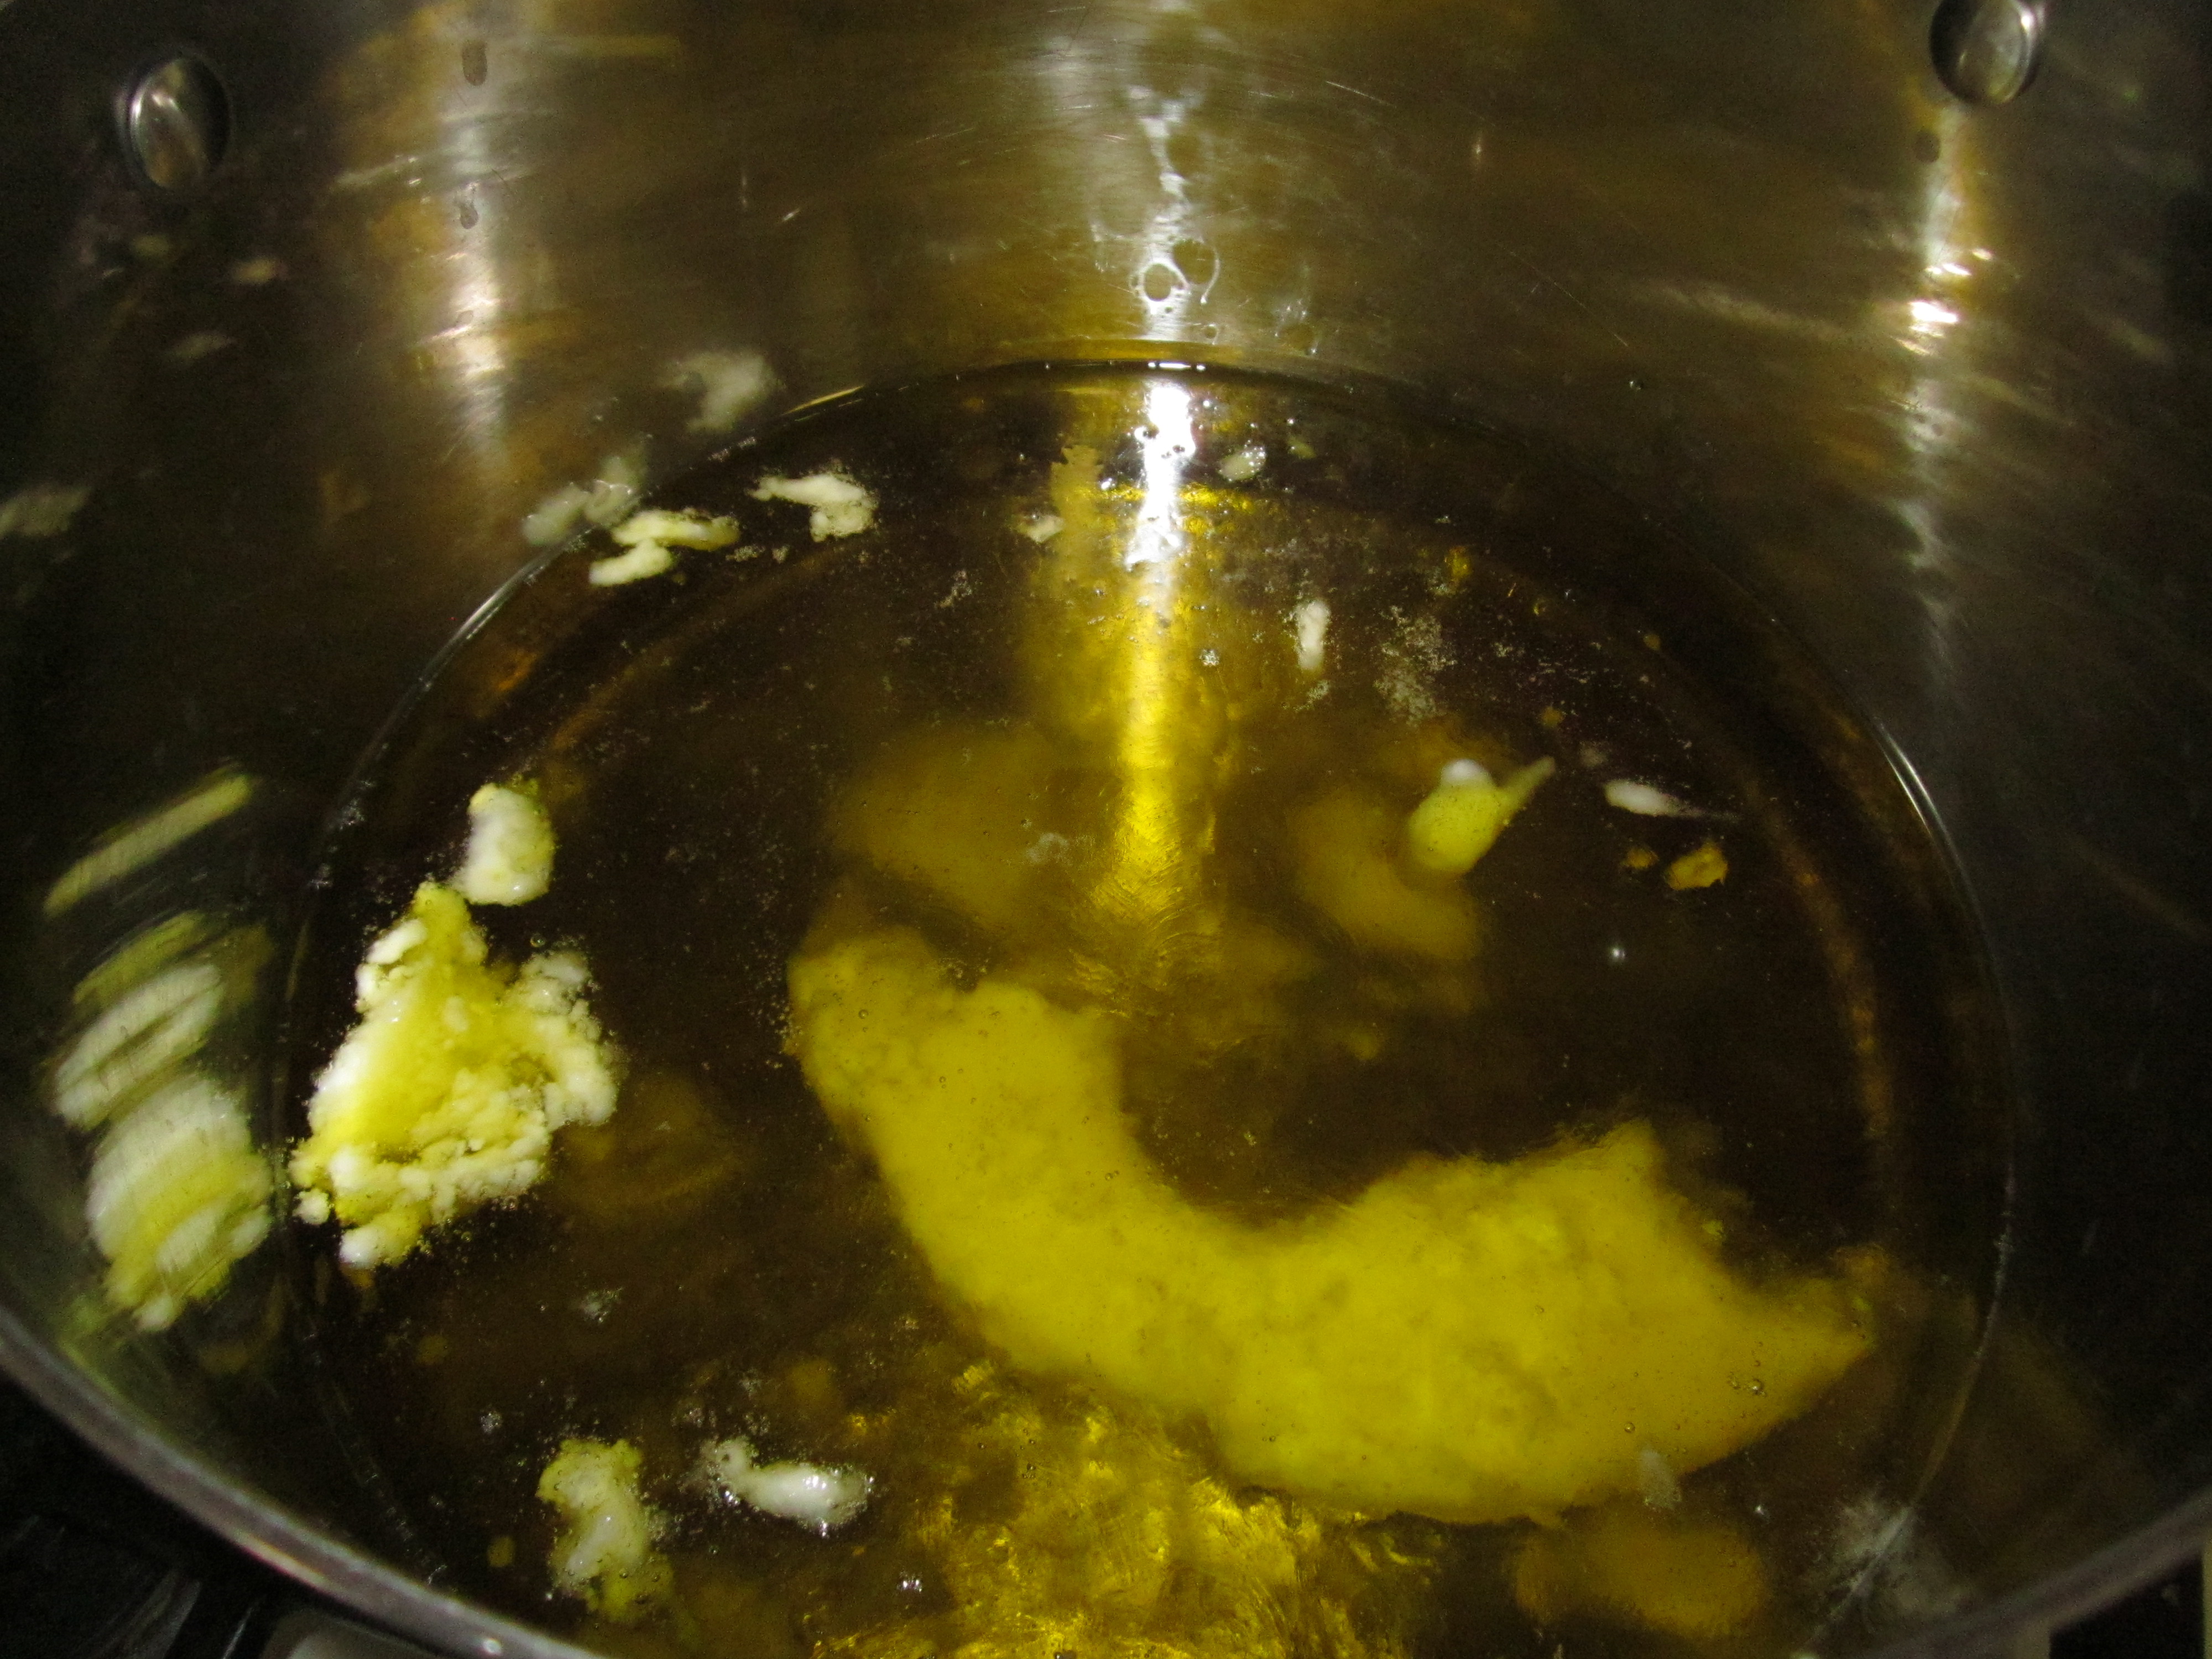
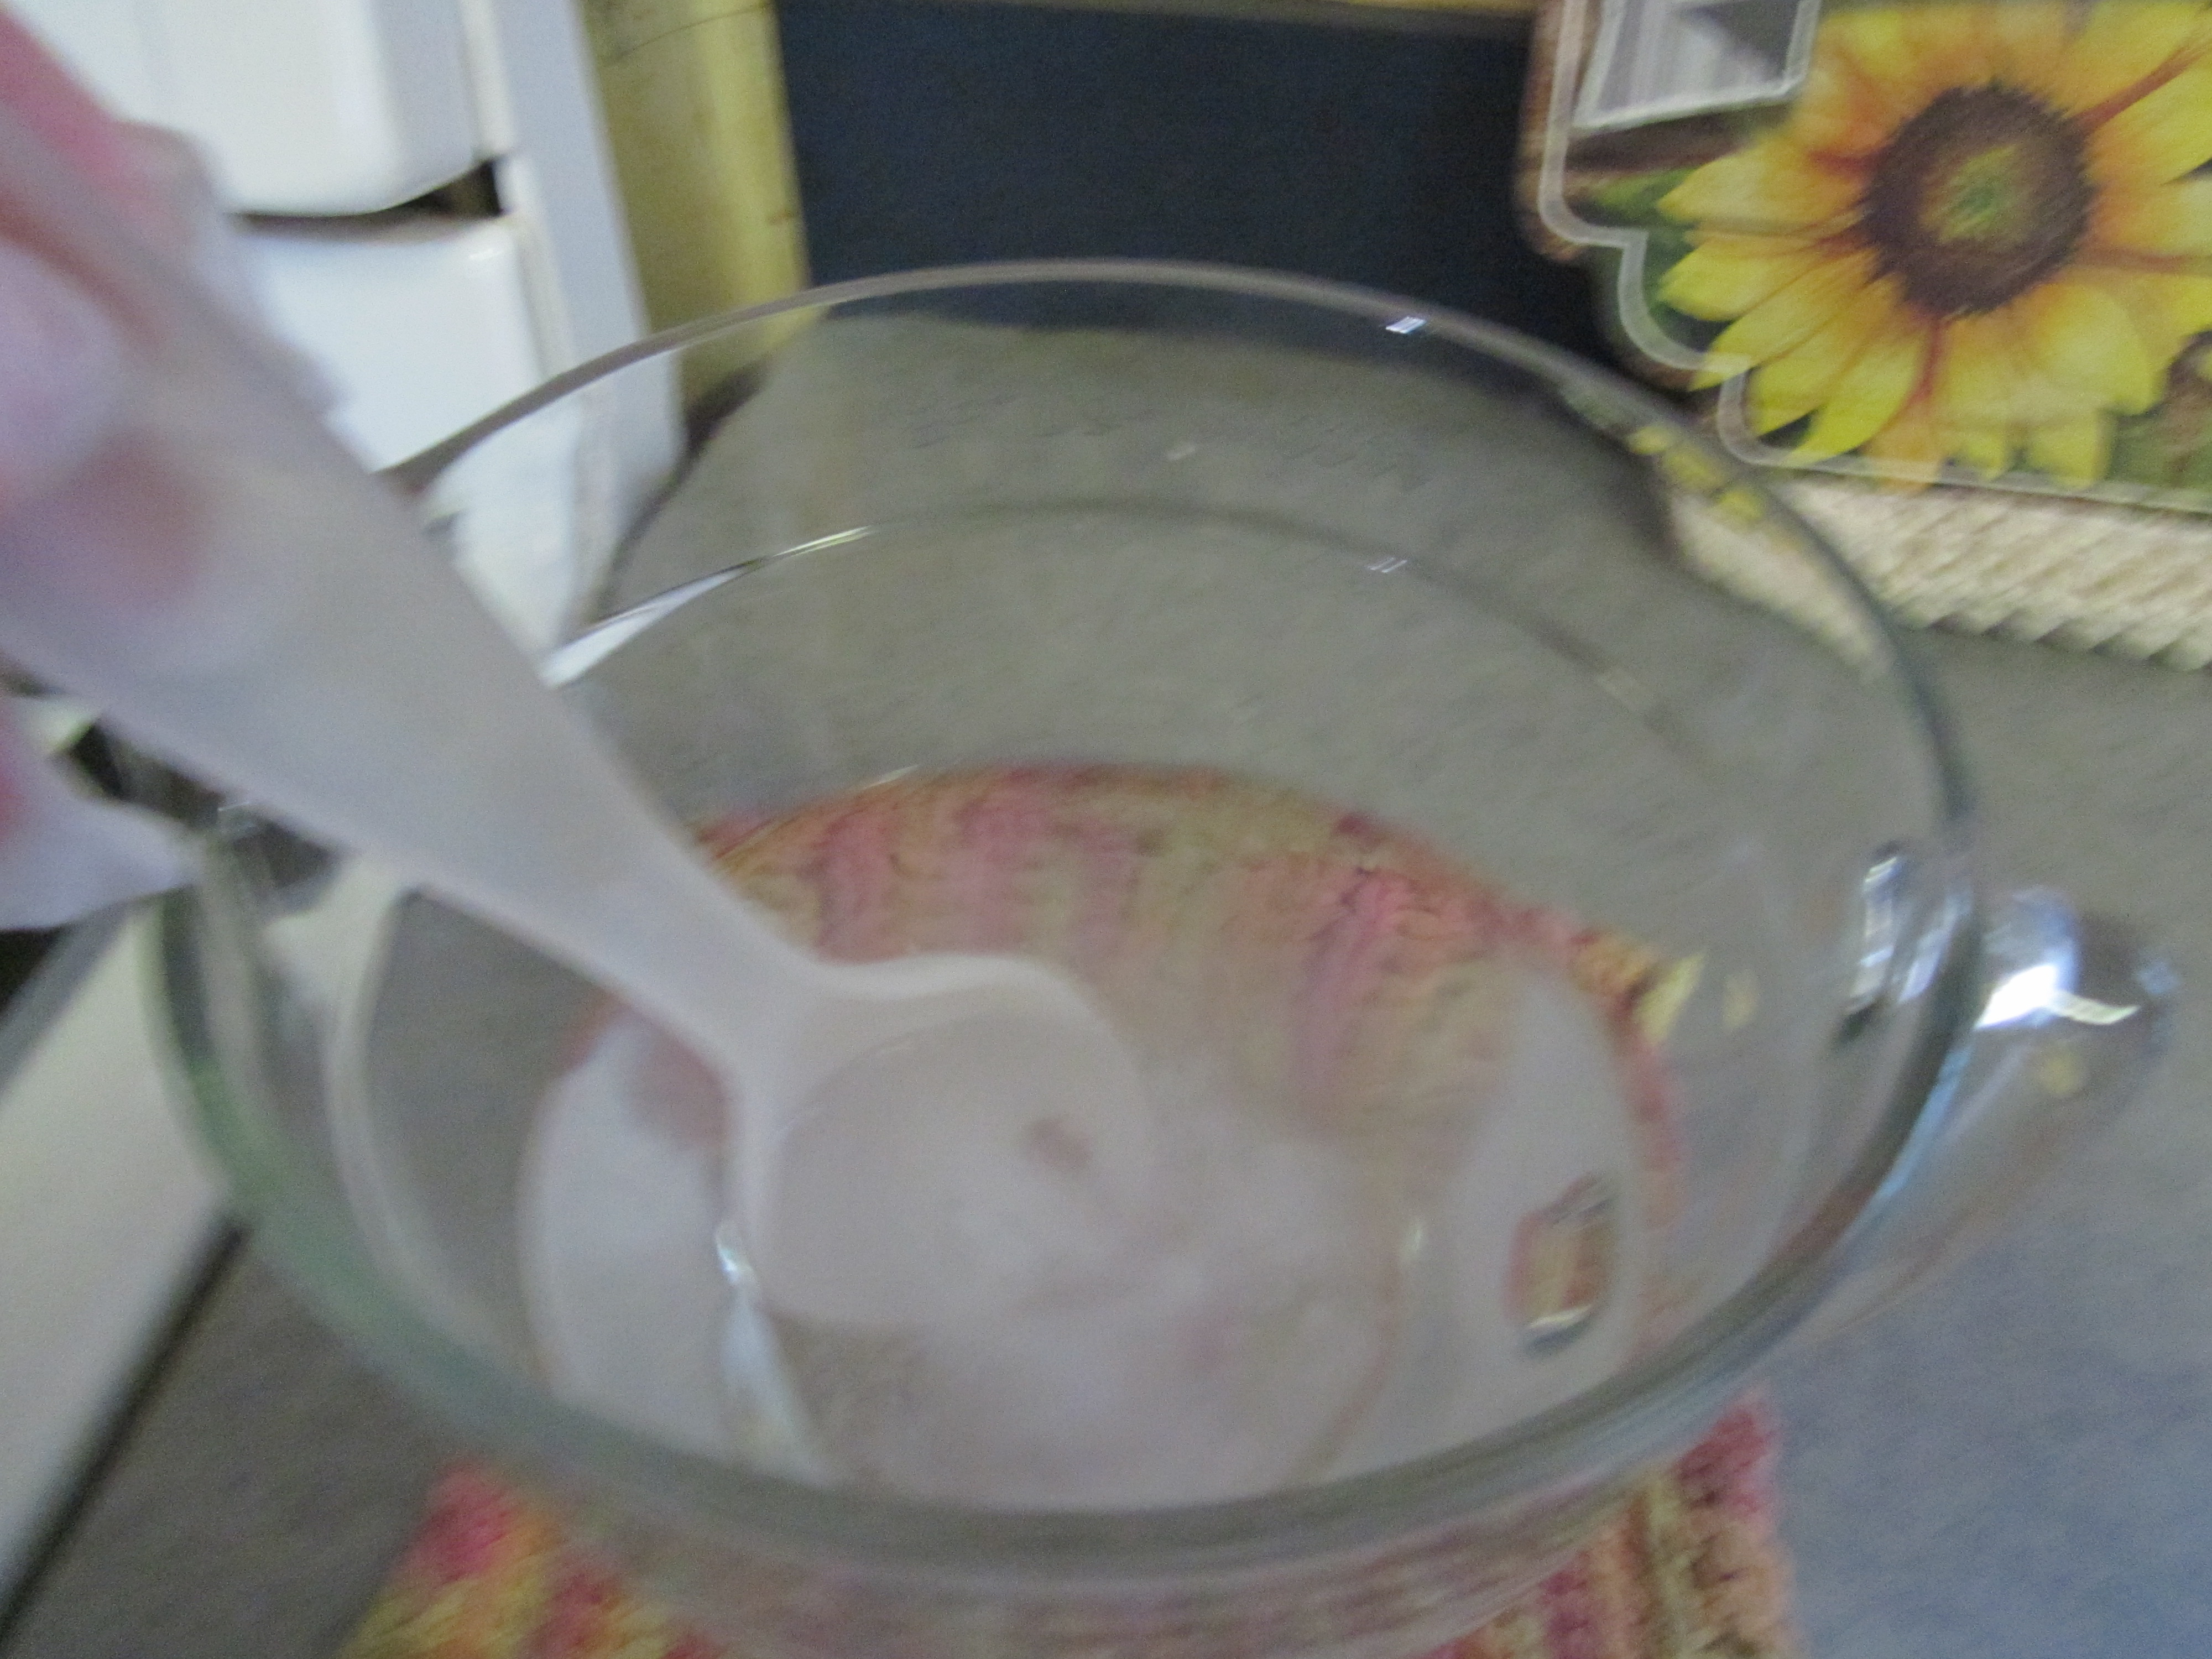
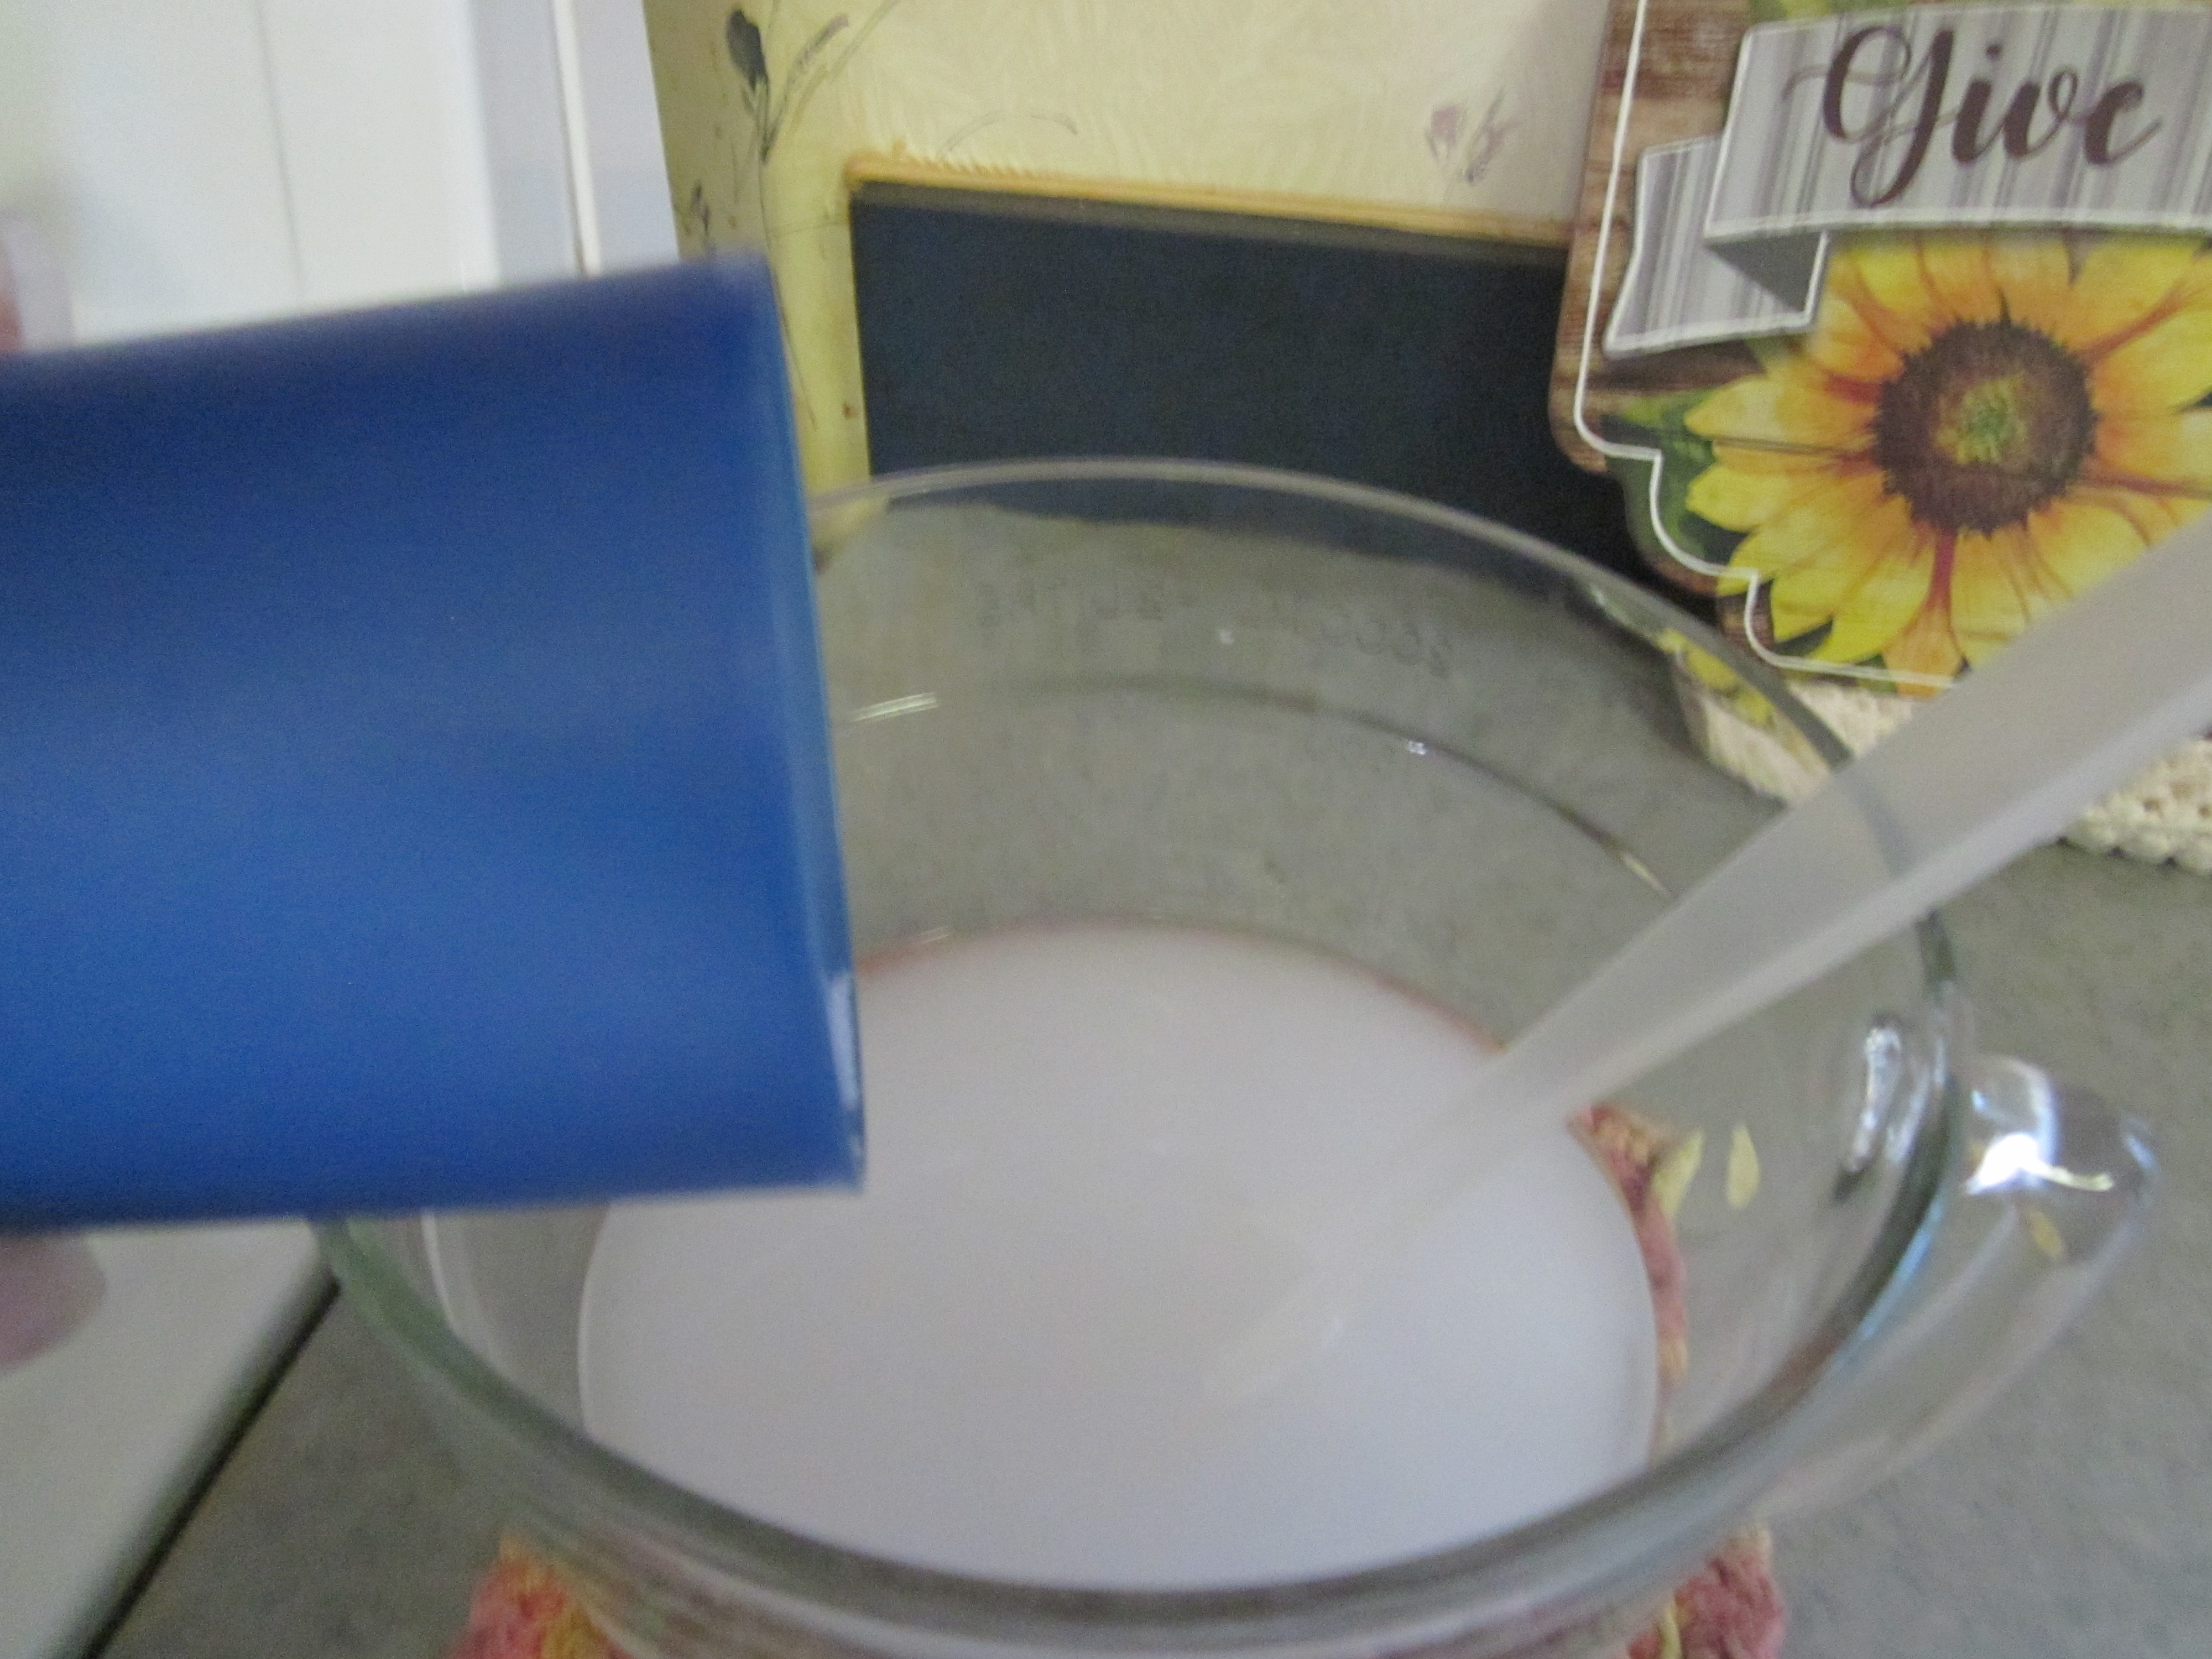
Slowly add the lye to the water while stirring.
Adding Lye to Water
Always add the lye to the water – never add water to the lye.Make sure you do this slowly and stir it in as you go so that the lye dissolves. Dumping all of the lye in at once could cause the lye to form clumps that refuse to dissolve. You don’t want lye clumps!
Lye Water
The lye-water will look cloudy for a while but there should be no solid pieces left in it.
Lye-water Temperature around 150 degrees Fahrenheit
Place the other thermometer (if you have two) in the lye-water. Check the temperature when it stops rising. Mine usually is about 150 degrees Fahrenheit (65.5 Celsius).
Check the oils to assure all solids have melted. Check the temperature of the oils. I try not to let the oils get as hot as the lye-water. Between 130 and 140 Fahrenheit (54.4 and 60 Celsius) is good as long as the solids have melted. Then turn off the heat.
One of the reasons I like heating the oils on the stove instead of the microwave is because I can better control the temperature.
Now let both mixtures cool to around 100 degrees Fahrenheit (37.7 Celsius).
I usually check both temperatures every 15 minutes or so.
While the mixtures are cooling prepare your mold(s).
For this tutorial I decided to use some of the soap molds I suggested to you in my previous post. I wasn’t sure how many molds it would take for my 4 lb. batch so I prepared more molds than I knew I would need.I set the molds where they are going to stay while the liquid soap hardens so I don’t have to carry them with liquid soap in them and risk spilling it. Since the soap will be wrapped in a towel once it is poured into the mold(s) I place a towel underneath the mold(s). I also lined the cardboard mold(s) with plastic.
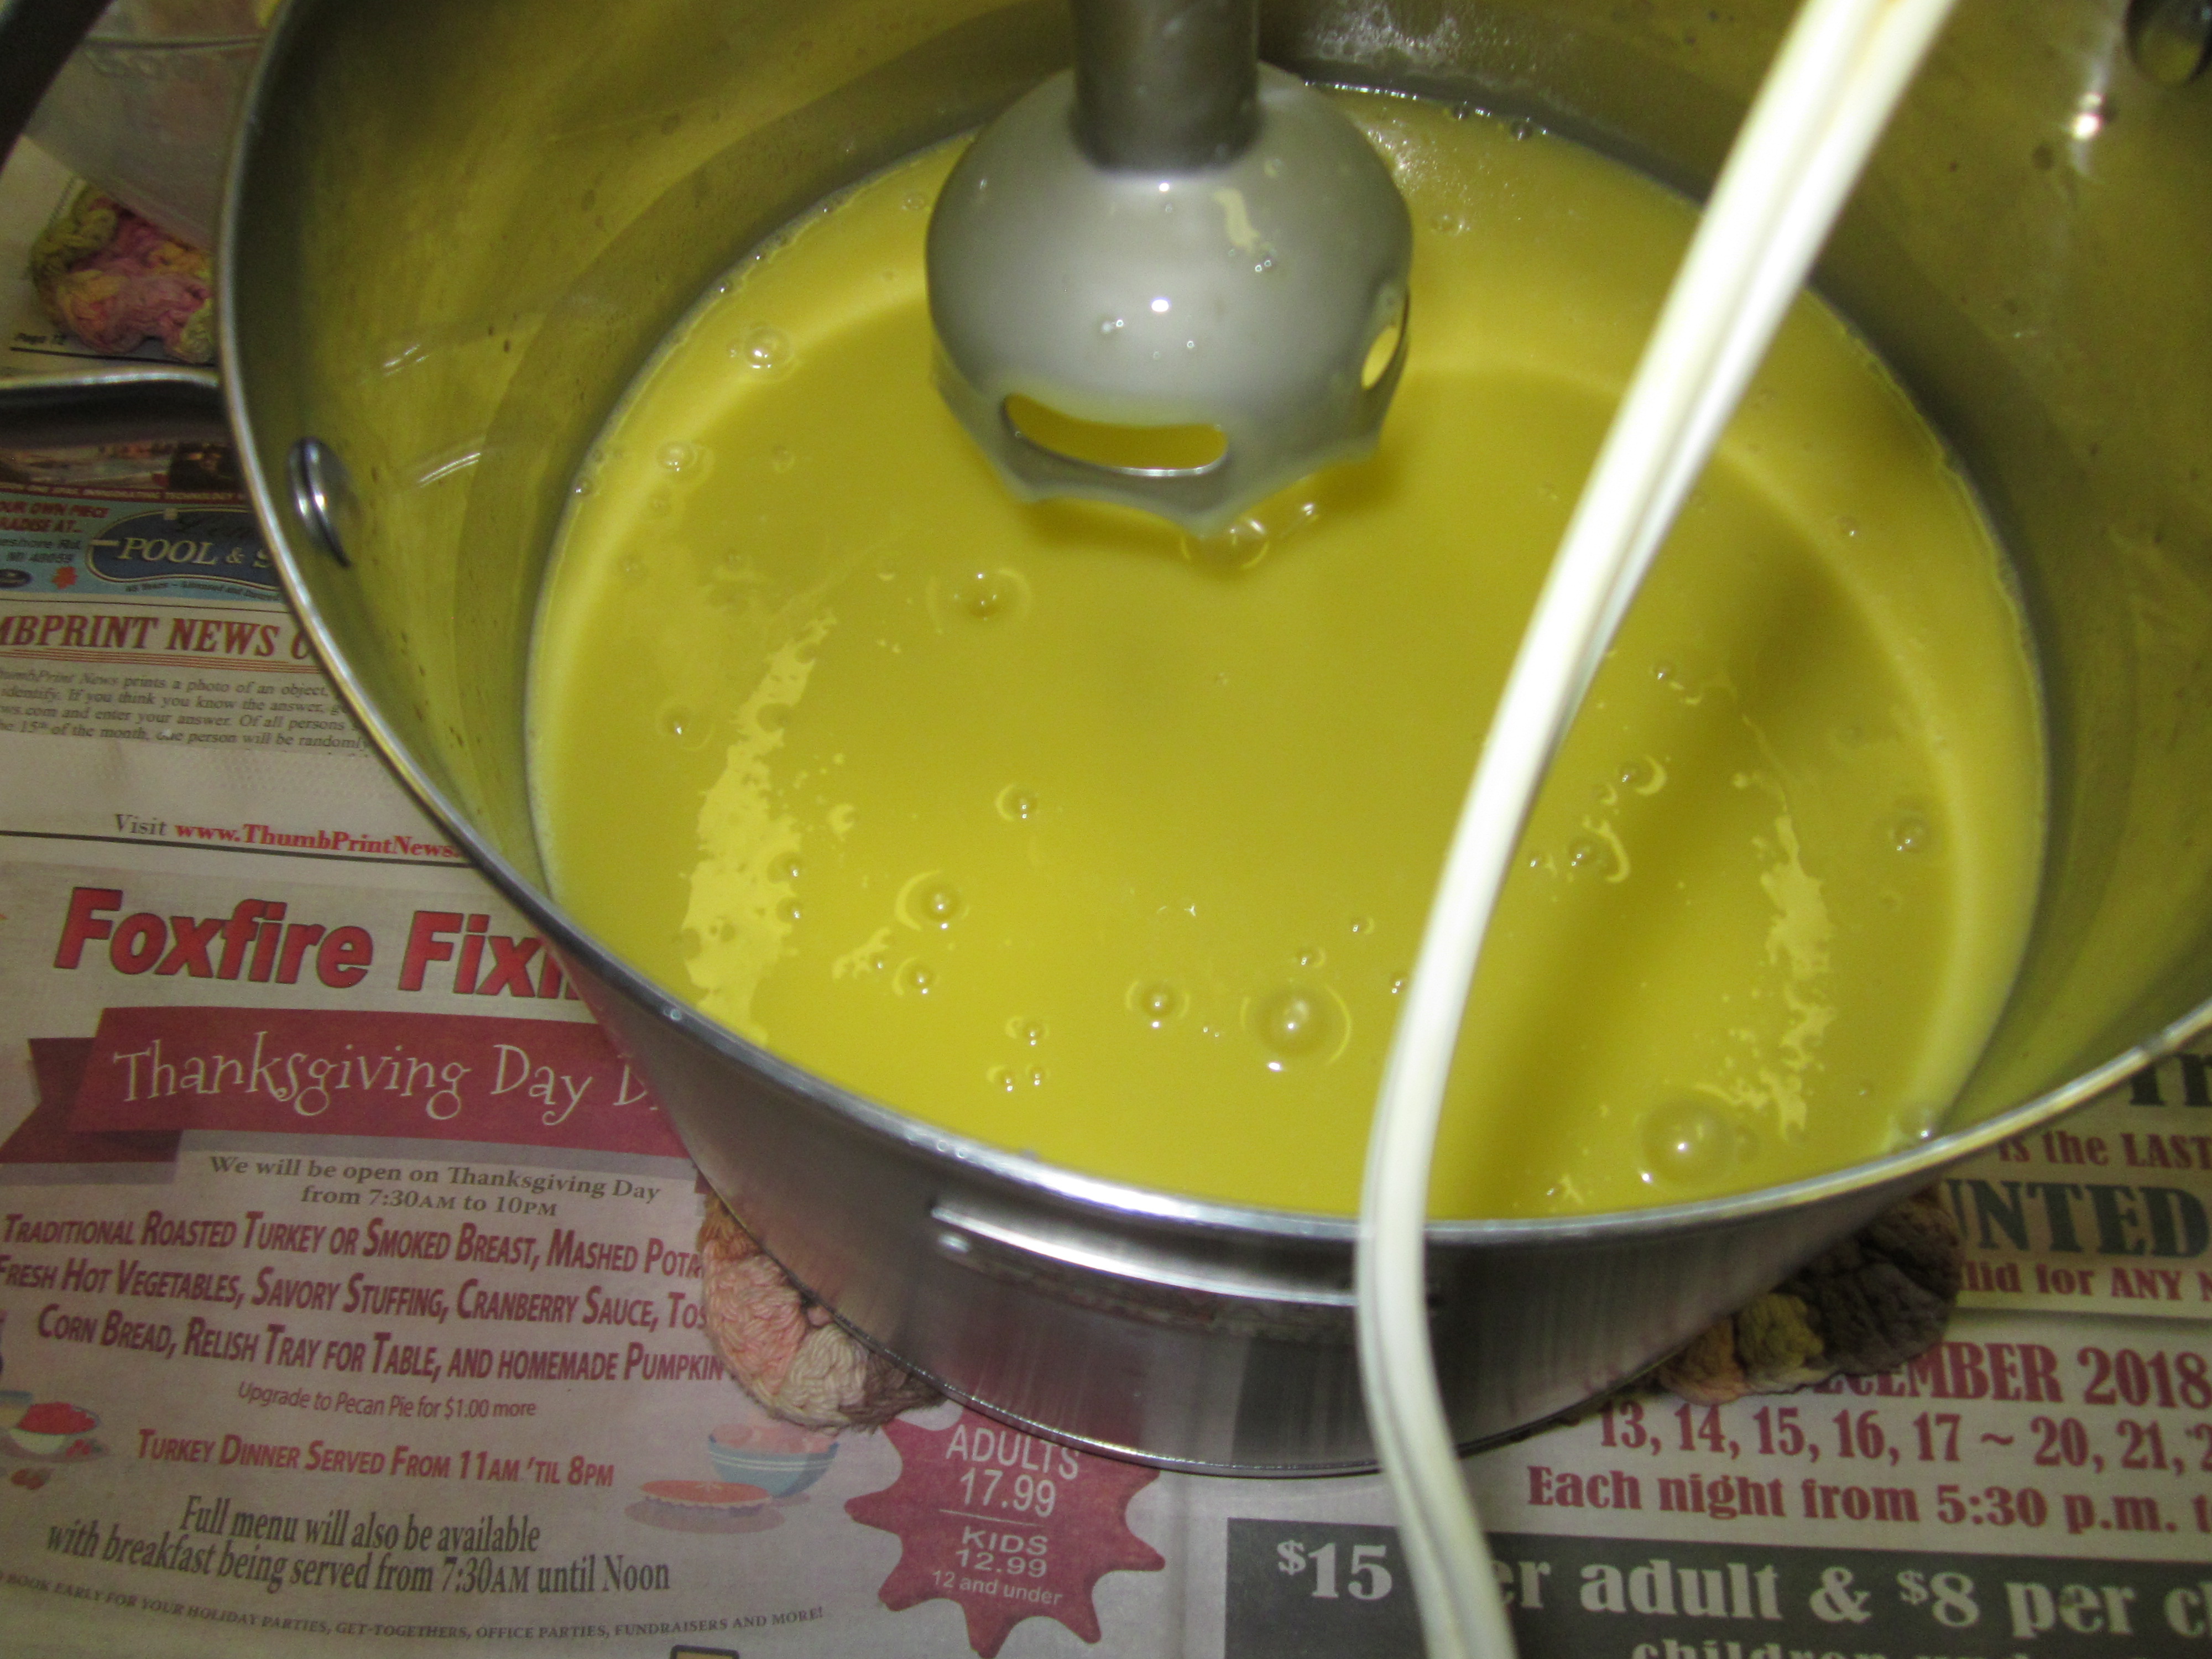
Once the oil mixture and the lye-water have cooled to around 100 degrees Fahrenheit 37.7 Celsius) slowly add the lye-water to the oils while stirring.
If the lye-water cools quicker than the oils you have a couple of options. The first would be to help cool the oils by placing the pan of oil in a sink of ice water and stirring it (do not get water in the oils). The second option, if the two mixtures are within 10-15 degrees of each other would be to mix them together anyway. They will probably still come to a trace it will just take longer.
It is important to add the lye-water to the oils – do not add the oils to the lye water.
Stirring soap mixture
As you begin stirring the lye-water into the oils you will see the change taking place.
At this point you can continue stirring or begin mixing using the emersion blender.
If you use the emersion blender make sure the entire blade housing is emersed in the mixture. You don’t want this mixture splattering.
Stir or mix the batter until it comes to a trace.
Trace is when the mixture becomes thick like cake batter or a thick gravy. If you let a drop of the mixture fall off the end of the spoon it will leave an indentation for a second or so.
If you have decided to add a fragrance (.5 oz. per lb. of soap) add the fragrance once the mixture comes to a trace.
Once the mixture has come to a trace it can be poured into the mold(s).
My 4 lb. batch filled these three molds.
Cover the soap with plastic wrap to prevent soda ash from forming.
(Soda ash is a white powdery looking substance that forms when unsaponified lye reacts with naturally occurring carbon dioxide in the air. It usually forms within 1 to 3 days and although soap with ash is completely safe to use, it can look a little odd or unsafe to someone who doesn’t know what it is.)
Now wrap the towel up over the soap or cover it with another towel. It will sit for 24-48 hours before it is ready to remove from the mold(s). I’ll explain in Part V.
Soap Recipe – Large batch (Makes about 18 – 20 average size bars.)
If you’ve not been following along with this soapmaking series you might want to read Part I and Part II before you continue with this page.
In Part I we established that “soap is made by combining fats or oils with an alkali, such as lye.” In this post I will write about some ingredient that can be used and give you a recipe that I have used many times.
LYE
As I mentioned in Part I there are two types of lye – Sodium Hydroxide (NaOH) and Potassium Hydroxide (KOH). While either can be used to make soap, they are not interchangeable. They make different types of soap and though they could be mixed with the same fats or oils the recipe would require a different amount of sodium hydroxide than potassium hydroxide. The recipe that I will give you uses sodium hydroxide.
Here in the US sodium hydroxide might be a bit hard to find. It used to be sold commonly as a drain cleaner and some places like Walmart and Ace Hardware still carry it according to their websites. If you do decide to buy lye that is sold as drain cleaner just make sure it says “pure lye” or something similar on the label. You can also find it online at soapmaking supply sites like this. You will likely find that lye sold as drain cleaner is less expensive than lye sold for soapmaking. (I am not affiliated with, nor do I receive anything from, the above businesses. I just wanted to point you in the right direction.)
Water/Liquid
Since the lye that we use comes in the form of either beads or flakes we need to mix it with liquid to begin the chemical process before mixing it with the fats or oils. Basic recipes generally use water as the liquid with some calling for distilled water. I’m not sure why it would be necessary to buy distilled water since other liquids could be substituted. In the past I have used various herbal teas and coffee as liquids in my soap and though they each react differently with the lye they have all made good soaps. When mixing lye with water I am cautious not to use water that has been treated with chemicals such as chlorine or fluoride, therefore I use a purified water.
Fats and Oils
Pretty much any animal fat or vegetable oil can be combined with lye to make soap, but all fats are not created equal. The type of soap and the amount of lye it takes to saponify (turn it into soap) will vary depending on the fatty acid profile of each oil. To keep this simple, for those who just want to learn to make soap, I’m not going to go into all the math and science behind it but if you want to learn more you can do an internet search for ‘saponification chart’ and will you find many sites that will explain.
In commercial soap making common oils are beef tallow, coconut oil and palm oil but for those making their own soap the options range from the very frugal using rendered bacon grease (I’ve done that) or straining oil that you have used for deep frying to purchasing high end organic and sometimes even rare oils.
I don’t think there is any one oil that makes the perfect soap, however we will all have a different idea of what the perfect soap is. While it is possible to make a soap with just one oil, generally a combination of different fats and oils are used to balance the qualities of the soap. Some recipes will have six or more oils in varying amounts. The recipe that I give below uses just two oils. The coconut oil that makes a very hard and cleansing (drying) bar of soap along with a big bubbly lather has been balanced with olive oil which makes a soft soap that is more conditioning and less drying.
I do formulate my own recipes using this soap calculator. It looks pretty complicated but once I tell it the fats that I want to use and the amounts it will show me a page like the one below which is the recipe. (Feel free to hop over to that soap calculator and play with it and let me know if you have any questions.)
Not only does it tell me the amount of each ingredient I will need (in pounds, ounces and grams) it also tells me the qualities I can expect from this recipe.
Below is the recipe we will use in Part IV of this series. I wrote the recipe for a large batch using 4 lbs. (1814.37 grams) of fats/oils, which is what I made, but also broke it down into a (small) one lb. (453.59237 gram) batch for those who don’t want to start out that big. It is a simple recipe. The oils can be found on grocery store shelves (at least here in the US). It does not call for extras like fragrance or colorants, which are totally unnecessary. If you do decide to add a fragrance or essential oil to this recipe you would need 2 ounces for the large batch or .5 ounce for the small batch.
Soap Recipe – Large batch (Makes about 18 – 20 average size bars.)
Our next step (Part IV) will be the actual process for making the soap. Now while you make sure you have all the equipment and ingredients you need; I will work on Part IV. We’ll meet back here soon 🙂
Thanks for reading and if you have any questions, please leave them in the comments section below.