Category Archives: homemade

Coconut Oil Soap

When buying soap you usually don’t find one that is made with only one oil. The rule is generally to use a combination of oils to achieve the desired effects, things such as a good lather, a hard bar, a soap that is conditioning, rinses well and does not go rancid quickly. Each individual oil brings different properties to the soap.

While this may be shocking to my children, I’m sure my dad would attest to the fact that I do not always follow the rules, so when a lady asked me if I could make a soap with only coconut oil, I said I would give it a try. This was probably a couple years ago, but fortunately I was familiar with a handy on-line tool called a soap or lye calculator. This tool allows you to enter the amount of various oils you would like to use in your soap, and it will calculate the amount of lye and water you need to add. Using this very handy tool I was able to come up with a soap recipe that has only coconut oil, water and lye as the ingredients.

The first thing I found out about this soap is that it is a very hard bar of soap. I found this out upon trying to cut the soap into bars. Using various tools I attempted to cut this soap but instead the soap would crack or break into chunks. They were not pretty bars. After approximately 6 weeks of curing I sampled this soap in the shower. I discovered that it was a nice soap with lots of bubbly lather. Not only is this soap nice for a shower, it’s great cleansing properties make it an ideal soap for people who choose to make their own laundry soap.

The second time I was asked, by this same lady, to make this recipe I decided to alter the recipe by adding more water in hopes that it would be soft enough to cut. Less that 24 hours after making the soap it was still too hard to cut, and I again ended up with some odd shaped soaps.

This brings us to today when I made this soap again. I made a small (2 pound) batch and poured it into individual soap molds.

IMG_0601
Coconut oil soap in individual molds.

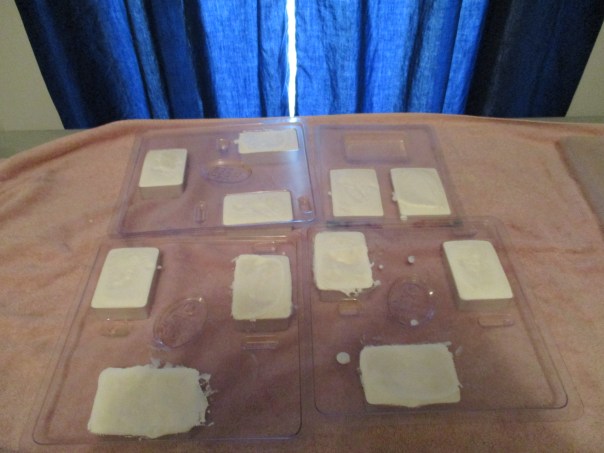
I discovered that this soap was ready to come out of the molds after only about 4 hours. It will still have to sit for about six week before it is ready use or sell.

IMG_0603
Coconut oil soap unmolded after four hours

Wool Dryer Balls Make Me Laugh

For about a year now we have been using wool dryer balls as an alternative to dryer sheets. I knew I had to find an alternative fabric softener because I began having allergic reactions to the fragrances in the store bought dryer sheets. When  my husband saw me buying the unscented dryer sheets he commented on how bad the chemicals in those things were, so while I did not experience any apparent side effects from the unscented variety, I decided to look for a healthier means of drying our clothes.

Various internet searches let me to deduce that wool dryer balls were probably the best option. I read that using wool dryer balls softens the clothes, reduces the drying time, can reduce static, reduce wrinkles, and since they can be reused (from what I’ve read for up to 1000 loads of laundry) they can be cheaper to use than dryer sheets.

Rather than spending the $20+ to buy a set, I decided to make my own. I read that the more (balls) you use the more the drying time is reduced, and you should use at least 4. I decided on 8.

Since we have been using them, I am satisfied that they soften the clothes, and I don’t have a problem with wrinkles. I am not sure if they actually shorten the drying time since this would take a scientific experiment to determine, and all of the kids are beyond the point of having to produce science fair projects.  While it is possible that they reduce static cling, I still get static in fabrics such as fleece and nylon if they are left in the dryer until completely dry. I know that they are all natural, therefore I don’t worry about what chemicals may be leaching from them and into my clothes, and they are unscented so I don’t get headaches or sneezing fits because of them. Since I made them myself I am certain that they have saved me money.

These balls in the dryer also provide me with a good laugh more times then not. From the first time my husband unsuspectingly open the dryer and upon seeing this let out a yell, to finding a ball stuffed in a shirt sleeve, pillow case, or pant leg, I always find it funny. We now know that deciding to take the laundry out of the dryer means the search is on. I usually take the laundry out of the dryer one piece at a time, making sure to shake any of these elusive little critters back into the dryer, and then make sure I count eight before closing up the dryer.


Wool Dryer Balls
Wool Dryer Balls


It doesn’t always work that way though. A few months ago we had a ball that had gone missing for about two weeks. Each time I did laundry I would be reminded that it was missing and would check places like under the chairs in the living room, in case it rolled there while I was folding the clothes, or in a pillow case that may have been washed recently. I knew it would eventually turn up, because no one in their right mind would break in just to steal one wool dryer ball, and if my husband got so tired of having to count balls he would have gotten rid of all of them, not just one. I figured it was mixed up in some of my daughters stuff, and when it suddenly popped out of one of her shirt sleeves she would get a good laugh and return it to its rightful place. Then one day Trooper decided to play with his toys and he tipped over the whole toy basket and the missing ball went rolling across the floor.  Mystery solved, I chucked as I returned it to the dryer where is could resume active duty.

IMG_0532

Other times I get in a hurry and grab the whole load of clothes out of the dryer and end up with something like this.

IMG_0562
OOPS!

I laugh as I hear the balls hitting the floor and think oops, I forgot again. Notice that there are only 7 balls on the floor so I have to go shake and search the load so I can return #8 to the dryer.

Some people may find this frustrating or a lot of work keeping track of these little buggers, but I can’t help but laugh when I hear my husband mumbling, and when I ask what is wrong, he says he’s missing a ball.

Homemade Gifts

I enjoy making homemade Christmas gifts, so this year I decided to make fingerless gloves and matching ear warmers for my 4 daughters and two sons-in-law.

For the girls I used this pattern http://www.beatriceryandesigns.com/2015/02/09/amazing-grace-fingerless-gloves-free-crochet-pattern/   which was a free online pattern. The first pair were a bit challenging, counting and referring back to the pattern for each stitch, but by the time I got to the fourth pair I pretty much had the pattern memorized. I didn’t use a written pattern for the ear warmers. I simply used the same stitches required for the gloves and crocheted them in the shape of the ear warmer. The challenge to this was getting the appropriate size. I experimented on the first one and repeated that for the other three.

I wasn’t going to make fingerless gloves for my sons-in-law because I thought they might be a bit girly, but then I realized that nowadays practically everyone is carrying a phone all the time that requires the use of their fingers for either texting or swiping the screen so the guys might appreciate this kind of glove as well.

For the guys gloves and ear warmers I used a more masculine and simple pattern, and I regret that I did not get pictures of them, but below are three of the girls modeling their Christmas gifts from mom.

IMG_0541
Tina
IMG_0537
Kara
IMG_0538
Lindell

My Christmas Gift To You – Potato Stuff

When ever our family gets together we all bring a dish to pass, so all of the cooking doesn’t fall on whoever is hosting the party. Many years ago, I don’t remember how many but it’s probably going on twenty, for our Christmas brunch celebration I began making a potato dish. It became a hit, and I think I have made it every year since. I’m going to share the recipe with you.

Ruth’s Potato Stuff has become it’s name, because after years of referring to it as Ruth’s potato stuff, my sister told me that I had to give it a name. I said, “you already did. It’s Ruth’s Potato Stuff because that is how everyone knows it.” (I know, I’m revealing my quirkiness)

Usually I make it on Christmas Eve so that we can have it when we all get together on Christmas morning, but this year we will be having our family Christmas brunch tomorrow, so I will make the potato stuff today, Christmas Day.

I start fairly early. It takes along time to make, since everything gets cooked separately before being put together. Remember this is a party recipe, so the proportions are large because it is meant to feed many.

I start by boiling about 8-10 lbs. of potatoes and hard boiling about a dozen eggs. I then let them cool. Later in the day I cut 2 lbs. of bacon. Into about 1 inch pieces and fry them up. While the bacon is cooking I peel the potatoes and slice them (around 1/2 inch thick), peel the eggs and cut them in small(crumble-like) pieces, and shred about 16 oz. of sharp cheddar cheese. When the bacon is crispy I drain it on paper towel. I pull my large electric frying pan out of the back of the cupboard, where it has been stored since the last time I used it (last Christmas). I melt  two sticks of butter in the frying pan and add the potatoes. I sprinkle them generously with Lawrly’s Seasoning Salt and turn them as the begin to get crispy. After I figure they have a decent amount of crispy and seasoning salt throughout, I turn the frying pan down and top the potatoes with the egg crumbles, the bacon pieces and lastly the shredded cheese. I leave the frying pan on low and cover just long enough to melt the cheese.

Fortunately this time of year the nights are cold, so I can (with the cover on it) store the whole pan in my vehicle overnight. (I would never be able to fit it in the fridge.) At this time I also take the plug for electric frying pan so I don’t forget it in the morning. The hardest part about this process is the drive to our brunch destination makes us really hungry because the potato stuff smells so good.

Once at our destination I take the frying pan in and plug it in. It will probably take at least 20 minutes for this to heat through and once people start digging into it, the ingredients get mixed together well.

This has never been a secret recipe, and I believe one of my sisters has made it before, but one of the reason I am sharing this is because it has become part of our family tradition, and I want my daughters to know how to make it. Even though they now have written instructions, I can’t imagine any one of my daughters making this. While they have varying degrees of cooking skills, they all seem to lack a love of cooking. What I can imagine is a future where their Christmas Eve is spent with the four of them together making potato stuff or perhaps their husbands making potato stuff.

Now I must say Merry Christmas and get back to making Potato Stuff.

My Other recent Crochet Project

IMG_0486

I really had no idea what the end results would be when I started the project, but here it is. I decided to make Aunt Donna a homemade birthday gift, and I’ve often seen her using reusable shopping bags, so I thought maybe a big bag would be something she would like.

I read through a few patterns before starting just to get some idea of how to  crochet a bag. I went through some of my yarn and found one that I thought I had enough of and then I began. After crocheting the bottom of the bag I was getting bored doing the same stitch over and over, so I began to experiment with some new stitches. On the sides I changed stitches every two or three rows. When I got to the handles I decided to crochet with two strands held together in order to make the handles stronger. Since I only had one skein of the color I was using I needed to add a second color. I’m not sure why I chose yellow, but by this time my husband had noticed what I was doing and he thought that adding more color was a great idea.

After I finished off the handles and the bag was basically complete I realized I needed to add something to hold down the flapping circles, near the top, that were a result of one of the new stitches that I tried. In order to add more color and hold down the circles I decided to make flowers and attach them to the bag. Since I was crocheting in the evening while we were enjoying a fire in the fireplace and listening to music, I decided to join my husband for a drink. When I finished crocheting the second flower I realized that I had crocheted it backwards. It still looked like a flower but did not match the first one I made.

At this point I thought, “not all flowers look alike,” so it made much more sense if all the flowers were different than if they were all the same. I poured another drink and continued making flowers. Even though I didn’t finish them all that night, and the rest were finished while I was not under the influence, I continued to make them all different.

After I finished attaching the flowers, I knew that the bag needed a lining. I pulled out a piece of fabric that I thought would work, and since sewing is definitely not one of my strong points and pattern design is something I know nothing about, I let it sit on the table for nearly a week. Two days before Aunt Donna’s birthday party I knew I had to bite the bullet and finish the bag. So I took some measurements and drew out a pattern on freezer paper. I cut it out and pinned it to the fabric. Then I cut out the fabric pieces and sewed them together. I can’t say how well the lining actually fits inside the bag because, being inside, it was difficult to see. It seemed to work though. I hand stitched the lining around the top edge of the bag. These stitches were far from perfect but they seemed to hold the lining in place well.

After it was completely finished (or so I thought) my husband suggested and I agreed that the handles needed to be reinforced. I selected a heavy weight yarn in a gold color to crochet around and reinforce the handles. The end result is a Ruth Ciani original. It is definitely one of a kind, and I can assured you that it won’t be duplicated, because not even I could do it if I tried.

IMG_0502

I did have a lot of fun making it, and I hope Aunt Donna will have as much fun (as I said to my daughters) embracing her eccentricity and carrying this bag.