Category Archives: soap

Making Soap

If you area regular reader of Don’t Eat It! Soap blog you may be wondering where all the soap posts have been. Honestly I haven’t done much soap making lately. Summer is just filled with so many other things to do, and having anticipated this I made enough soap last winter and spring to get me through until things slowed down again. I did make one batch of soap this summer, about 6 weeks ago, and I am testing it now. I made this soap by request of a lady who has very sensitive skin. The person who had made her soap in the past was no longer making it for her. She isn’t sure what the ingredients were in the soap that was being made for her, but she knew that it had lard in it. She suspects that the ingredient that causes her sensitively is coconut oil, and I was pretty much convinced when she said my aloe soap (with coconut oil in it) made her break out. I told her it would be trial and error, but I would attempt to make her a soap that she can use.

She described the soap that she was previously using as having no lather, being very soft and “snot-like” when wet, and taking up to a year to cure. I have honestly never made a soap with those properties, but it sounded to me like it may have a high olive oil content. Since my aloe soap also contained olive oil, I decided to play it safe at first and make a soap with lard as the only oil.

Lard (or hog renderin’s as Granny, on the Beverly Hillbilly’s, would call it) has probably been used as an ingredient in soap making since the beginning of soap making, and it is likely what our grandparents or great grandparents used to make soap. My lard soap would be different than theirs for a couple of reasons. Their homemade soap would have been made using wood ash, which is also known as potassium hydroxide, as the lye. Although I have yet to use it, my understanding is that this makes a softer soap than  sodium hydroxide, which is now commercially available, and I use to make my soap. Also they probably did not have scales to measure precise amounts of each ingredient, so the soap may have been very strong and harsh on the skin. I suspect this is why lye soap has a bad reputation.

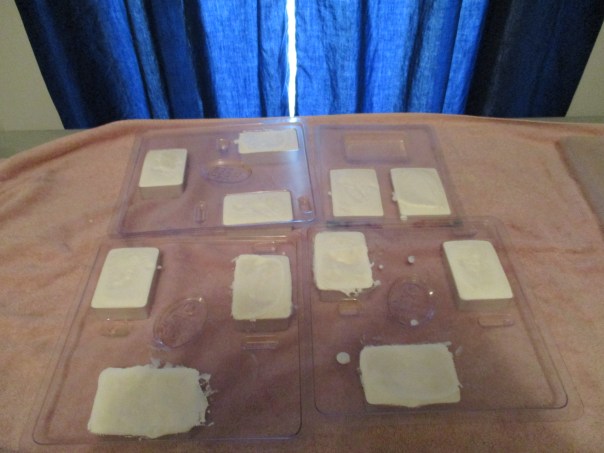
The only three ingredients in the lard soap that I made are water, lard, and sodium hydroxide (lye). Since this is a test batch I only used two pounds of oil and ended up with eight bars.

img_1895
Lard Soap

This recipe made nice white bars of soap. My husband and I have each used a bar of this soap and both had the same impression. The soap feels nice on the skin, it does not have a bubbly lather but feels more creamy going on. It rinses off well and does not leave the skin feeling dry. While it would not be my first choice, it is a nice soap.

I will get it to the person who requested it this week and say a prayer that this soap works for her.

With the rain that we had late last week and through the weekend making indoors work my preference, I decided Saturday morning would be a good time to make soap. I knew that I was low on both coffee and breakfast bar soaps so I decided to make the coffee soap this time and will probably make breakfast bar later this week.

The coffee soap is made with brewed coffee, instead of water, as the liquid. It has coconut oil and olive oil, and after the oils are combined with the coffee and lye, I add coffee grounds, sugar and powered milk. Sugar is used as an ingredient in soap to increase lather, the coffee grounds add scrubbing power to the soap, and I have discovered that using powdered or dehydrated milk gives the creamy feel of a milk based soap without having to worry about scorching the milk when adding the lye to it. The best way I have found to add the coffee grounds, sugar and powdered milk is to first mix them with a small amount of water to dissolve the milk and the sugar, then blend it into the soap after the soap has come to a trace or just before pouring it into the mold.

img_1893
Coffee Soap 24 hours after being poured into the mold

The soap was still somewhat soft on Sunday, but is now ready to come out of the mold and be cut into bars today (Tuesday). It should be ready to use in 6 weeks.


Another New Soap

While my last soap experiment, Spearmint Soap, is currently being tested and I await feedback, I decided to try something new. As I’ve mentioned before I love to try new things, but rather than make a full batch of something new and find out that it didn’t turn out to be a great soap, I decided to make a split batch. This is easy enough to do since many of my soaps have the same base recipe. The recipe includes Olive Oil, Coconut Oil, Water and Sodium Hydroxide (lye). After combining these ingredients in the proper order, and mixing them at the appropriate temperature until they are the right consistency, I poured half of the soap in a separate bowl.

To the first half I added fresh aloe juice/gel that I had removed from the inside of several aloe leaves. That is not the new soap. My aloe soap has actually become one of my more popular soaps and I thought I should make some more.  For the new soap I added grapefruit peel to the second half. I had dried and stored this peel a while back. When I opened the container the fragrance was strong and pleasant and unmistakably grapefruit. I ground the dried peel until it was a powder. Then mixed it into the soap before it was poured into the mold.

I am not certain what effects this will have on the finished product. Even though grapefruit peel is reported to have vitamins and enzymes that are beneficial for skin care I don’t know that they would survive the chemical process involved in making soap. Unfortunately, the fragrance will barely, if at all, survive the processing that is yet to take place. It will probably add some color, maybe yellow, and some texture to the bar.

The most difficult part about cold process soap making is waiting six weeks for the soap to be ready to use. I’ll let you know how it turns out.

Spearmint Soap, Moving Day and Maple Syrup

Spearmint Soap

I’m still excited about my spearmint soap, but after taking it out of the molds I realized that maybe I should have done a little research before making this recipe. I’m beginning to think that my middle name should have been “Experiment”, because I seem to do a lot of that.  Although the soap is not fatally flawed, and only the appearance of the soap will suffer, I did make one mistake that can and will be corrected in future batches.

IMG_0883
Spearmint Soap

This picture shows some brown spots that developed on the soap. While I was certain the spots were caused by the spearmint, I was a bit perplexed about why the brown spots only occurred in some areas and why some of the spearmint retained its green color. I decided to do a google search to find out what others have experienced when adding spearmint to handcrafted soap. The first site I found, described this effect as bleeding. I found out that bleeding is when the color from an embedded object leaches of into the surrounding area. I found out that many herbs can have this effect, and to varying degrees, but spearmint is one of the worst.

The next website that I came across actually told me how to prevent this from happening. It said that the cause is the actual color coming out of the leaves when it is submerged in the wetness of the soap, and if you make a tea with the herbs first, the color will leach out into the water (tea). Then the leaves can be added to the soap. That answered my question. When I made my soap I added the spearmint leaves that I had used to make the tea with, but since I wasn’t sure I had enough, I decided to add some dry leaves as well. I have concluded that the dry leaves that I added are the ones that bled into the soap, while the leaves from the tea remained green. Since this is simply an aesthetic problem, Dom and I are looking forward to using these bars of soap.

The good news is I can detect a slight minty smell to this soap.

Moving Day

IMG_0925
2 Weeks Old

The chicks seemed to be getting quite curious about the world outside of their brooder. Every time we would walk up to the brooder they would crane their necks looking  up at us. Since the weather has warmed significantly for the near term forecast, we decided Tuesday was moving day.

IMG_0932

My husband brought the hutch out of the back shed and assembled it while I was busy in the kitchen. “Movin’ On Up” the theme song from the Jefferson’s kept running through my head. https://www.youtube.com/watch?v=FHDwRECFL8M I would change the words to “Movin’ on out, to the deck” but the tune repeated itself over and over in my mind. I probably could have stopped this by turning on the radio, but it was a nice day, I was in a good mood, and it really wasn’t bothering me, in fact I thought it was kind of funny. It turned really funny when I was helping my husband carry the brooder out the deck, and he started singing “Movin’ on up…” Like minds.

IMG_0929

The heat lamp was moved into their new home. As were their food and water dishes.

IMG_0927

They seemed very curious about everything, but settled in nicely.

IMG_0930

Their play house was also moved with them.

My camera battery died before I got to take a picture of the roost my husband installed for them.  (Roosters aren’t the only ones who like to roost) I also did not get a picture of the canvass that drapes the hutch to protect them from the elements. It is just a large piece of canvass that we lay over the top of the hutch, it drapes down the sides and front. When the chicks need the warmth we wrap the hutch with the canvass just like wrapping a Christmas present, and we secure the canvass with clips.

The “Babies” seem very content in their new (but temporary) home, Scout can now see them at eye level, and don’t be surprised if, on the evenings when the weather is nice, I tell you that we sat on the deck and watched “Chicken TV”.

Maple Syrup

IMG_0891

Sunday and Monday were our last day for collecting sap. Since the sap was still running clear we may have pulled the spiles a little early, it may have been only a few hours or maybe a few days prior to the time the sap would become cloudy. The nighttime temperatures will not be below freezing at least for the next week and the buds on the Silver Maple trees are getting ready to pop open.

Our big consideration was the extreme amounts of time and energy that were needed to turn the sap into syrup, and decided that we had done enough. Since February 20th, when we first tapped the trees, until now, my husband spent 5 full days (9-12 hours each) out at the farm cooking sap, getting the fire going then continually adding wood to the fire to keep the sap boiling, stirring and watching the steam roll off, as the water boiled out, then adding more sap to the pot. At the end of the day he would bring the sap home and we would spend another 1 1/2 to 2 hours cooking the sap into syrup.

I don’t have exact numbers on our total yield for the season. My best guess is between 5 and 6 quarts of syrup.

My husband and I agree that it was a great experience and having homemade, self-harvested maple syrup is greatly rewarding. Some of our thoughts about this experience are that it was not a steady year for maple syrup, in our area, since the extreme weather changes over the  last couple of weeks prompted the sap to stop and start flowing several times. We found out that our Silver Maple trees at the farm had greater sap flow than the Sugar Maples that we tapped. In fact, last week when the silver maples were flowing well and the sugar maples were not flowing, my husband moved all of the taps to the Silver Maples. We found out that The Silver Maples make a wonderful syrup. We observed that the color of the syrup seemed to get lighter over the course of the season, with our first batch being the darkest and each batch slightly lighter in color. Thankfully it is a short season for making maple syrup and not a year round job.

A Bonus Picture


IMG_0914

This squirrel enjoyed the day in the tree. Apparently too nervous about our (and the boys) presence to venture down.


New Soap

I made a new soap recipe this morning that I am pretty excited about. The oils in this recipe are sunflower oil, tallow and coconut oil. I have used this combination in the past and I know that it makes a hard bar of soap that is cleansing, conditioning, and has great lather. For this soap I decided to use a spearmint tea, made with our homegrown spearmint, for the liquid and added crushed spearmint leaves to the soap.

IMG_0875
Spearmint Soap In The Molds 6 Hours After Being Made
IMG_0863
Cocoa Soap Still Going Through The Gel Stage 48 Hours After Being Made

As you can see in the picture this soap sets up quickly compared to this cocoa soap which was made with coconut oil and olive oil, and was still going through the gel stage 48 hours after it was made. The spearmint soap has been in the mold less than 6 hours. Tomorrow I will take it out of the molds and cut it into bars. The individual bars will be test bars. In about 6 weeks, when the soap is ready to be tested, I will use one and give one to my husband. There are a couple more for family members who volunteer (KC?) or are recruited (JB?) to test and evaluate them, before I decide to sell them. It is my hope that a bit of the spearmint scent remains along with the refreshing feeling that spearmint gives. Our spearmint did, after all, make one heck of a nice spearmint vodka.


Coconut Oil Soap

When buying soap you usually don’t find one that is made with only one oil. The rule is generally to use a combination of oils to achieve the desired effects, things such as a good lather, a hard bar, a soap that is conditioning, rinses well and does not go rancid quickly. Each individual oil brings different properties to the soap.

While this may be shocking to my children, I’m sure my dad would attest to the fact that I do not always follow the rules, so when a lady asked me if I could make a soap with only coconut oil, I said I would give it a try. This was probably a couple years ago, but fortunately I was familiar with a handy on-line tool called a soap or lye calculator. This tool allows you to enter the amount of various oils you would like to use in your soap, and it will calculate the amount of lye and water you need to add. Using this very handy tool I was able to come up with a soap recipe that has only coconut oil, water and lye as the ingredients.

The first thing I found out about this soap is that it is a very hard bar of soap. I found this out upon trying to cut the soap into bars. Using various tools I attempted to cut this soap but instead the soap would crack or break into chunks. They were not pretty bars. After approximately 6 weeks of curing I sampled this soap in the shower. I discovered that it was a nice soap with lots of bubbly lather. Not only is this soap nice for a shower, it’s great cleansing properties make it an ideal soap for people who choose to make their own laundry soap.

The second time I was asked, by this same lady, to make this recipe I decided to alter the recipe by adding more water in hopes that it would be soft enough to cut. Less that 24 hours after making the soap it was still too hard to cut, and I again ended up with some odd shaped soaps.

This brings us to today when I made this soap again. I made a small (2 pound) batch and poured it into individual soap molds.

IMG_0601
Coconut oil soap in individual molds.

I discovered that this soap was ready to come out of the molds after only about 4 hours. It will still have to sit for about six week before it is ready use or sell.

IMG_0603
Coconut oil soap unmolded after four hours