Long time readers know that I usually spend the month between Thanksgiving and Christmas making Christmas gifts. This year was different as having to deal with my dad’s affairs left me little time for crafting. I did, however find myself with about three days before Christmas to whip up a few things. Fortunately, the gift(s) I had planned for my daughters were a simple pattern that I had made a few times so I was familiar with the process.
Regular readers also know that I like to make practical/useful gifts. This year I decided to make reusable shopping bags. My husband and I started using these bags earlier in the year and like how sturdy they are. They can be packed full, and we can just grab the handle and carry the bag without having to worry about the bag ripping open. The biggest problem we have, and my daughters mentioned it too, is remembering to take them along when we go shopping. We are getting better about it. I suggested to my daughter that after they are unpacked, they should be left by the door (near your shoes or coat) so when you go out next time you will remember to take them along to the car.
I had some fun fabrics that I had purchased when I saw it on clearance for $0.99 per yard. One of those deals that I couldn’t pass up even though I had no plans for the fabric at that time.
Bag made with Dr Seuss fabric
Bag made with Snoopy fabric.
Bag made with Dr. Seuss fabric.
The bags doubled as gift wrap since I just put all the other gifts we had for the girls in their bag. No wrapping required.
Last week when my youngest daughter called me, she said that she had just got home from grocery shopping. I asked if she had used the bag I made her and she replied, “yes”. That made me happy! 😀
Yes – you can teach an old dog new tricks (but this one was easy).
I think it was more than a year ago that my sister asked me if I wanted to try the Diamond Dotz kit she had bought. She had started it but hadn’t worked on it for a while and didn’t know when or if she would have time for it again.
Until a few weeks ago it had been sitting in my craft room still in the box she sent it in. I hadn’t even looked at it to see what was involved. Suddenly I found myself without anything I wanted to crochet so I pulled out this project to work on in the evenings.
In this particular kit, which reminded me of a paint by number, the flower area was divided up into small circles each with a symbol inside indicating what color dot should be placed on that circle. There was a symbol key on the border of the picture. The flower area was also coated with some type of glue. The dots are made out of faceted resin and to apply them to the fabric I used a stylus that was included in the kit. First I dipped the tip of the stylus, that is slightly bigger than a ball point pen, into a wax. The wax helps the dot adhere to the stylus. Then I picked up a dot which fit perfectly on the end of the stylus and placed it on a circle that contained the matching symbol. The dot sticks to the glue on the fabric.
As my husband observed he first told me I was crazy (several times). Admittedly it was very small and intricate work, but I did not find it stressful. He eventually realized that I might find it therapeutic, which I did. Mostly I enjoyed the creative process, but I know the focus and fine motor coordination required is beneficial. I worked on it for one or two hours each evening for about two weeks. In the end my husband very much admired the finished project.
When it was finished I gave it to my sister. She loved it and plans on getting it framed.
I did enjoy this activity and would enjoy doing it again but only if I find a project that I really want to make for myself or someone else. I suspect it could be easy (for me) to get carried away and make a bunch of these and have nothing to do with them (LOL).
Hello and welcome. I thought I would share some of the craft projects I have completed in the last couple of months.
For Christmas I made cork boards as Christmas gifts for the girls.
My husband’s father used to own a wine shop where he sold wine making supplies. When he passed away my husband inherited a lot of the wine making supplies. For over a year we had large bags of corks stored in the barn that we had no idea what we would do with. When one of my daughters mentioned wanting a bulletin board, I had an idea. I used a top to a banker’s box for the frame and covered it with some scrap fabric that I had on hand. I ran some jute through the side of the box as a hanger. Then I hot glued the corks in. The picture above is one of three that I made.
I was very pleased with the way they turned out and the girls loved them.
I made this bear with some scrap fabric and a bag of stuffing I had. Since I used buttons for the eyes, she (my husband decided it was a girl bear) was made completely with things I had on hand. Her name is Melody.
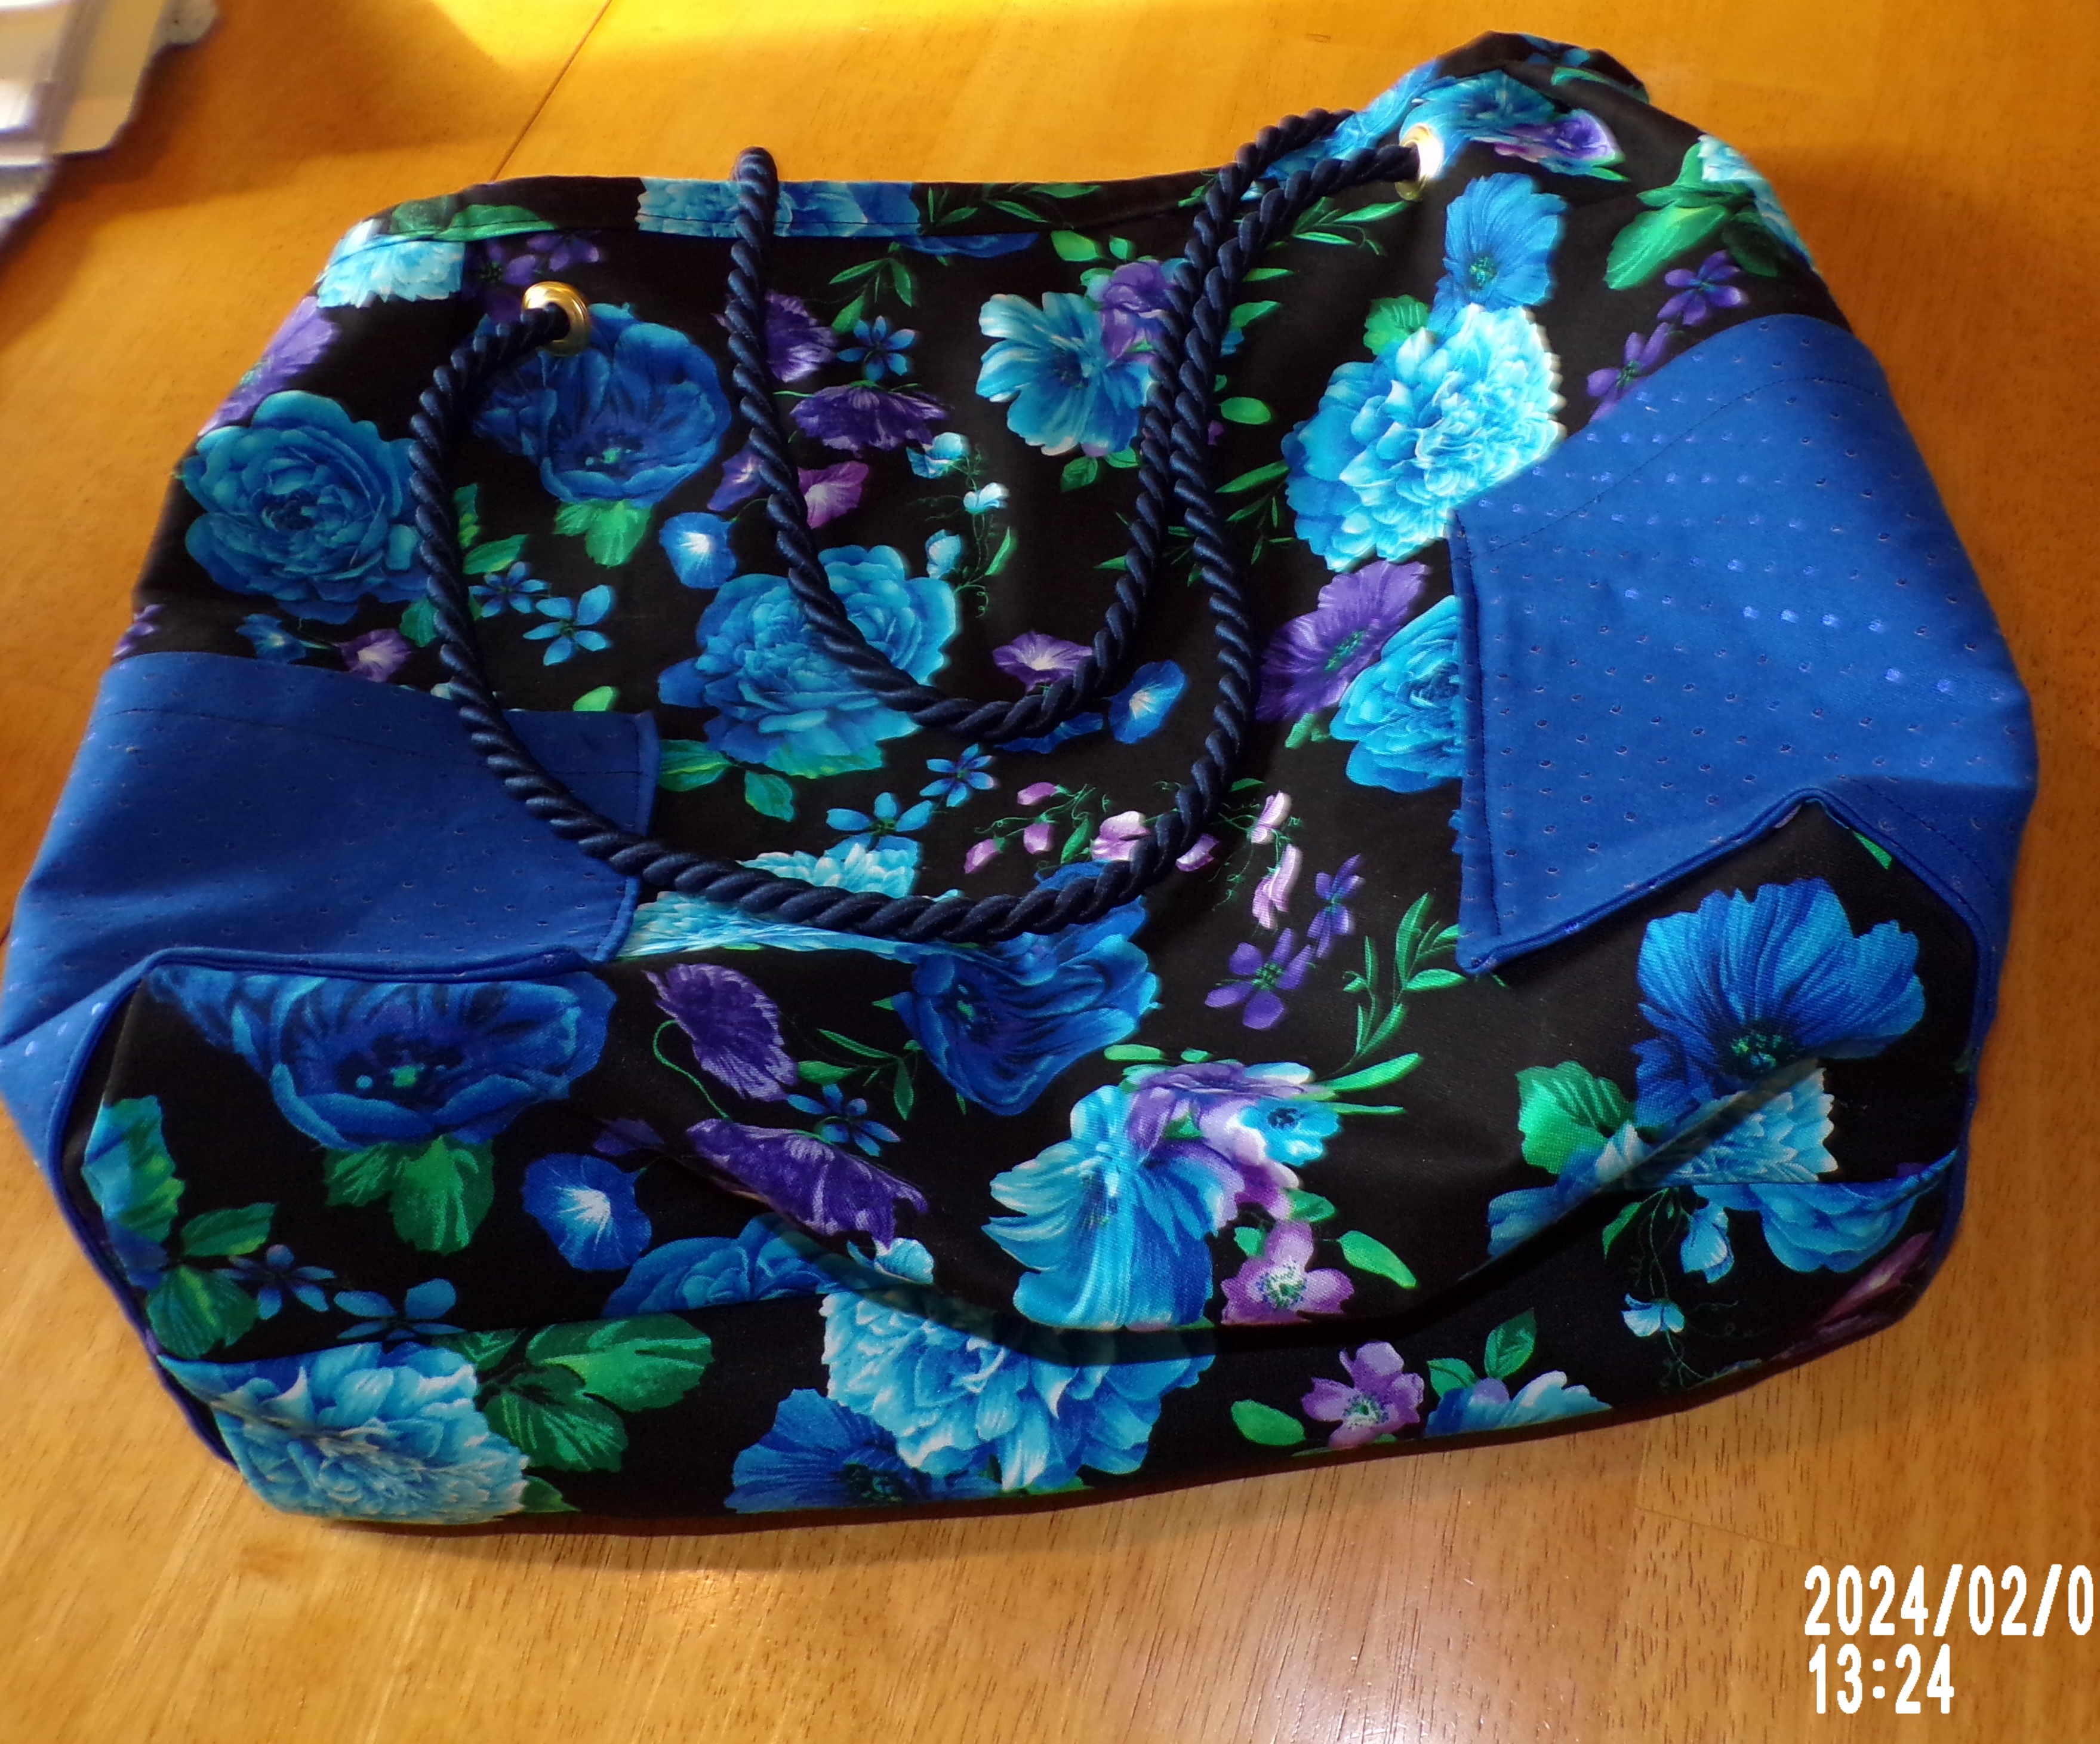
When I came across this free pattern/tutorial for a shopping bag/purse I decided to try my hand at making one. For this my sister and I made a trip to the fabric store and selected the fabrics. Selecting fabrics is at least half the fun, especially when you have a sister or two to shop with. 🙂 The inside of the bag is completely lined with the solid blue fabric and has pockets like the ones on the outside done in the flowered fabric. Thus, the bag is reversable.
This hoodie for my grandson, Jackson, is my most recent sewing project and I have just started one for his sister Addie. While hers will be made of different fabrics I am using the same pattern.
I have to say with each of these sewing projects I’ve learned something new.
The days are flying by and before we get too far into November, I wanted to take a quick look back at things that happened in October that I haven’t yet blogged about.
Crafting
I made a batch of soap in October, something I haven’t done in far too long. It won’t be ready to use for a couple of weeks yet.
I also did a little sewing. Granddaughter Addie’s birthday was this week (it’s hard to believe she is six years old) so I made her an outfit. The top is pictured below. I also made a pair of matching leggings. He birthday party is today and I’m excited to give her this gift. She always loves new clothes.
Over the summer and into the fall I had been working on some projects to donate to the humane society. I made 7 fleece blankets that they will use for the dogs that they care for.
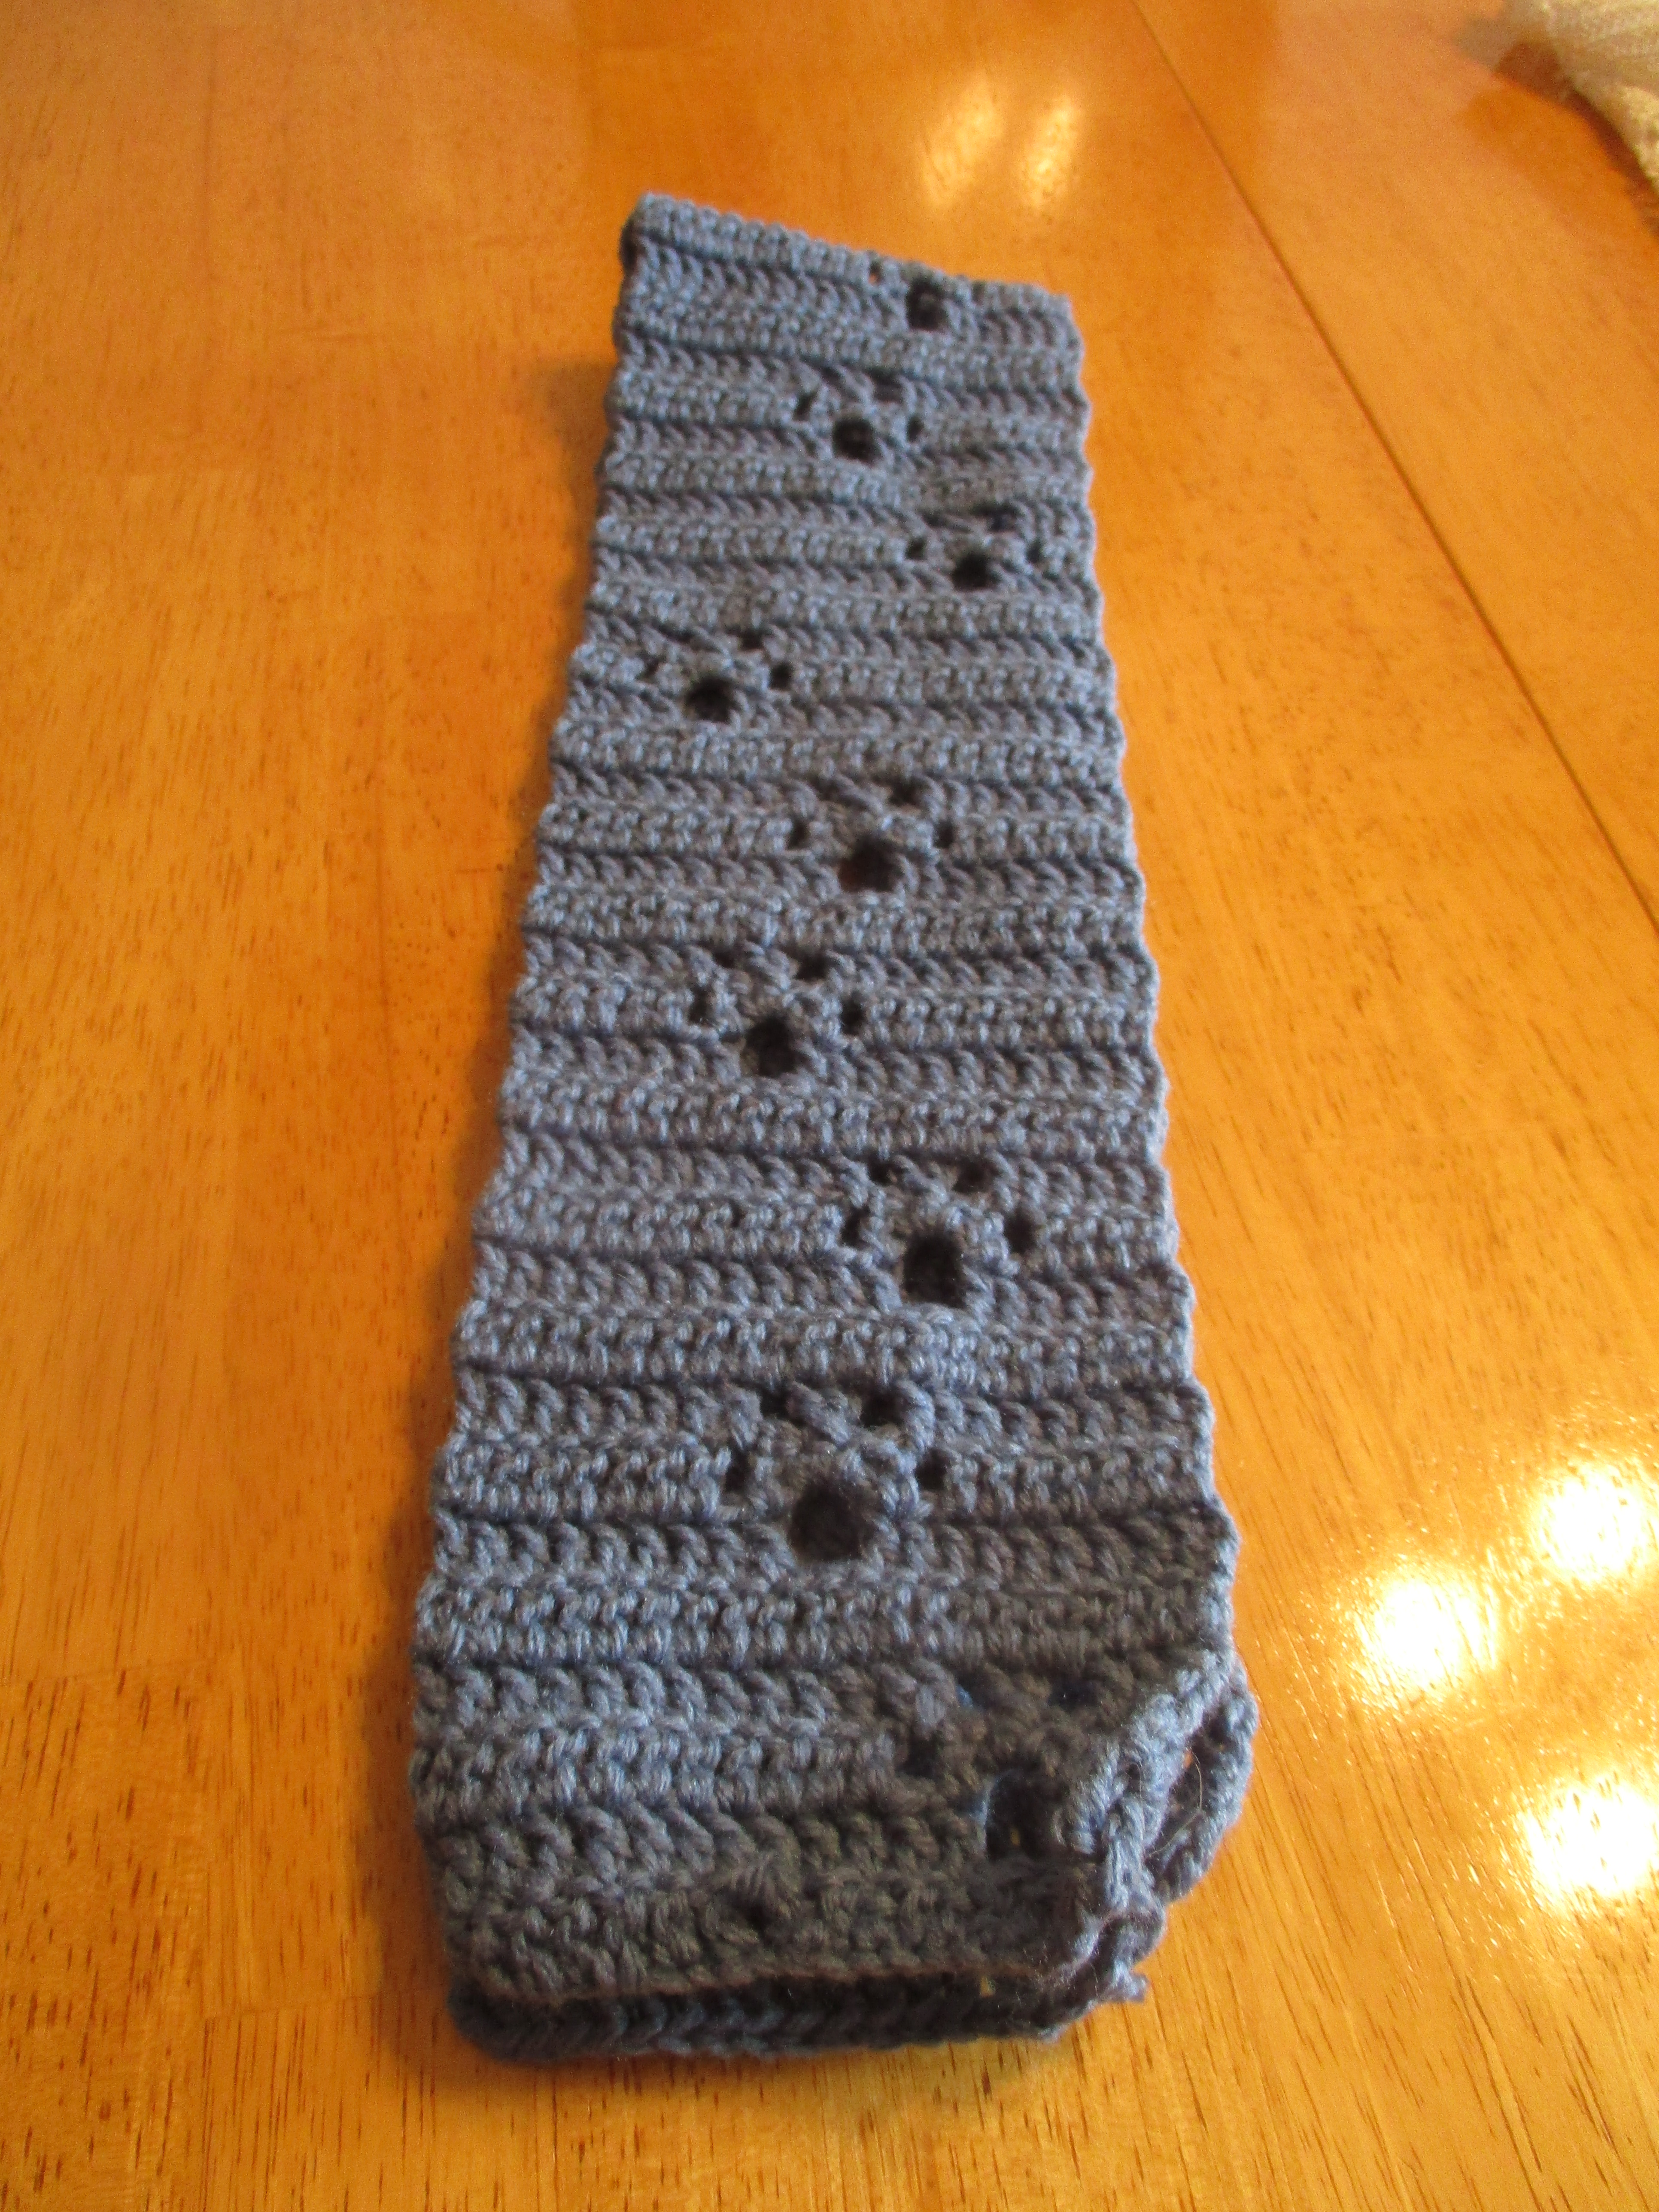
Puppy Paw Print Scarf
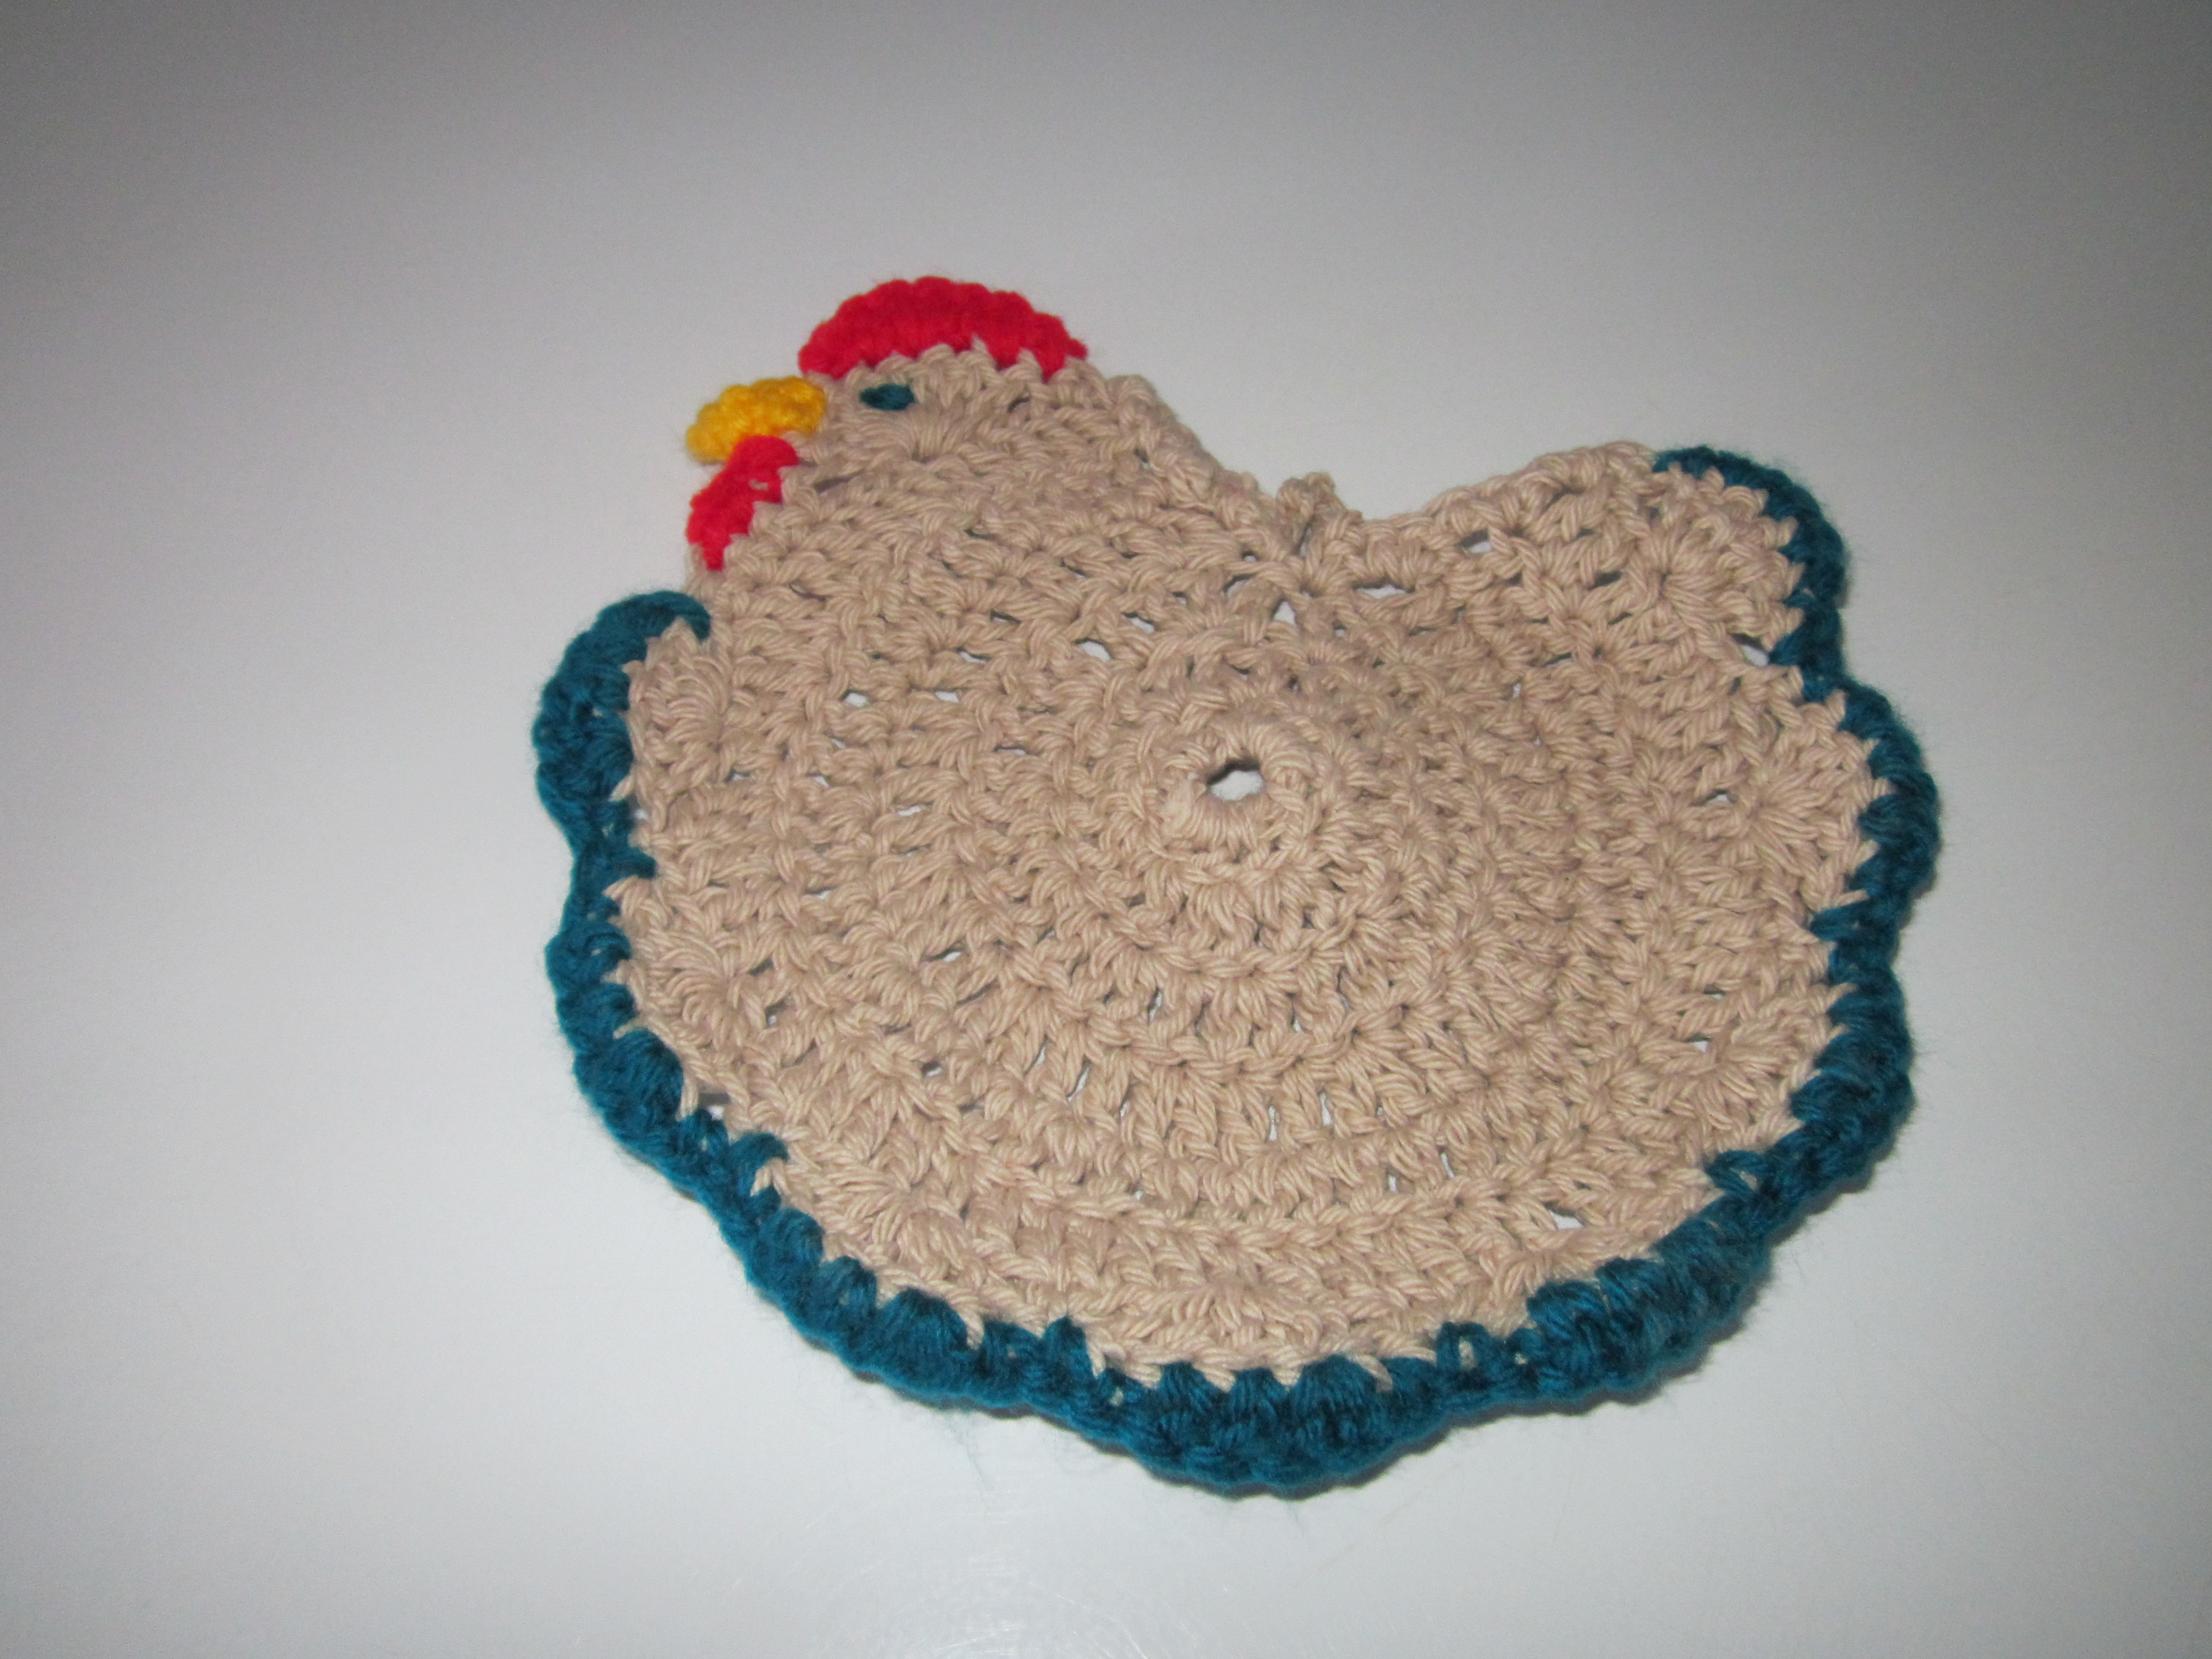
I also crocheted eight, puppy paw print scarves and three chicken potholders that I donated for them to sell at their annual Pawzarr, a fundraiser that they hold each year in December.
Chicken Potholder
I decided to deliver these items to the humane society on October 10, my late mother-in-law’s birthday. I chose that day because the humane society was mom’s favorite charity. I thought the donation was a nice way the memorialize mom. The staff at the humane society were very appreciative.
House Plans
Things are coming along with our house plans, not quickly, but building a house isn’t something that happens quickly. We did get the permit to install the septic system. Since the permit is good for three years, we shouldn’t have to worry about it expiring before we can build the house. We have a quote from the excavation company for building the septic system and digging the foundation and we are working with the builder to put together the house plan and get the figures of what it is all going to cost.
Recommended Reading
The first book on my recommended reading list this month is one I read earlier this year but I’m sharing it in honor of Veterans Day (November 11) the day which we in the USA honor our military veterans.
The book, No Surrender, is about World War II hero Roddie Edmonds and is written by his son Chris Edmonds years after Roddie’s death.
From Good Reads:
Spanning seven decades and linking a sprawling cast of heroes from every corner of the country, No Surrender is an unforgettable story of a father’s extraordinary acts of valor in the treacherous final days of World War II and a son’s journey to discover them.
Like most members of the Greatest Generation, Roddie Edmonds, a humble American soldier from East Tennessee, rarely spoke about his experiences during World War II. Not even his son Chris—who always considered his father a hero—knew the full details of Roddie’s capture at the Battle of the Bulge or his captivity at Stalag IXA, a Nazi POW camp. But when Chris’s daughter was assigned a family history project, Chris reread Roddie’s wartime diaries, which set in motion a series of life-changing events.
Called to learn his father’s story with a renewed sense of passion and purpose, Chris embarked on a years-long journey, interviewing surviving POWs under Roddie’s command, and retracing his father’s footsteps, from Fort Jackson, Georgia, where a boyish Roddie transformed into a seasoned leader of men, to the patch of grass near Zeigenhein, Germany, where he stared evil in the eye and dared a Nazi to shoot.
Chris Edmonds, along with New York Times bestselling author Douglas Century, takes us to the front lines of this inspiring multigenerational story, revealing in gripping, novelistic detail Roddie’s previously untold heroism—and the lasting effects his bravery had on the lives of thousands, then and now. “What was most remarkable about my journey to discover what my father did during the war,” Chris writes, “was the realization that any one of us has the untapped potential to do something incredibly courageous. We all have the potential to change the world simply by standing up for what’s right.”
A quintessential American story of bravery, compassion, and righteousness, No Surrender is a shining example of the transformative and redemptive power of moral courage and a celebration of faith, family, and service, the very characteristics that continue to define us today.
My second recommendation this month came about as a result of a recent conversation with my daughter. As she inquired about our family ancestry, I included that, although it is undocumented, my dad has always claimed that we were somehow related to the Donner Party.
“The Donner Party?” she asked, as if she was familiar with their story, and indeed she was. After our conversation I did an internet search and found the following website with the story of the Donner party, a group of American pioneers who migrated to California in a wagon train from the Midwest. Delayed by a multitude of mishaps, they spent the winter of 1846–1847 snowbound in the Sierra Nevada Mountain range. This account is written by Eliza P. Donner Houghton, the youngest Donner child and one of the few survivors of the trip. The entire story can be found at this link https://www.genealogytrails.com/ill/donner.html.
The Expedition of the Donner Party and its Tragic Fate
by Eliza P. Donner Houghton CREATED/PUBLISHED Chicago, A.C. McClurg & co., 1911.
SUMMARY Eliza Houghton (b. 1843) was the youngest child of George Donner, one of two Springfield, Illinois, brothers who organized the ill-fated California-bound emigrant party that bore their name. Eliza and her older sisters were rescued by relief parties that made their way to the stranded travelers at Donner Lake, but their parents perished, and the girls were left to make their way alone in the West. The expedition of the Donner party and its tragic fate (1911) begins with Mrs. Houghton’s account of her childhood and the family’s tragic overland journey, and rescue. She continues with her life as an orphan, first at Fort Sutter, and then with a family in Sonoma and with her older half-sister in Sacramento.
While this piece is not rated in stars, for anyone who enjoys learning about U.S. history I think it’s worth your time to read this first-hand account.
Hello and welcome! I hope you all had a nice Christmas. We did. It was a blessing that the storm that wreaked havoc across much of the country did not disrupt our Christmas plans.
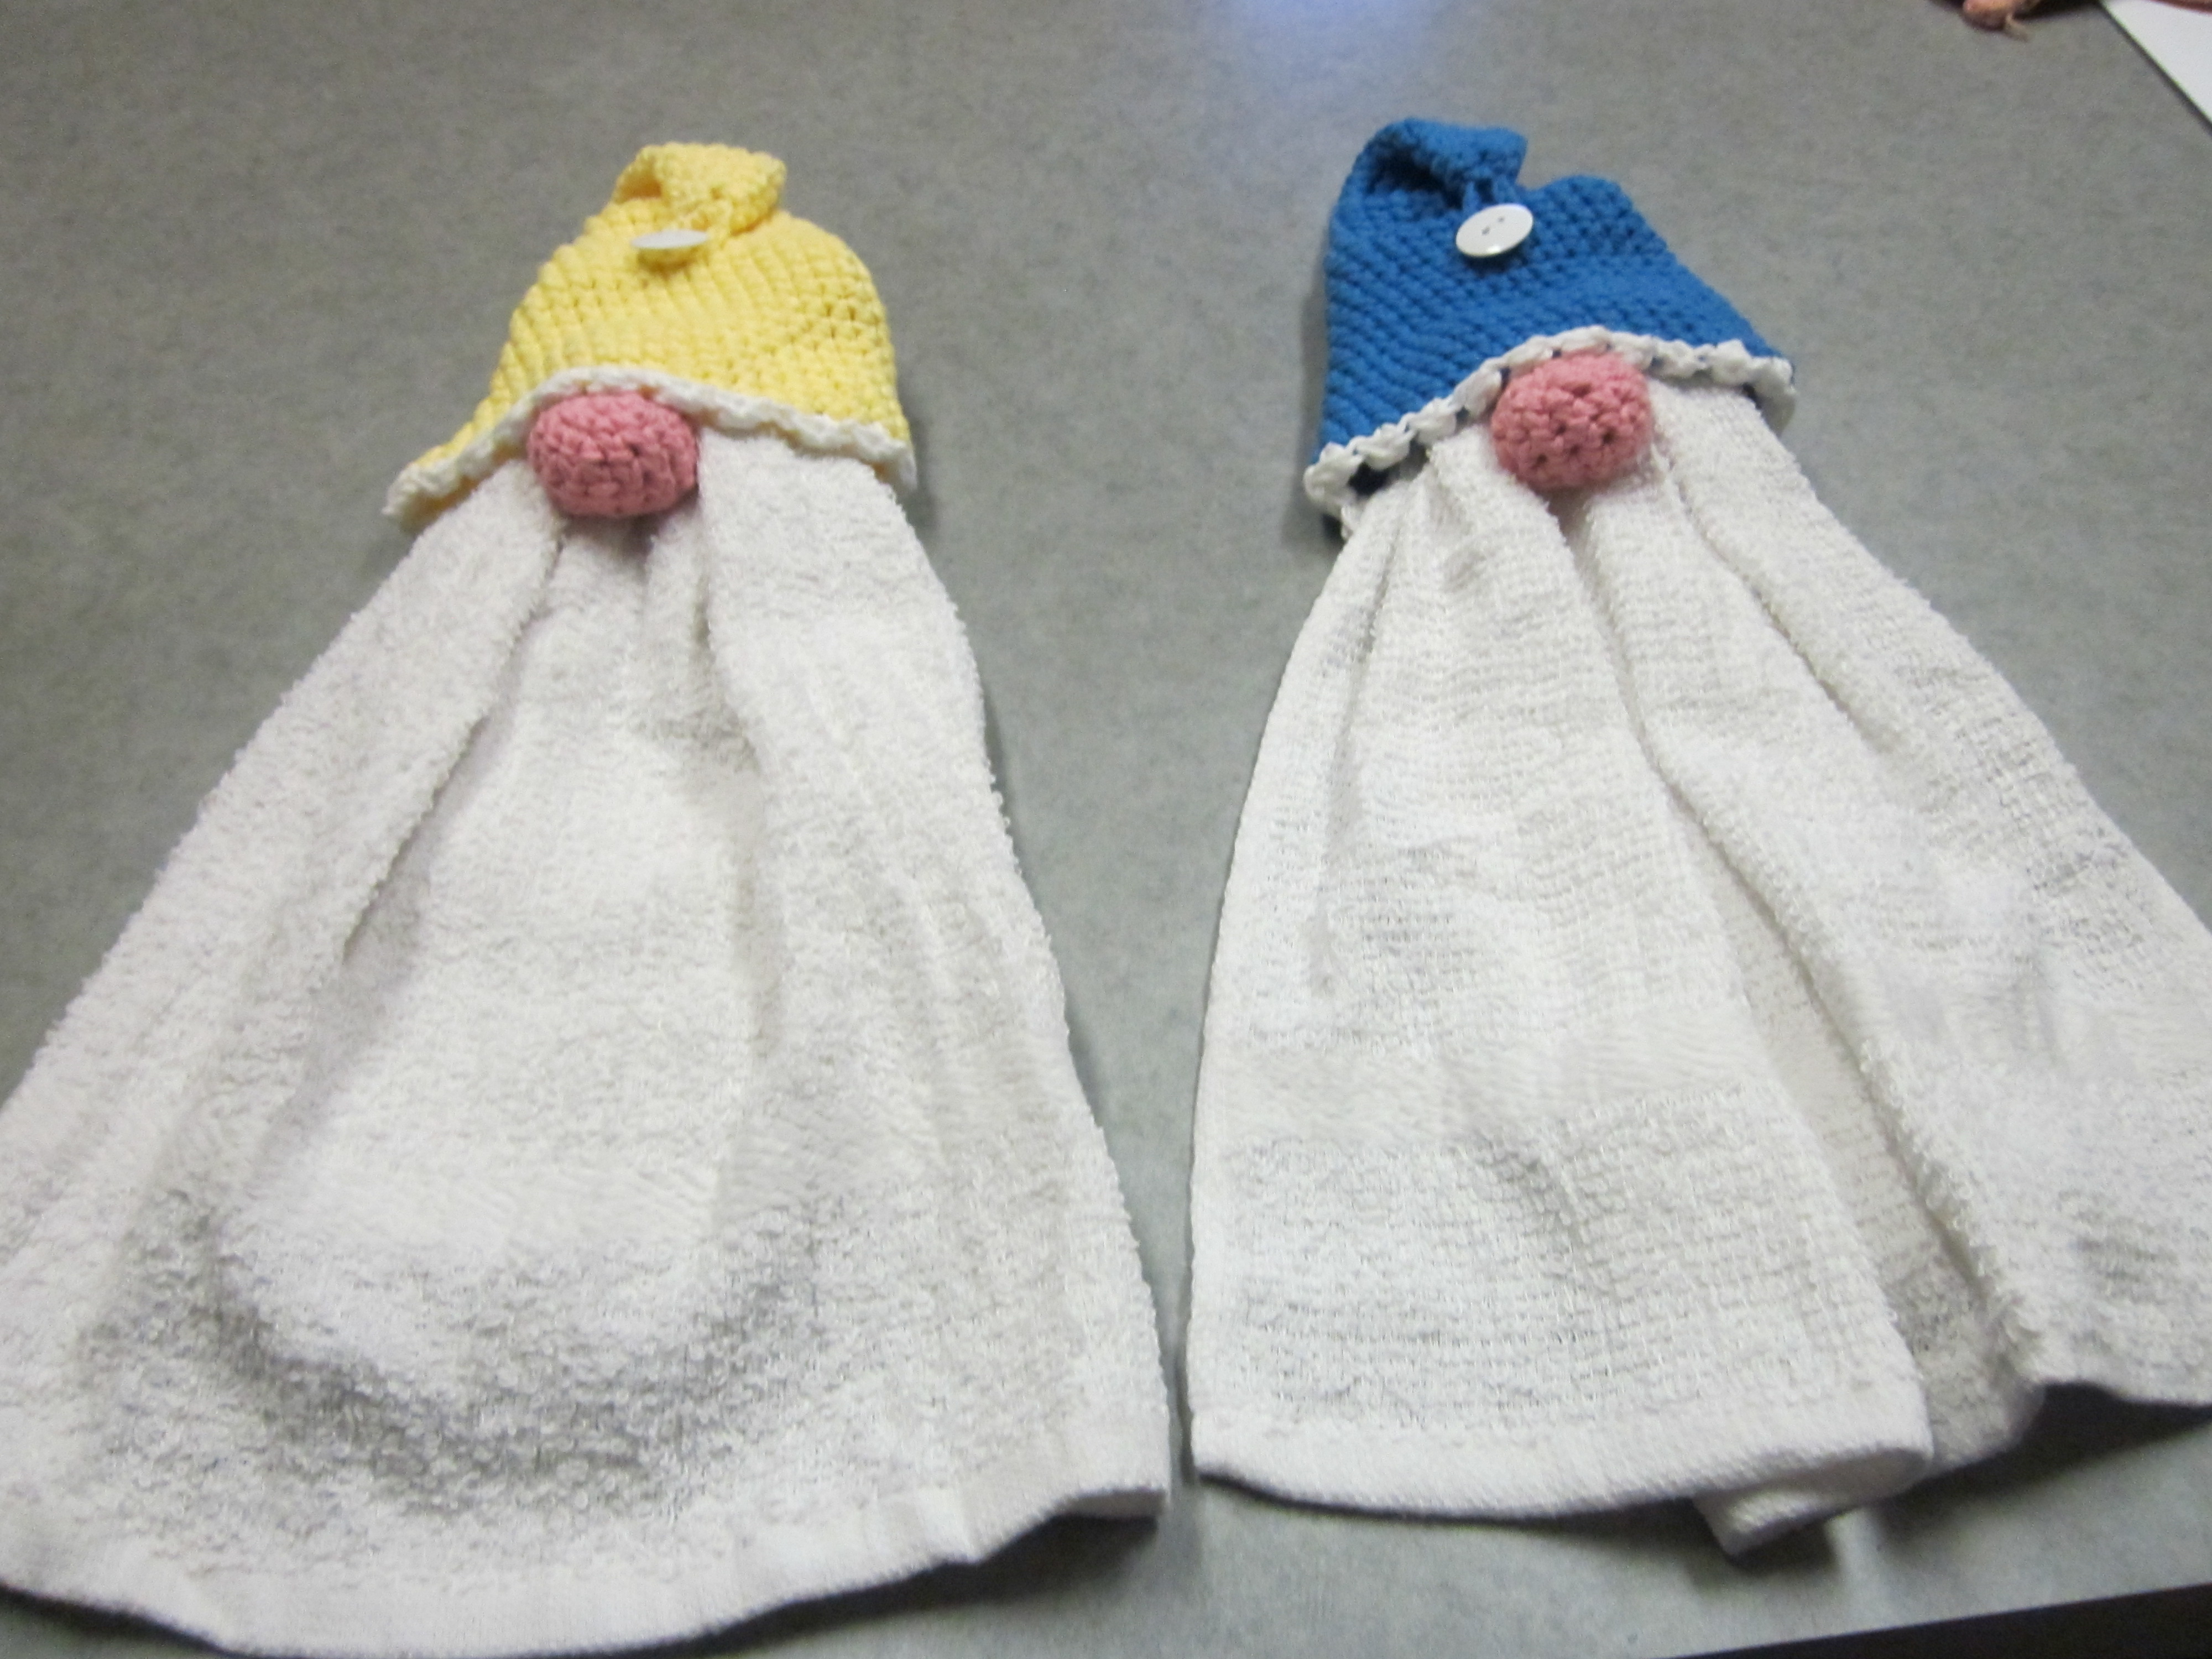
One of the gifts I made this year were these gnome towel toppers. The free crochet pattern can be found here. I made several of these as they worked up pretty quick and were budget friendly to make. I didn’t make them in red in green as the original pattern calls for because I wanted the recipients to use them throughout the year not just around Christmas time. I knew when I started making these that one of them would be for my next-door neighbor, Karen. Like me she is a cook and a crafter, and she and I like to exchange homemade gifts.
These gnome towel toppers have a ring crocheted inside them to hold the towel so the towel can be removed and washed. The gnome hat loops down and buttons so it can be hung, usually on the oven handle.
On the Tuesday before Christmas, I took Karens gift over to her. As I handed her the gift she said, “Oh, I have something for you,” then handed me a gift bag. We opened our gifts at the same time and then had a good laugh.
Karens gift to me were the two towels, with toppers, pictured below. The first one I saw was the Gnome for the Holidays one.
The strange thing is that she and I had never even spoke about Gnomes before, we just thought they would be a good gift each other.