Category Archives: garlic

A Year In Growing Garlic (Part VII)

IMG_2617

If you planted garlic last fall, as we did, by now you should be seeing vigorous green top growth. How vigorous can depend on many things. Variety of garlic you planted, clove size that was planted and soil conditions are all major factors. If You are not seeing vigorous green growth you will probably need to add some nitrogen fertilizer to give it a boost. It is recommended that nitrogen only be given up until the time that the bulbs start forming. This article explains that bulbs start forming around the time the ground temperature reaches around 60 degrees. http://greyduckgarlic.com/Southern_Garlic_Grower_Guide.html  Another article I read said that bulbs start forming around Memorial day. That article I’m assuming was referring to growing garlic in a cooler, northern climate like ours.

This time of year it is also important to make sure that garlic is getting enough water. This year our problem has been too much water, since we have had “April showers” in January, February, March, April and the first part of May. Although our garlic has shown signs of being stressed with some yellowing of the leaves, due to too much water, we are optimistic that we will have a decent crop.

It is recommended that garlic receive 1 inch of water a week during dry periods up until about two weeks before harvest. At this time we have no intention of watering the garlic anytime soon.

Keeping garlic weeded is the other chore that needs to be done from now until harvest. “Weed early, weed often” seems to be a garlic growers mantra as I seen it written in more then one article that I’ve read about growing garlic. Last week my husband and I spent several hours on two separate days weeding the garlic. Weeding garlic is something that needs to be done by hand, especially if it is planted with several rows close together, like our is.  At this point the weeds were still small and with the ground being wet the weeds came out easily. I believe this is the reason for the “weed early” advice. As bulb formation begins making sure the garlic weed free is even more important, as garlic that is crowded by weeds or roots of weeds will produce smaller bulbs. I do expect that we will be on our hands and knees weeding the garlic a couple more times before harvest. 🙂


A Year In Growing Garlic (Part V)

If you are new to reading my blog you may have missed these earlier posts, so check them out and catch up on our year in growing garlic.

https://donteatitsoap.com/2016/09/30/a-year-in-growing-garlic-part-i/

https://donteatitsoap.com/2016/10/13/a-year-in-growing-garlic-part-ii/

https://donteatitsoap.com/2016/10/18/a-year-in-growing-garlic-part-iii/

https://donteatitsoap.com/2017/01/28/a-year-in-growing-garlic-part-iv/

In my Part IV post that I wrote in January I expressed our great concerns about how well the garlic would grow in the wet conditions that we were having this past winter. The wet conditions continued pretty much throughout the winter, with only short freezing periods, and now into the spring. At this point we have learned that garlic is much more resilient that we believed it to be.

IMG_2407

The garlic is coming up beautifully and we are so thankful. Since it has all grown up through the straw, we will leave the straw in place to help with weed control. If the garlic had not grown through the straw we would be raking the straw away in hopes of revealing the garlic spouts.

As the ground dries and temperatures warm I expect to see vigorous green growth on the garlic. We will keep them weeded and watered as necessary and probably side dress it with nitrogen fertilizer in the spring to encourage the green growth. It is recommended that fertilizer not be given after May because at this point the bulb will be developing.


For Garlic Lovers

I am a bit afraid that things are getting somewhat confusing on my blog since I’ve recently written about soap and sap, but I still feel the need to add this post about a soup that I made recently. To be clear this is definitely a recipe to eat but I would not recommend bathing with it 🙂 .

The soup which I might call cream of potato with mushroom and garlic was loosely based on this recipe  http://allrecipes.com/recipe/13131/cream-of-garlic-soup/ . I’m really not sure how much you have to change a recipe before it can become your own, but I am fairly sure that the original recipe would be good as well. I didn’t precisely measure most of the ingredients so I’ll just share with you the changes that I made to this recipe.

I started with three medium size bulbs of garlic, I peeled each clove and minced it in the garlic press, this was at least 3/4 of a cup maybe more. I heated the olive oil in a pan and then added the minced garlic to the hot olive oil and turned off the heat. I had also peeled, cubed and boiled three good size potatoes. Instead of white wine (in the original recipe) I increased the amount of chicken broth to about 3 1/2 cups. I added the garlic/olive oil to the chicken broth. I drained and mashed the potatoes. I then began using a mixer to beat the potatoes and slowly adding the broth. If you decide to use the mixer like I did, instead of a blender that is recommended in the original recipe, it is important to add the broth slowly because at some point the mixture might become so thin that it begins to splatter. Take it from me, you really don’t want to find yourself washing it off the counter, walls,  your shirt and anywhere else it happens to land. When the mixture did get too thin to use the mixer I found that I was able to stir in the rest of the broth. I put this mixture on the stove over medium heat, stirred in about 3 cups of half and half and added about one teaspoon of salt.

While that was cooking I washed, sliced and sautéed about 12 ounces of fresh mushrooms. I then added them to the soup. I let this cook over low heat for about an hour, stirring every now and then to make sure it was not scorching.

As my title says this soup is for garlic lovers. It does have a very strong garlic flavor. Yumm!  I am not sure that I would like it as much without the mushrooms and it might even be better with cheese melted on top.

As garlic farmers we are interested in all things garlic, so I invite you to share how you like to use garlic. Do you use it medicinally? Do you have a favorite recipe? Please feel free to comment on this page.


A Year In Growing Garlic (Part III)

On Thursday as we continued to prepare for planting we made a couple of “executive” (meaning my husband and I agreed) decisions. The first one is that we will not plant Spanish Roja garlic this year. We decided this because this variety does not store well and thus does not meet the standards that we have set. It seems to start going bad within three months of harvest even when properly stored, while the other varieties will remain fresh for 5 or more months when properly stored.  The second decision we made is that the chickens would stay inside the chicken yard while we were planting.


While the chickens have a large penned area, most days we leave the gate open and they are free to roam our farm. We know all too well that when our chickens spot freshly tilled soil or straw piles it is a free-for-all, they scratch and peck and then nestle their whole bodies into the soil or straw without a care for what they may be destroying. So for the next few days, until we are done planting, and mulching with straw, and the straw hopefully gets rained on and matted down so it is less appealing to the chickens, we will keep the chickens in their pen, and save ourselves a lot of grief.

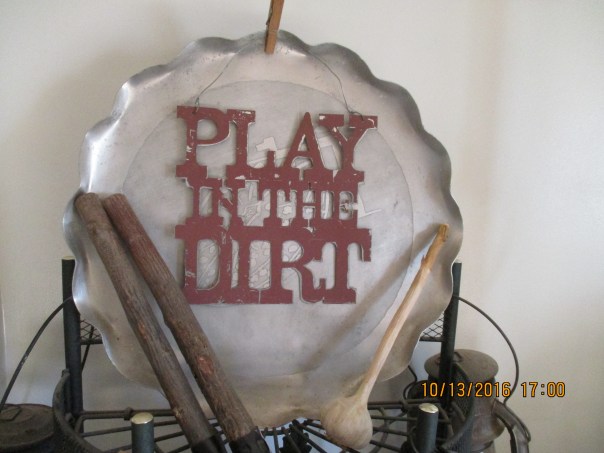
WARNING: If a garlic farmer ever asks you if you want to “get down and dirty”, participate in “grounding or earthing” https://draxe.com/earthing/ ,  or “play in the dirt”, they may be trying to recruit you to plant garlic :).

img_1945

Friday October 14th was, as I like to say when we are about to start a big project, “Game On”.

The job started with my husband tilling up the garlic bed in the morning. The soil was very loose, with no big clumps like we have dealt with in past years and very few rocks. What a blessing this was.

img_1946

He also set out the stakes and twine, that we would use to mark the rows, as well as our lattice planting grids.

img_1948 
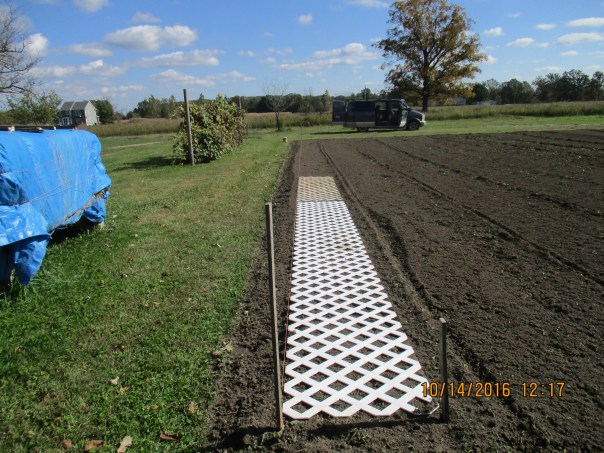
In past years we have used one 8×2 foot piece of lattice to make our four rows. We plant in the rows that had four spaces across this gives us 64 cloves in the ground and then we pick up the lattice and place it in the next (8×2 foot) space in the row. This year we purchased 2 more 8×2 foot pieces of lattice. We placed them end to end in the row and were able to plant 192 cloves before getting up to move the lattice. We found that each row would accommodate eight, 8 foot, lengths of lattice, so our 64 feet long rows contain 512 garlic plants.

img_1951

We each started out with a bucket full of garlic cloves, our planting stick which we use to make the hole that the clove is planted in, and a foam kneeling pad. Although the foam kneeling pads were comfortable, we abandoned them early on as the  soil was soft enough that the kneeling pads were not necessary. I suspect they also would have negated any positive effects we attained from grounding.

img_1969

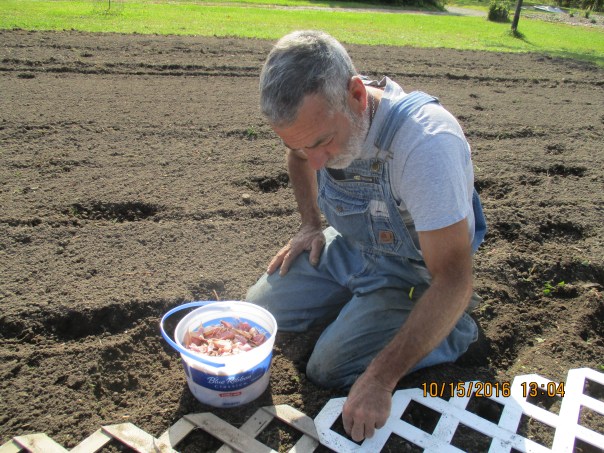
Using our planting sticks we poke a hole about 4 inches deep in the soil and then place a clove in the hole. The clove must be planted root side down/ pointy side up and this is the reason we are on our hand and knees in the dirt planting each clove with TLC. My husband eventually realized that the soil was loose enough, this year, that he could simply push the clove deep enough into the soil without using the stick to make a hole first.

img_1960

After each of the lattice sections were planted, while my husband moved them to the next section in the row, I cover each planted clove with soil. Since the soil was loose and not clumpy this was done by simple running the back of a garden rake over the area.

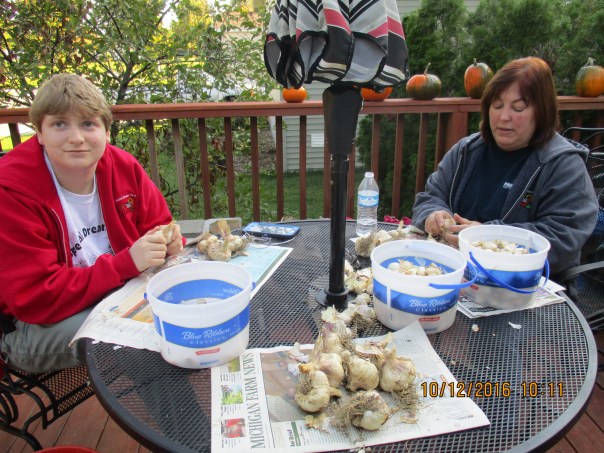
It took us an average of 45 minutes to plant one 64 foot row or 512 cloves of garlic. On Friday we planted Red Toch and S&H Silver and ended with 3 full rows and partial row planted. On Saturday we planted Music and Chesnok Red and at this point we have 7 1/2 rows or 3840 cloves planted. With the 20 lbs. of Chesnok Red that are arrived today, and will hopefully be planted tomorrow, we should end up with somewhere in the area of 5000 garlic planted this year.


img_1977

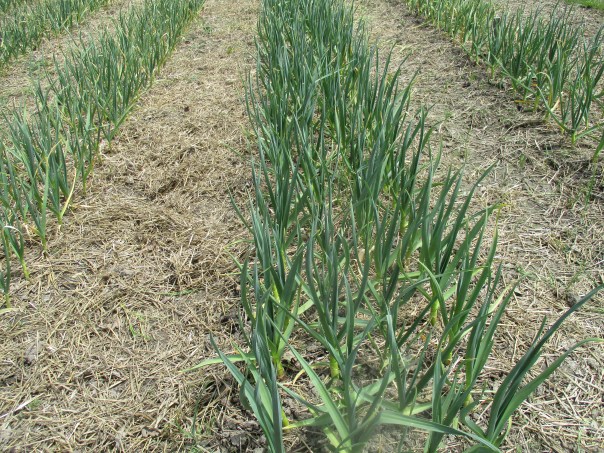
Once the planting was done on Saturday we mulched all of the rows with a thick layer of straw.  It took one bale of straw per row. Over the winter the mulch will insulate the ground and protect the cloves from extreme temperatures. The rain we got on Sunday weighed down the straw so it will not blow away. My husband also ran several rows of twine around the whole area close to the ground. This will keep the dogs out of the area and hopefully the chickens as well.

My husband and I agree that garlic planting this year has seemed easier than in any of the previous years. Continually amending the soil and some tweaks to our process are really paying off.

A Year In growing Garlic (Part II)

We have been closely watching the weather forecasts as garlic planting time approaches, and due to rain in the forecast for this coming Sunday and Monday, we have adjusted our planting schedule to begin this Friday, October 14 and get as much in the ground Friday and Saturday as possible.

Even though the seed garlic that I ordered this year isn’t scheduled to arrive until Monday, Wednesday was the perfect day to start preparing our seed garlic for planting. It was the perfect day not only because of the timing, but also because I had a couple of volunteers to help. My sister Jamie and cousin Abbey arrived shortly after 9:00 A.M. and since the weather was decent we decided to work outside. img_1942

Our task for the day was to divide the seed garlic bulbs into individual cloves. To do this we peel off the papery skin that binds the cloves together, but leave intact the last skin that covers each individual clove. We found in some cases that last skin would break off while we were breaking the cloves apart. Those cloves were set aside and I will try to use them in cooking before they get bad.

** Note – We have since learned that it is not necessary to keep the last layer of skin intact.

img_1944

This is not a hard job, but with large quantities can be very time consuming. It is a job that proves that “many hands make light work”. We probably actually worked for about 3 1/2 hours while we chatted and drank ice tea. We also took a time out for lunch. We split about 25 lbs. of bulbs and the time seemed to fly by. When they had to leave, Abbey said she liked the work we were doing today. Although I thanked them for all their help, I’m not certain that they understand how much help they really were. To put it in perspective, this task that we accomplished in a few short hours would have taken 3 times as long or been a full days work if I was doing it on my own.

Today my husband and I will finish splitting apart the approximately 25 lbs. of garlic that we have on hand so they are ready to be planted over the next two days.

If you are following along, and have decided to grow your own garlic, unless you are growing large amounts, you probably won’t need to recruit help for this task or plan it days in advance. It should be done as close to planting time as possible.