Category Archives: garlic

A Year In Growing Garlic (Part III)

On Thursday as we continued to prepare for planting we made a couple of “executive” (meaning my husband and I agreed) decisions. The first one is that we will not plant Spanish Roja garlic this year. We decided this because this variety does not store well and thus does not meet the standards that we have set. It seems to start going bad within three months of harvest even when properly stored, while the other varieties will remain fresh for 5 or more months when properly stored.  The second decision we made is that the chickens would stay inside the chicken yard while we were planting.


While the chickens have a large penned area, most days we leave the gate open and they are free to roam our farm. We know all too well that when our chickens spot freshly tilled soil or straw piles it is a free-for-all, they scratch and peck and then nestle their whole bodies into the soil or straw without a care for what they may be destroying. So for the next few days, until we are done planting, and mulching with straw, and the straw hopefully gets rained on and matted down so it is less appealing to the chickens, we will keep the chickens in their pen, and save ourselves a lot of grief.

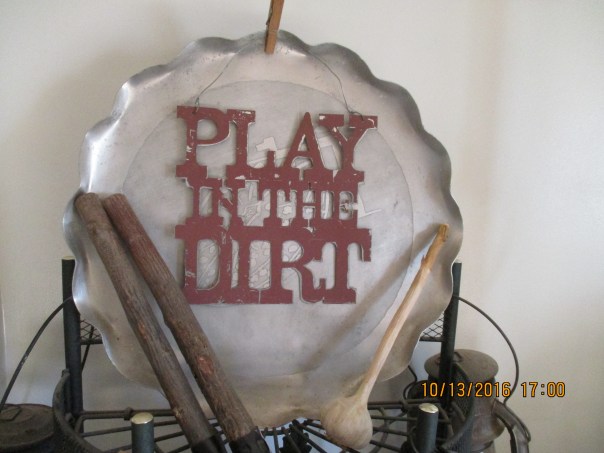
WARNING: If a garlic farmer ever asks you if you want to “get down and dirty”, participate in “grounding or earthing” https://draxe.com/earthing/ ,  or “play in the dirt”, they may be trying to recruit you to plant garlic :).
img_1945

Friday October 14th was, as I like to say when we are about to start a big project, “Game On”.

The job started with my husband tilling up the garlic bed in the morning. The soil was very loose, with no big clumps like we have dealt with in past years and very few rocks. What a blessing this was.

img_1946

He also set out the stakes and twine, that we would use to mark the rows, as well as our lattice planting grids.
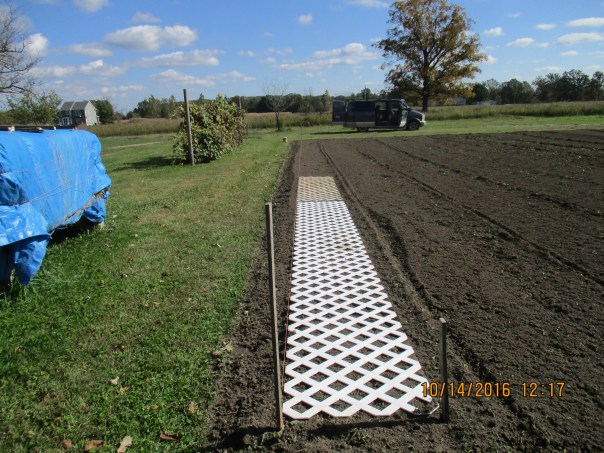
img_1948 In past years we have used one 8×2 foot piece of lattice to make our four rows. We plant in the rows that had four spaces across this gives us 64 cloves in the ground and then we pick up the lattice and place it in the next (8×2 foot) space in the row. This year we purchased 2 more 8×2 foot pieces of lattice. We placed them end to end in the row and were able to plant 192 cloves before getting up to move the lattice. We found that each row would accommodate eight, 8 foot, lengths of lattice, so our 64 feet long rows contain 512 garlic plants.

img_1951

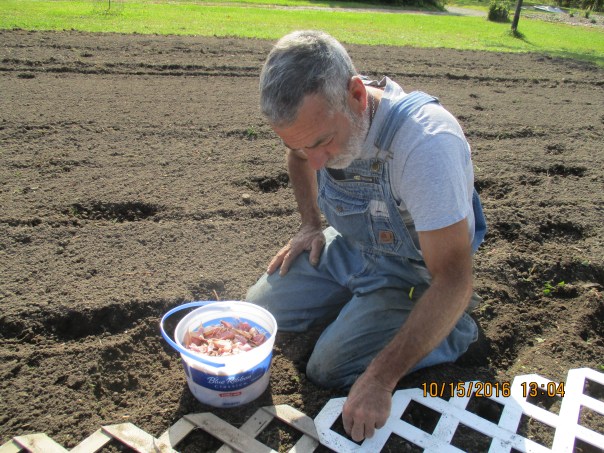
We each started out with a bucket full of garlic cloves, our planting stick which we use to make the hole that the clove is planted in, and a foam kneeling pad. Although the foam kneeling pads were comfortable, we abandoned them early on as the  soil was soft enough that the kneeling pads were not necessary. I suspect they also would have negated any positive effects we attained from grounding.
img_1969

Using our planting sticks we poke a hole about 4 inches deep in the soil and then place a clove in the hole. The clove must be planted root side down/ pointy side up and this is the reason we are on our hand and knees in the dirt planting each clove with TLC. My husband eventually realized that the soil was loose enough, this year, that he could simply push the clove deep enough into the soil without using the stick to make a hole first.

img_1960

After each of the lattice sections were planted, while my husband moved them to the next section in the row, I cover each planted clove with soil. Since the soil was loose and not clumpy this was done by simple running the back of a garden rake over the area.

It took us an average of 45 minutes to plant one 64 foot row or 512 cloves of garlic. On Friday we planted Red Toch and S&H Silver and ended with 3 full rows and partial row planted. On Saturday we planted Music and Chesnok Red and at this point we have 7 1/2 rows or 3840 cloves planted. With the 20 lbs. of Chesnok Red that are arrived today, and will hopefully be planted tomorrow, we should end up with somewhere in the area of 5000 garlic planted this year.


img_1977

Once the planting was done on Saturday we mulched all of the rows with a thick layer of straw.  It took one bale of straw per row. Over the winter the mulch will insulate the ground and protect the cloves from extreme temperatures. The rain we got on Sunday weighed down the straw so it will not blow away. My husband also ran several rows of twine around the whole area close to the ground. This will keep the dogs out of the area and hopefully the chickens as well.

My husband and I agree that garlic planting this year has seemed easier than in any of the previous years. Continually amending the soil and some tweaks to our process are really paying off.
A Year In growing Garlic (Part II)

We have been closely watching the weather forecasts as garlic planting time approaches, and due to rain in the forecast for this coming Sunday and Monday, we have adjusted our planting schedule to begin this Friday, October 14 and get as much in the ground Friday and Saturday as possible.

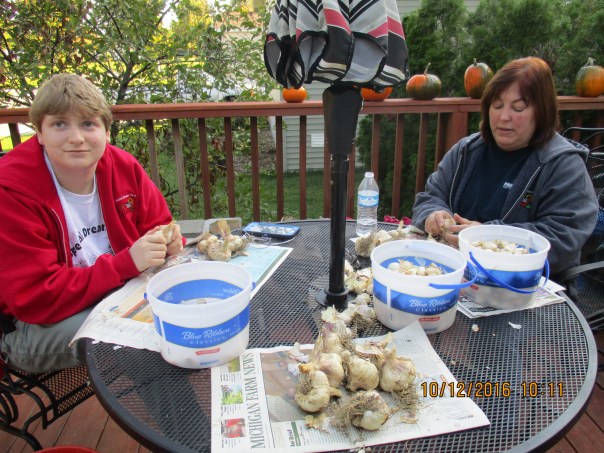
Even though the seed garlic that I ordered this year isn’t scheduled to arrive until Monday, Wednesday was the perfect day to start preparing our seed garlic for planting. It was the perfect day not only because of the timing, but also because I had a couple of volunteers to help. My sister Jamie and cousin Abbey arrived shortly after 9:00 A.M. and since the weather was decent we decided to work outside. img_1942

Our task for the day was to divide the seed garlic bulbs into individual cloves. To do this we peel off the papery skin that binds the cloves together, but leave intact the last skin that covers each individual clove. We found in some cases that last skin would break off while we were breaking the cloves apart. Those cloves were set aside and I will try to use them in cooking before they get bad.

** Note – We have since learned that it is not necessary to keep the last layer of skin intact.

img_1944

This is not a hard job, but with large quantities can be very time consuming. It is a job that proves that “many hands make light work”. We probably actually worked for about 3 1/2 hours while we chatted and drank ice tea. We also took a time out for lunch. We split about 25 lbs. of bulbs and the time seemed to fly by. When they had to leave, Abbey said she liked the work we were doing today. Although I thanked them for all their help, I’m not certain that they understand how much help they really were. To put it in perspective, this task that we accomplished in a few short hours would have taken 3 times as long or been a full days work if I was doing it on my own.

Today my husband and I will finish splitting apart the approximately 25 lbs. of garlic that we have on hand so they are ready to be planted over the next two days.

If you are following along, and have decided to grow your own garlic, unless you are growing large amounts, you probably won’t need to recruit help for this task or plan it days in advance. It should be done as close to planting time as possible.

A Year in Growing Garlic (Part I)

IMG_3897

Since I’ve recently had a lot of people ask me questions about growing garlic I thought I would take you through a year in garlic growing. Growing garlic is pretty much a year round cycle and we have already begun our preparations for next years crop. Preparations actually started while I was cleaning the crop that we harvested this year. As I clipped and cleaned each bulb after they had dried, I also selected and set aside the bulbs that will be used as seed for next years crop.

Seed garlic is usually the largest bulbs that we harvest but even smaller bulbs may make the cut if they have large cloves. When planted, larger cloves (assuming the right growing conditions) will produce larger bulbs. I saved around 50 pounds of garlic for seed but we have since decided that we wanted to increase our production even more so I ordered another 20 lbs. There are many online sources for seed garlic and I do order my seed from one of these. Finding a source of locally grown garlic for seed may be advantageous, however, since  garlic seems to take a couple of seasons to acclimate, and a garlic that is already used to your growing climate may perform better in the first season. Buying seed garlic can be costly, but considering you will save next years seed from the crop that you grow it should only need to be a one time purchase. I’ve seen prices anywhere from $17 to $25 a pound. At first glance you may you may think you have found a good deal but if you see seed garlic for $8 check the amount of garlic you are getting. It may only be 1/4 pound. I even saw one online source selling 2 bulbs for $9.

This is also the time of year that we prepare the ground for the garlic. The claim is that garlic will grow in any type of soil but will perform best in a well drained loam. Over the past few years we have found that garlic will indeed grow in soil that is heavy on the clay side but we have lost sections of garlic that were planted in low areas that did not drain well. So checking your drainage before planting is a good idea. We use this time between plantings to condition and nourish the soil.  Our ground was tilled in early August, shortly after this years crop was harvested. At this time the straw that was used for mulch and any weeds that had grown up were worked into the soil, adding organic matter that is needed to help loosen the soil. Other ways to condition the soil include planting a cover crop that can be cut before planting the garlic, adding compost to the soil, or adding rotted manure to the soil. In different years we have utilized these different methods. We also tend to the area by mowing any plants that come up, whether they are weeds or cover crop, before they go to seed. The mowed clippings remain on the ground as a green manure and the would be seeds do not mature to grow up in next years garlic bed.

It is recommended that garlic be planted about 6 weeks  before the ground freezes. This gives the roots time to begin to grow but the garlic should not sprout above ground. Our target date for planting  this year is October 15th or 16th but we will be watching the weather forecasts as we approach those dates and may have to modify our plans if much rain is in the forecast. During last winter with warm temperatures and continual freeze and thaw cycles the garlic did sprout and the leaves suffered some freeze damage. I had great concerns about how this would effect the crop. What we discover upon harvesting was that while the hardneck varieties that are normally grown in northern climates such as ours produced decent size bulbs, the softneck varieties which are normally grown in warmer climates produced larger bulbs.

If you too are going to grow garlic this year, follow along.  I plan on writing posts on each step along the way, so we can do this together. Please feel free to ask questions and share your experiences.


Buying Our Garlic

We are pleased, we are excited, and we are thrilled to announce that you can now purchase our Michigan grown garlic at Nino Salvaggio’s  Saint Clair Shores, Michigan location and Vince and Joes locations in Shelby Township, Michigan and Clinton Township, Michigan. It is also available at Water To Go in Richmond, Michigan and Pure Michigan Country Market on 10th Street in Port Huron, Michigan.

Nino Salvaggio’s is selling our S&H Silver and Red Toch varieties, while Vince and Joe’s is selling Chesnok Red and Music Garlic. Water to go carries Chesnok Red, S&H Silver and Red Toch, and Pure Michigan carries Chesnok Red, S&H Silver, Red Toch, Music and Spanish Roja.

We would like to send out a big thank you to all of these retailers for helping us get our garlic in the hands of those who love it. If you shop at one of these retailers you, too, might want to let them know that you appreciate their efforts to support local farmers while making quality products available to the customers.

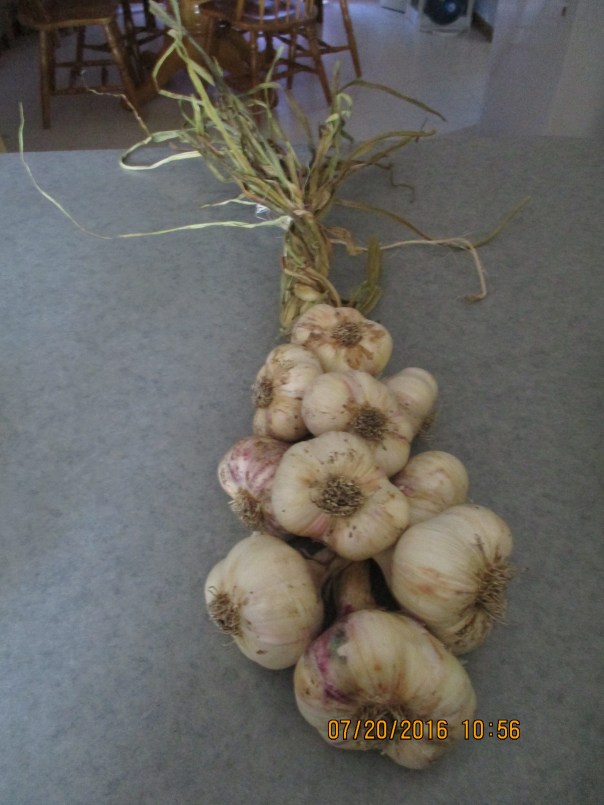
Garlic Braids

IMG_1631

I have decided to make some of the Red Toch garlic into braids. I can do the same with S&H Silver when it is ready. I have made a few with 10 bulbs but can do them in different sizes. If you are interested in a garlic braid send me an email at ruth20012001@yahoo.com (put “Garlic” in the subject line) and let me know what size and variety you would like and we can figure out how best for you to get it.