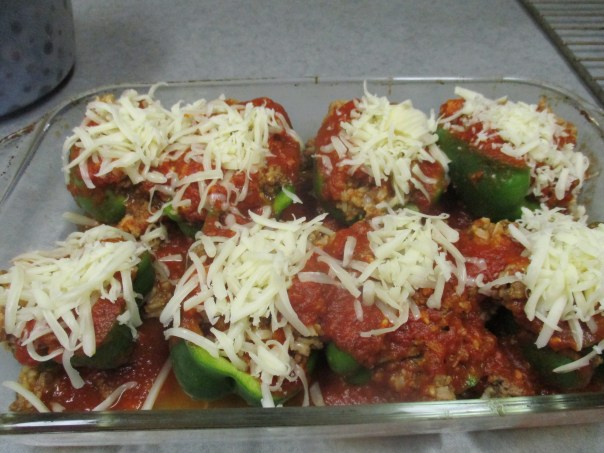
Two weeks ago I used up our last jar of homemade spaghetti sauce, so I ran to the store and… No just kidding. That would be funny to my children who know that homemade/ homegrown spaghetti sauce is my specialty, and we eat lots of it. Even now that it is just my husband and me at home we average using one to two quarts a week. Not only do we use this sauce for spaghetti (we use the term loosely to describe any pasta, i.e. rigatoni, mostaccioli, rotini, topped with spaghetti sauce ) we also use it if we make lasagna, ravioli, stuffed cabbage or stuffed peppers.
Stuffed Peppers
Each year we grow lots of paste tomatoes, most of which I make into sauce, we also grow the oregano, basil, parsley and of course garlic, that I use in the spaghetti sauce. Since making tomato sauce is very time consuming, and when the tomatoes are ripe I find myself with more tomatoes than time (to make them into sauce), the last two years I have resorted to quicker methods of preserving tomatoes. I have frozen tomatoes and canned tomato juice, because I can always make those in to sauce later. Once I even dehydrated tomatoes because I couldn’t let them go to waste and slicing them up for the dehydrator was the quickest thing I could think of.
My plan for making sauce last week was to cook down tomato juice. I figured I would probably have to cook down 5 quarts of tomato juice to make the enough sauce (about 2 quarts) and it would take most of the day. In the morning before I started I came across this post about dehydrated tomatoes on one of the blogs I follow http://selfrelianceadventures.com/dehydrated-tomato-chips/ and was reminded that I had dried some tomatoes last summer and they were just sitting in my pantry waiting for me to think of something to use them for. I then had an idea.
Maybe I could use the dehydrated tomatoes to thicken the tomato juice. Now when I dehydrated the tomatoes they still had the skins on and the seeds in them and I really didn’t want chunks of tomato with skins and seed in my sauce so I would have to experiment. I took out a handful, about 10 or so, dried tomato slices and put them in my Nutri Bullet blender. I then added about half a quart of tomato juice. I plugged it in and let it run for a minute or so. When I poured this combination into my sauce pan it was a thick sauce – no chunks, no seeds, no skins. SUCCESS! I then added 2 1/2 more quarts of tomato juice and let it simmer for a couple hours before adding the rest of my ingredients.
This worked so well I’m sure I will repeat this process and use the rest of my dried tomatoes in the next few weeks. It wouldn’t really be necessary to add tomato juice to the dried tomatoes – water would work just fine, and in the correct proportions, though I’m not sure what they are right now, cooking the liquid off would not be necessary.
I am so thrilled that I have discovered this method of making sauce. I decided to share it with you in hopes that someone who reads this might find it helpful just as I did with the above post from Self Reliant Adventures.
Oh, and I suspect I will be dehydrating lots more tomatoes this summer. 🙂
I can’t tell you how hard it was not to add “Oh my” to the end of the title, and if you added it in your mind then I am certain that you, too, grew up in the age of “The Wizard of Oz” . Of course now days I suppose I could put “OM” at least 90% of you would know what it meant. LOL
All that is beside the point. I really just wanted to show you the crochet projects that I have recently completed. After putting so much time into crocheting the tablecloth last year, I have found that it has become a habit each time I sit down in my recliner to reach for a crochet project.
These slippers are some of my favorites. My husband and I each have a pair to wear around the house in the winter and I always like to have an extra pair or two made up, just in case.
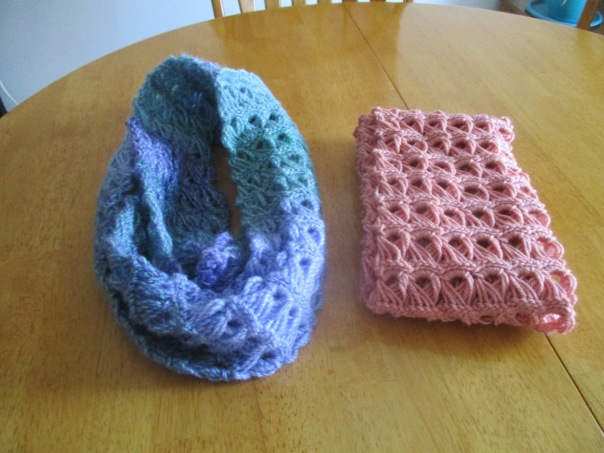
These two infinity scarves are done in a “broomstick lace” stitch. I love the way it looks and it is also a fun stitch to work.
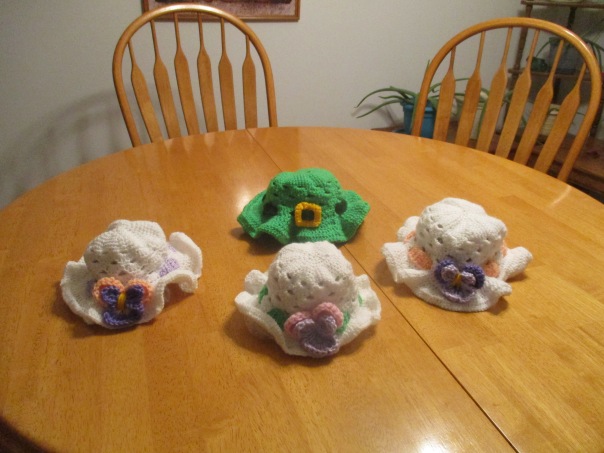
I’m planning on taking these Easter or Spring hats to a spring craft sale to see if I can sell them, except the green one since my sister told me that her Granddaughter, Ava, (my great niece) “needs” this one.
Now, ♫ I’m off the see my crochet hook ♪ ♪ (to the tune of The Wonderful Wizard of OZ)
I have been tempted to write about this project several times over the past few months but I wanted to wait until it was finished. It all started back in February 2017 when I received a phone call from my sister, K.C.. She told me that she had been talking to a friend, I’ll call her G, and G told her that she wanted to find someone to make her a crocheted tablecloth. K.C. had told G that I crochet. She wasn’t sure that I would/could crochet a tablecloth or if I would have the time since Spring was just around the corner. “I gave G your phone number, she will be calling you,” K.C. told me.
Well that was something to think about. My past crochet projects have pretty much been done with some of the basic stitches and are small projects that can be completed in a few days to few weeks, slippers, washcloths, hats, baby afghans and such, although lately I had been trying new things, learning new stitches and increasing my skills. I have always admired crocheted doilies and have several that were made by my mother and my husbands grandmother. They are made with fine crochet cotton and delicate yet complex stitch combinations to create a beautiful motif. Never had I considered making one. Crocheting a tablecloth would be like crocheting a doily only much bigger. I wondered if I could do this.
I didn’t have long to think about it because the next day G called me. She told me she wanted a table cloth, her table was round and measured 48 inches across, she didn’t have a pattern. She was a knitter but when she tried to knit one she discovered that it was more complicated than she thought. I explained that I had never done anything like that before, but I was willing to try. I really didn’t know how long it would take or how much time I could put into it because things get busy on the farm in spring and summer. She said there was no hurry, so we agreed to both look for a pattern that she liked and would fit her table. After a week or so of searching online for crochet tablecloth patterns and emailing back and forth we decided on this pineapple pattern. She was a bit concerned because she wanted the tablecloth to measure 48 inches while this pattern made a 54 inch tablecloth. I told her that I could adjust the pattern to fit by leaving out some of the rows on the edging. That should be easy enough … I thought.
My next step was to obtain the materials I needed. I have all of my Mom’s old crochet hooks so I was certain that I had the right size hook but when I checked the pattern for the type of thread used I discovered that J.P. Coats Luster Sheen is no longer made. Although I searched I couldn’t really find any answers as to what would be comparable and I had no idea how much was in one ball. So I was own my own to decide what to use and prayerfully guestimate how much I would need.
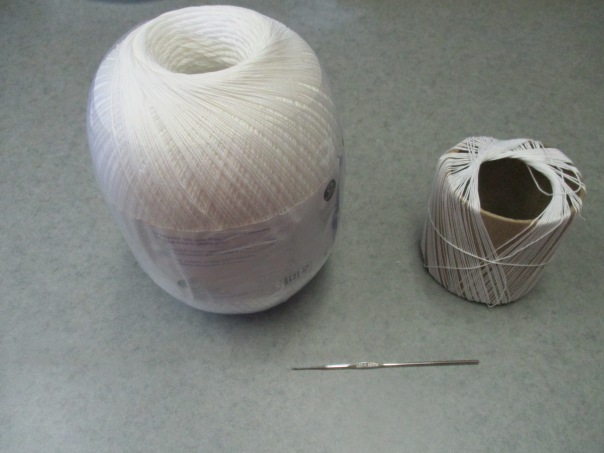
This is the size of the spool I started with compared to how much was left when I finished and the crochet hook I used.
I selected this large roll of Aunt Lydia’s size 10 merchandized cotton. While I was certain that this was a finer thread than what the pattern called for, I liked the length that it was available in (2730 YD/2495 M). Longer thread meant less joins in the tablecloth and with something this thin joins would be difficult to conceal. Since the thread was finer than what was called for I also went with a smaller hook 1.25mm. Yes, believe it or not, there is a hook on the end of that little metal stick.
It was sometime in early March before I actually sat down and got started. In the beginning rounds I struggled to get the stitches tight and even, I crocheted 6 or 8 rounds then ripped it out and started over. I did this several times. Eventually I moved on. I also struggled a lot in the beginning with my eyesight. I was not used to focusing on anything so small, and in reality throughout the whole process I rarely saw the actual hook. It was more of getting a feel for it and realizing that if I didn’t pick up the string on the hook, I was holding the hook backwards and needed to turn it around and try again.
Progress By May 9
With relatively few exceptions, I worked on this project for an hour or two each day usually in the evening but some days I would work on it for an hour or so after lunch as well. It was shortly after I had started it that our power was out for a couple of days, and I wasn’t able to work on the tablecloth at all because even in the daylight hours I needed supplemental light to work on this project.
There was, what I consider, another major flaw in this pattern. Most crochet patterns that I have used have a stitch count at the end of each row. When a row is complete it is prudent to stop crocheting and count all of the stitches in the row that was just finished. This way the one knows they are on track and won’t discover after completing the next row, or two, or three, that they have made a mistake. As you can imagine it is much easier to go back only into that row to correct errors than to take out and redo two or more rows. This pattern did not have stitch counts listed and there were several times throughout the process that I would come to a point and find that my previous row was wrong, thus I would have to pull out all of the work I had done after making the error in order to correct my mistake. The worst time was when I discovered the error was three rows back. I wanted to cry, but working with wet crochet cotton would only make things more difficult. I truly learned to the importance of stitch counts being listed on the patterns.
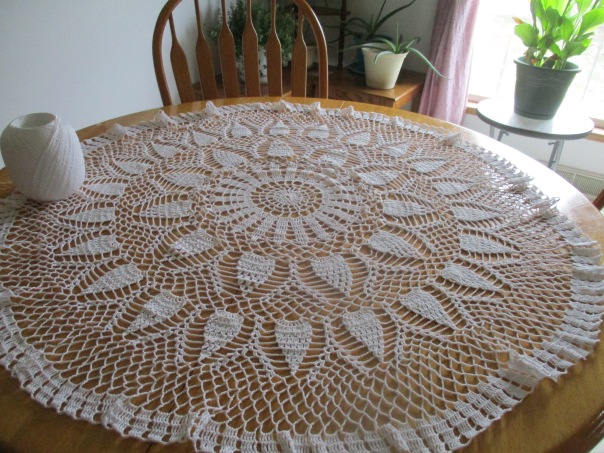
As the tablecloth grew my husband determined that it looked like a spider web. He began calling me Charlotte in reference to the book Charlotte’s Web. Each evening, when he would see me crocheting, he would ask “How’s your web coming Charlotte?” My reply “good” or “slow” or “it’s coming” was usually accompanied by a chuckle and sometimes I would hold up the tablecloth to show him my progress.
I was lucky that my own dinning room table was the same size as the table I was making this for, so occasionally I would place it on my table for a fitting. I would usually snap a photo and email it to G to show her how it was progressing. She was patiently waiting and at one time I told her if she decided to find something else I would certainly understand. By this time I had decided if for any reason she didn’t want it I would be happy to keep it for myself. G assured me that she wanted this tablecloth and would be happy to wait as long as it took.
After completing the second round of pineapple’s I put the tablecloth on my table and it was obvious that I would need to add some rounds (that were not in the pattern) in order to make the tablecloth big enough. My initial thought was to add another round of pineapples, but after studying the pattern I could not figure it out. Rather than give myself a major headache and perhaps end up in tears over it I decided that I could add as many rounds of loops as needed to the area outside of the pineapples. I did end up adding several rows of loops.
October 24
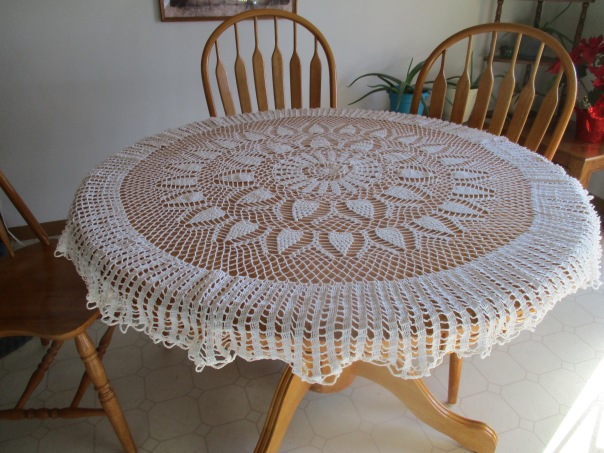
I also ended up adding several rows of border. I was concerned that it would look weird that the border did not line up with the edge of the table, but I actually like the way it turned out. I could have continued adding border rows so it would be longer but this the size that G wanted. Although I was enjoying making it, I also really wanted to finish it. The larger it got the longer it took to complete a round. With the boarder rounds it was taking me three evenings of crocheting to complete one round.
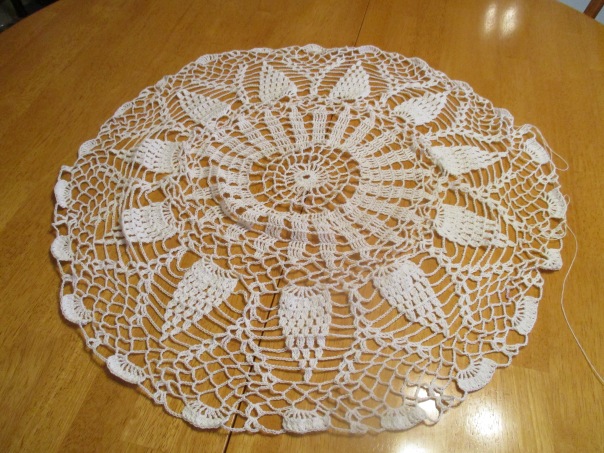
Finished December 23, 2017
On December 23 shortly after 2:00 P.M. I crocheted the final stitch and wove in the ends. I was elated. I really I don’t know if I can tell you how good it felt to have this project completed. After putting it on my table and taking some pictures and showing my husband, who was more than impressed, I called G. She wasn’t home at the time and I had to wait until the following day to deliver it. She was very pleased with the results as well.
After it was all done I couldn’t help but do some calculating. I had 20 yards of thread left on the spool so I had used 2710 yards. Using an online conversion site I learned that 2710 yard = 1.539773 or just over 1.5 miles or for those outside of the U.S. 2.478024 Kilometers. Which doesn’t seem far when you are driving or even walking but it becomes a heck of a long way when you are getting there 1.25 mm at a time. While I didn’t punch a time clock my estimated time based on 2 an average of two hours a day for 10 months is 600 hours. Even subtracting an approximated 30 days that I didn’t work on it I would have well over 500 hundred hours into it.
I have to say that it was a great learning experience, and I am so pleased that I took on and successfully completed this challenge. Then the question arises – will I do another one? I learned a long time ago never to say never, but I have no plans to make another one anytime soon. I do feel, however, that finishing this tablecloth before the end of 2017 has prepared me to take on the challenges of 2018.
I wish all of you reading this a Happy, Healthy and Prosperous New Year. God Bless!
As I mentioned in my Pre-Christmas post I had many projects in the works, so today I’m going to tell you about the Christmas gifts I made for my family this year.
My first thoughts were about what to give to my grandbabies Jackson who is 18 months and Adeline who is about 6 weeks. A few weeks ago I had asked my daughter what they needed for the baby. The one thing she mentioned that they didn’t have was a car seat canopy or tent. I’m not sure how much of a need this is because they were making do with a blanket thrown over the handle of the car seat to cover the baby when she was out in the cold. The design of the car seat canopy that attached to the handle would certainly be more convenient. So I decided to make one.
Crochet is usually my medium of choice but since my crochet time was being taken up by another major project that I was working on (I will write about it soon) there just wasn’t time to crochet anything more. While sewing is not something I am really skilled at, every once in a while I get out my sewing machine and pretend that I know what I am doing. This project would be my “once in a while” for the year.
I searched the internet for car seat canopy ideas and tutorials and found many. Then I combined some of the ideas I found and came up with my own design. One thing I have learned from my sister, who is very talented at sewing, is that flannel and fleece are “very forgiving” fabrics to work with. I am thankful for this because if there is a “sewing sin” I will undoubtedly commit it. I selected flannel for this project.
I decided to make it a patchwork blanket, but since I knew that finishing the edges would be a nightmare for me, I decided to use the rag blanket technique. Rather than having finished seams, I could sew the edges together then clip the edges so they would become frayed and fluff up after washing.
I selected four flannel fabrics, placing priority on finding one with a lady bug design. I wanted lady bugs because “Lady Bug” is the nickname that her parents have given Adeline. I think this nickname came by default, as they call her older brother “Bug”, none-the-less Lady Bug is a cute nickname.
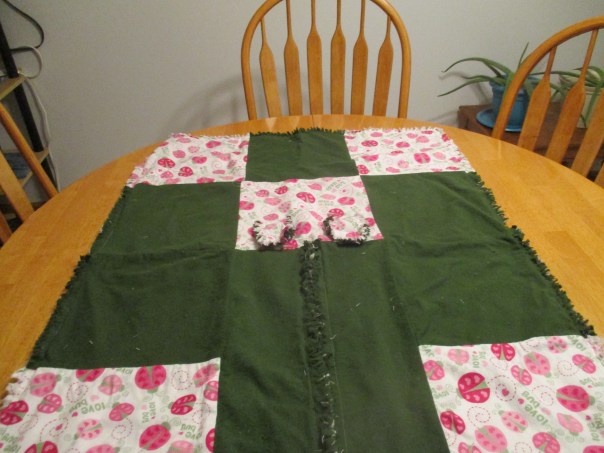
The following photos are the end result, although another trip though the washer and dryer will make the edges fluff up and hide any stitching that is still visible.
Designing the straps and the placement of them was mostly done with a prayerful guess since I didn’t have a car seat do to a fitting.
This is the back side since the straps are attached to the other side.
On Christmas Day I found out that my Prayers were answered. It FIT!!! 🙂
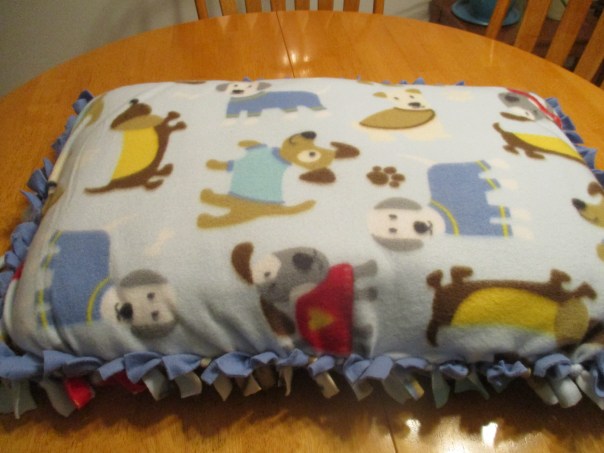
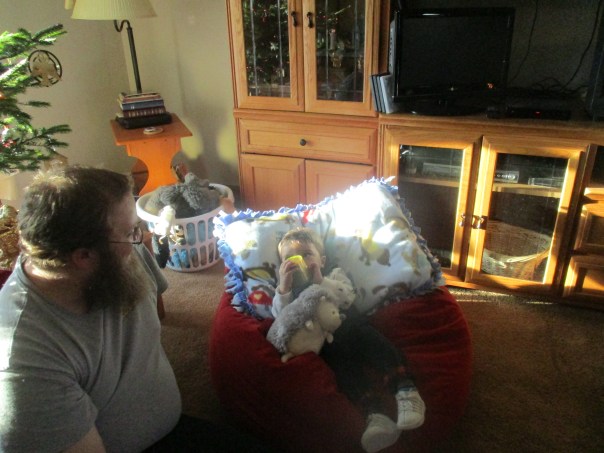
Jackson’s gift was next and just what do you make for an 18 month old who appears to have everything? Well I spotted a bag of poly-fil in my craft room and decided to make him a fleece pillow. For this project I decide to forego the sewing and make a tie pillow.
At this point Jackson could use it as a full body pillow, but I am sure it won’t be long before he grows into it
and do boys ever outgrow puppies?
Lastly I needed to come up with an idea of something to make for my daughters. I already had plans to bake banana bread for each of them, give them each a jar of homemade strawberry jam, and a soap and balm gift set, but I wanted to add a little something more. I was thinking about tote bags or market bags but knew I would not have time to crochet them. I was searching the internet for ideas and I came across this tutorial for t-shirt bags. https://www.mommypotamus.com/no-sew-t-shirt-tote-bag-tutorial/ Quick, easy, practical, this was perfect. I first took one of my old t-shirts that I had used for painting several times in the past and made a sample. I loved the outcome so I stopped by the Salvation Army Thrift Store to see if I could find t-shirts designs that my daughters would like.
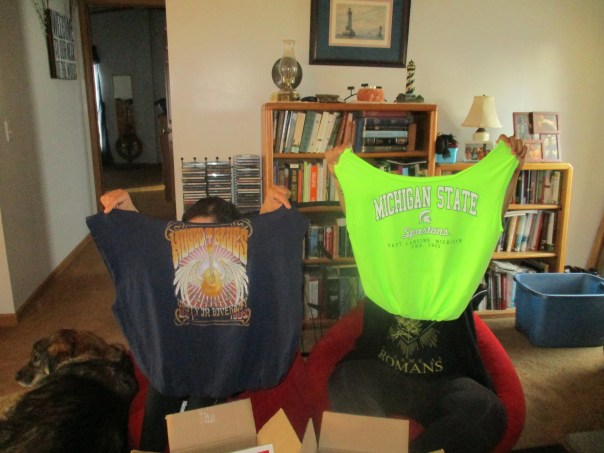
Success! Clockwise from top left – I picked the Disney shirt for Hanna, who even as an adult loves all things Disney; the Spartans shirt is for Lindell who is a Michigan State fan; I bought the fish shirt for Tina, who always enjoys visiting Aquariums; and the House of Blues shirt is perfect for Kara, who is my musician.
In the photo below Kara and Lindell are displaying their bags after opening their gifts on Christmas Day.
Incidentally after seeing me make these for the girls my husband asked if I would make him one, since we often pack up a bag of stuff to take along to the farm. “I’ll give you an old t-shirt,” he offered. One of the things we like about the t-shirt bags over the canvass bags that we use is that the t-shirt bags will wash nicely in the washing machine and dryer, whereas the canvass bags seem to shrink a little more with every washing. I suspect I will be making more of these in the future.
So this is the results of my crafting marathon which took place December 20- 23rd 2017 and left me with December 24th to do some holiday baking 🙂
Be sure to watch for my next post – My Biggest Accomplishment of 2017.
With only a few short days before Christmas I still have several projects in the works. Even though I don’t do Christmas shopping, I guess this year I am as bad as a last minute shopper. Call me a “last minute crafter”. Thus the next few days will be spent finishing those projects (that I will tell you about after the holidays), grocery shopping for our Christmas meal, and baking some Christmas treats.
I did want to take a minute to tell you how my latest soap turned out. I wrote about it in this post https://donteatitsoap.com/2017/12/03/the-soap-is-curing/ It is the one with cucumber, yogurt and Rosemary. I will start by saying my first impression was positive, but I always keep my thoughts to myself until I get some feedback from others. My husband was the next to try it. He showered with it in the morning then headed to the farm to get some work done. A while later he called me, “what was that soap I used this morning?” he asked. I told him and he went on to tell me his experience. “I always start my shower by lathering up my hair” he said. (Yes we both use my homemade soaps to wash our hair as well as our bodies.) “I started rubbing that soap in my hair and the next thing I knew I had a big pile of lather on top of my head. It felt really good and rinsed off nice too. I like it.”
My niece stopped by a couple days later so I gave her one for her and one for my sister to try. When I asked my sister about it she said something like this, “I usually don’t spend much time in the shower, I get in, wash up and get out. When I was using this soap I didn’t want to get out. It left my skin feeling so good, and I don’t know if I have ever felt so clean.” My niece also liked this soap, and I only wish I had written down her comments because I can’t remember them right now.
Besides the rich creamy lather and my skin feeling really soft after the shower, I noticed some things that no one else mentioned. First the bar had a bit of a gritty feeling like small grains of sand in the soap. I am not sure where this came from unless it was ground up cucumber seeds. It wasn’t offensive, in fact it gave the bar a little extra scrubbing power much like to coffee grounds in my coffee soap. The other thing I noticed was that I could smell the scent of Rosemary when I sniffed the bar. I am not surprised that no one else noticed this because I had to actually put the bar right up to my nose and sniff it in order to detect the fragrance. This soap recipe is definitely a keeper.
In my previous post I shared that my biggest dilemma was coming up with a name for this soap. A couple of readers offered cute suggestions, and while I very much appreciate their ideas I decided to stick with my “Don’t Eat It!” theme. This new soap is now called———————————————————————————————–
Yep! It’s Salad Bar Soap. Cucumbers are definitely salad food and yogurt and Rosemary could be ingredients in a salad dressing, so quirky as it may sound “Salad Bar” it is.
Now before I get back to all of the busyness of the next few days, Dom and I want to wish everyone a Very Merry Christmas. God Bless.


 On Christmas Day I found out that my Prayers were answered. It FIT!!! 🙂