While the smell of garlic may be appetizing even mouth-watering when it’s cooking into a pot of spaghetti sauce, baking into a piece of garlic bread, or made into a dip, there are times when the smell of garlic is, to say the least, a nuisance and can even be repugnant.
For years I’ve struggled with finding storage containers that are appropriate for storing foods with a heavy garlic smell (ditto for onion). When food with this strong smell are stored in plastic containers the smell is next to impossible to get out, and thus can be transferred to whatever is next stored in the container. I have adopted two rules for storing foods with heavy garlic or onion smell 1)store these foods in disposable containers, or 2) do not save leftovers.
A few days ago I broke my own rules and saved some (heavy on the garlic) clam sauce in a plastic container (one that I really didn’t want to throw away). Yesterday, after I emptied the container, I attempted to clean it. While it looked clean the garlic odor lingered in the bowl. In the past I have tried soaking plastic bowls in vinegar or lemon juice to get rid of the garlic smell, I’ve also tried scrubbing the plastic with baking soda, and combining the baking soda with vinegar to get rid of it, all to no avail.
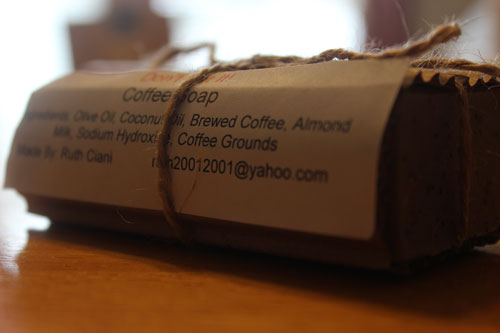
Yesterday, after I realized my mistake, I remembered reading about, and then blogging about, cooks who use coffee soap to wash the smell of garlic from their hands, https://donteatitsoap.com/2015/12/28/garlic-kitchen-tools-pros-and-cons/ I thought maybe coffee would work in this instance. I took the used coffee grounds from the morning, which were still on the top in the compost bucket, and put some in the bowl. I filled the bowl with hot water, put the lid on, I shook the bowl up, then let it sit for 10 minutes. When I opened the bowl and poured the coffee and grounds down the disposal, the garlic smell was replaced by a coffee smell. I washed the bowl with dish soap and hot water and all odors were gone.
I do not know if all of these steps were necessary. It is possible that soaking the bowl with brewed coffee (no grounds) would have removed the odor, or that a simple scrubbing with a few coffee grounds would have done the trick, and I will probably experiment with these options in the future. I just thought I would share with you the method that did work.
Now that I have discovered this trick I’m wondering if drinking coffee is the solution to garlic breath.
For about a year now we have been using wool dryer balls as an alternative to dryer sheets. I knew I had to find an alternative fabric softener because I began having allergic reactions to the fragrances in the store bought dryer sheets. When my husband saw me buying the unscented dryer sheets he commented on how bad the chemicals in those things were, so while I did not experience any apparent side effects from the unscented variety, I decided to look for a healthier means of drying our clothes.
Various internet searches let me to deduce that wool dryer balls were probably the best option. I read that using wool dryer balls softens the clothes, reduces the drying time, can reduce static, reduce wrinkles, and since they can be reused (from what I’ve read for up to 1000 loads of laundry) they can be cheaper to use than dryer sheets.
Rather than spending the $20+ to buy a set, I decided to make my own. I read that the more (balls) you use the more the drying time is reduced, and you should use at least 4. I decided on 8.
Since we have been using them, I am satisfied that they soften the clothes, and I don’t have a problem with wrinkles. I am not sure if they actually shorten the drying time since this would take a scientific experiment to determine, and all of the kids are beyond the point of having to produce science fair projects. While it is possible that they reduce static cling, I still get static in fabrics such as fleece and nylon if they are left in the dryer until completely dry. I know that they are all natural, therefore I don’t worry about what chemicals may be leaching from them and into my clothes, and they are unscented so I don’t get headaches or sneezing fits because of them. Since I made them myself I am certain that they have saved me money.
These balls in the dryer also provide me with a good laugh more times then not. From the first time my husband unsuspectingly open the dryer and upon seeing this let out a yell, to finding a ball stuffed in a shirt sleeve, pillow case, or pant leg, I always find it funny. We now know that deciding to take the laundry out of the dryer means the search is on. I usually take the laundry out of the dryer one piece at a time, making sure to shake any of these elusive little critters back into the dryer, and then make sure I count eight before closing up the dryer.
Wool Dryer Balls
It doesn’t always work that way though. A few months ago we had a ball that had gone missing for about two weeks. Each time I did laundry I would be reminded that it was missing and would check places like under the chairs in the living room, in case it rolled there while I was folding the clothes, or in a pillow case that may have been washed recently. I knew it would eventually turn up, because no one in their right mind would break in just to steal one wool dryer ball, and if my husband got so tired of having to count balls he would have gotten rid of all of them, not just one. I figured it was mixed up in some of my daughters stuff, and when it suddenly popped out of one of her shirt sleeves she would get a good laugh and return it to its rightful place. Then one day Trooper decided to play with his toys and he tipped over the whole toy basket and the missing ball went rolling across the floor. Mystery solved, I chucked as I returned it to the dryer where is could resume active duty.
Other times I get in a hurry and grab the whole load of clothes out of the dryer and end up with something like this.
OOPS!
I laugh as I hear the balls hitting the floor and think oops, I forgot again. Notice that there are only 7 balls on the floor so I have to go shake and search the load so I can return #8 to the dryer.
Some people may find this frustrating or a lot of work keeping track of these little buggers, but I can’t help but laugh when I hear my husband mumbling, and when I ask what is wrong, he says he’s missing a ball.
I usually don’t make New Years resolution’s because I’ve never had much success at changing something simply because it is a new year. As we turn the calendar to 2016, I hope you will join me in this simple resolution: Live, Laugh and Love.
Live life with a purpose, making good decisions that will help you reach your goals.
Love deeply. Love those that you are close to, that’s a no brainer, but you can also show love to those you don’t know by doing simple, random acts of kindness. It will bring you joy.
As you can imagine, as garlic growers we use a lot of fresh garlic at our house. Now I’ll be the first to admit that peeling and cutting, chopping or mincing fresh garlic is not the easiest way to go, but in my opinion fresh garlic is far superior to using garlic powder or even the store bought jars of minced garlic. Therefore I’m always open to easier ways of preparing fresh garlic.
I have a few tools or gadgets that are designed for use on garlic and I thought I’d share what I see as the pros and cons of each.
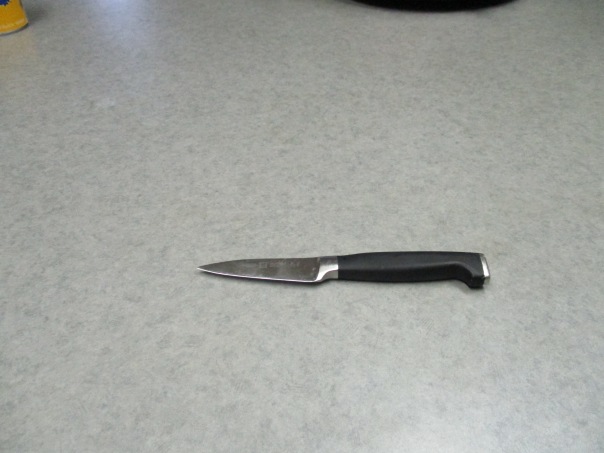
The first tool that I used is a simple paring knife.
Paring Knife
I often use a paring knife if I am only peeling and slicing one or two cloves of garlic. I simply cut off the root end of the clove and slip the knife under the skin and once the skin is loosened it generally peels right off. However using a paring knife to do a lot of cloves becomes a long and tedious process so I look for simpler options.
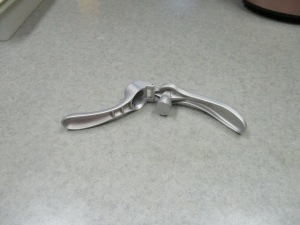
Another garlic tool that I’ve owned for many years is a garlic press.
Since this is the only garlic press that I have ever owned I can’t speak for them all. I do think a garlic press is a great tool if you need minced garlic. I bought this garlic press many years ago at a Pampered Chef party. Pampered Chef promotes this tool by saying that you don’t even have to peel the garlic and that is true. You can put an unpeeled clove of garlic inside and squeeze the handles and the peel remains in the press while minced garlic and juice squeezes out. I do find that some of the actual garlic is left inside along with the peel and therefore gets wasted. So peeling the garlic before putting it in the press is usually my preferred method. After squeezing the garlic through the press I use a knife to scrape the minced garlic off the outside of the press and into a bowl, I also use the knife to clean out any garlic that may have been left inside the press. One thing that has always been an issue for me has been the cleaning of this tool. Making sure the garlic is cleaned out of each individual hole takes a little extra attention, and sometimes a toothpick, but looking at the Pampered Chef website I see that this tool is now sold with a cleaning tool that is designed to press into the holes and clean any garlic out of them.
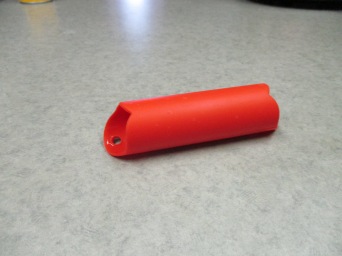
My favorite garlic tools thus far is this simple garlic peeler.
It is a simple silicone tube. This particular one is made by a company called zak! designs, but I see there are other ones out there including one sold by pampered chef. To peel garlic with this, simply put a clove or two inside the tube and roll it on the counter. It doesn’t take much of a roll. I usually just only roll until I hear a crack and at this point the peel will slip right off the clove usually leaving the clove whole. Pressing too hard might result in a smashed clove but the peel still comes right off. Some of the peel sticks inside the tube, and if you are peeling a lot of garlic you may need to rinse it out once in a while, but cleaning it out is simple enough, just run some water through the tube until everything is rinsed out.
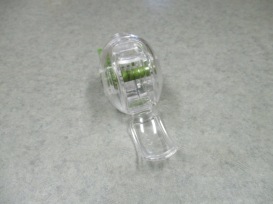
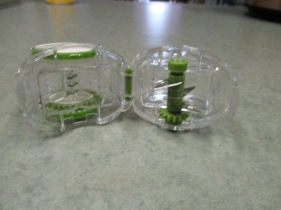
Another garlic gadget that I own is called a Garlic Twist.
Garlic twistGarlic Twist
When I bought the garlic twist, online, I thought it was a tool that would both peel and chop garlic. It wasn’t until after I received the item that I realized that in order to peel the garlic with it you have to smash the garlic with the flat side of this tool. Well I could use any number of items to do this. Using the garlic twist to chop or even mince garlic is easy, just put a clove or two, maybe even three depending on their size inside, put the lid on, and twist it. The more you twist the smaller it cuts the garlic. To remove the garlic you will need a spoon or small rubber spatula. I haven’t really put it through the paces, but it seems very durable. The company claims it can be used with ginger, peppers, herbs and nuts, but I have not tried any of these yet. It is made in the USA and sold by a company called NexTrend. The website says it has a lifetime warranty for durability.
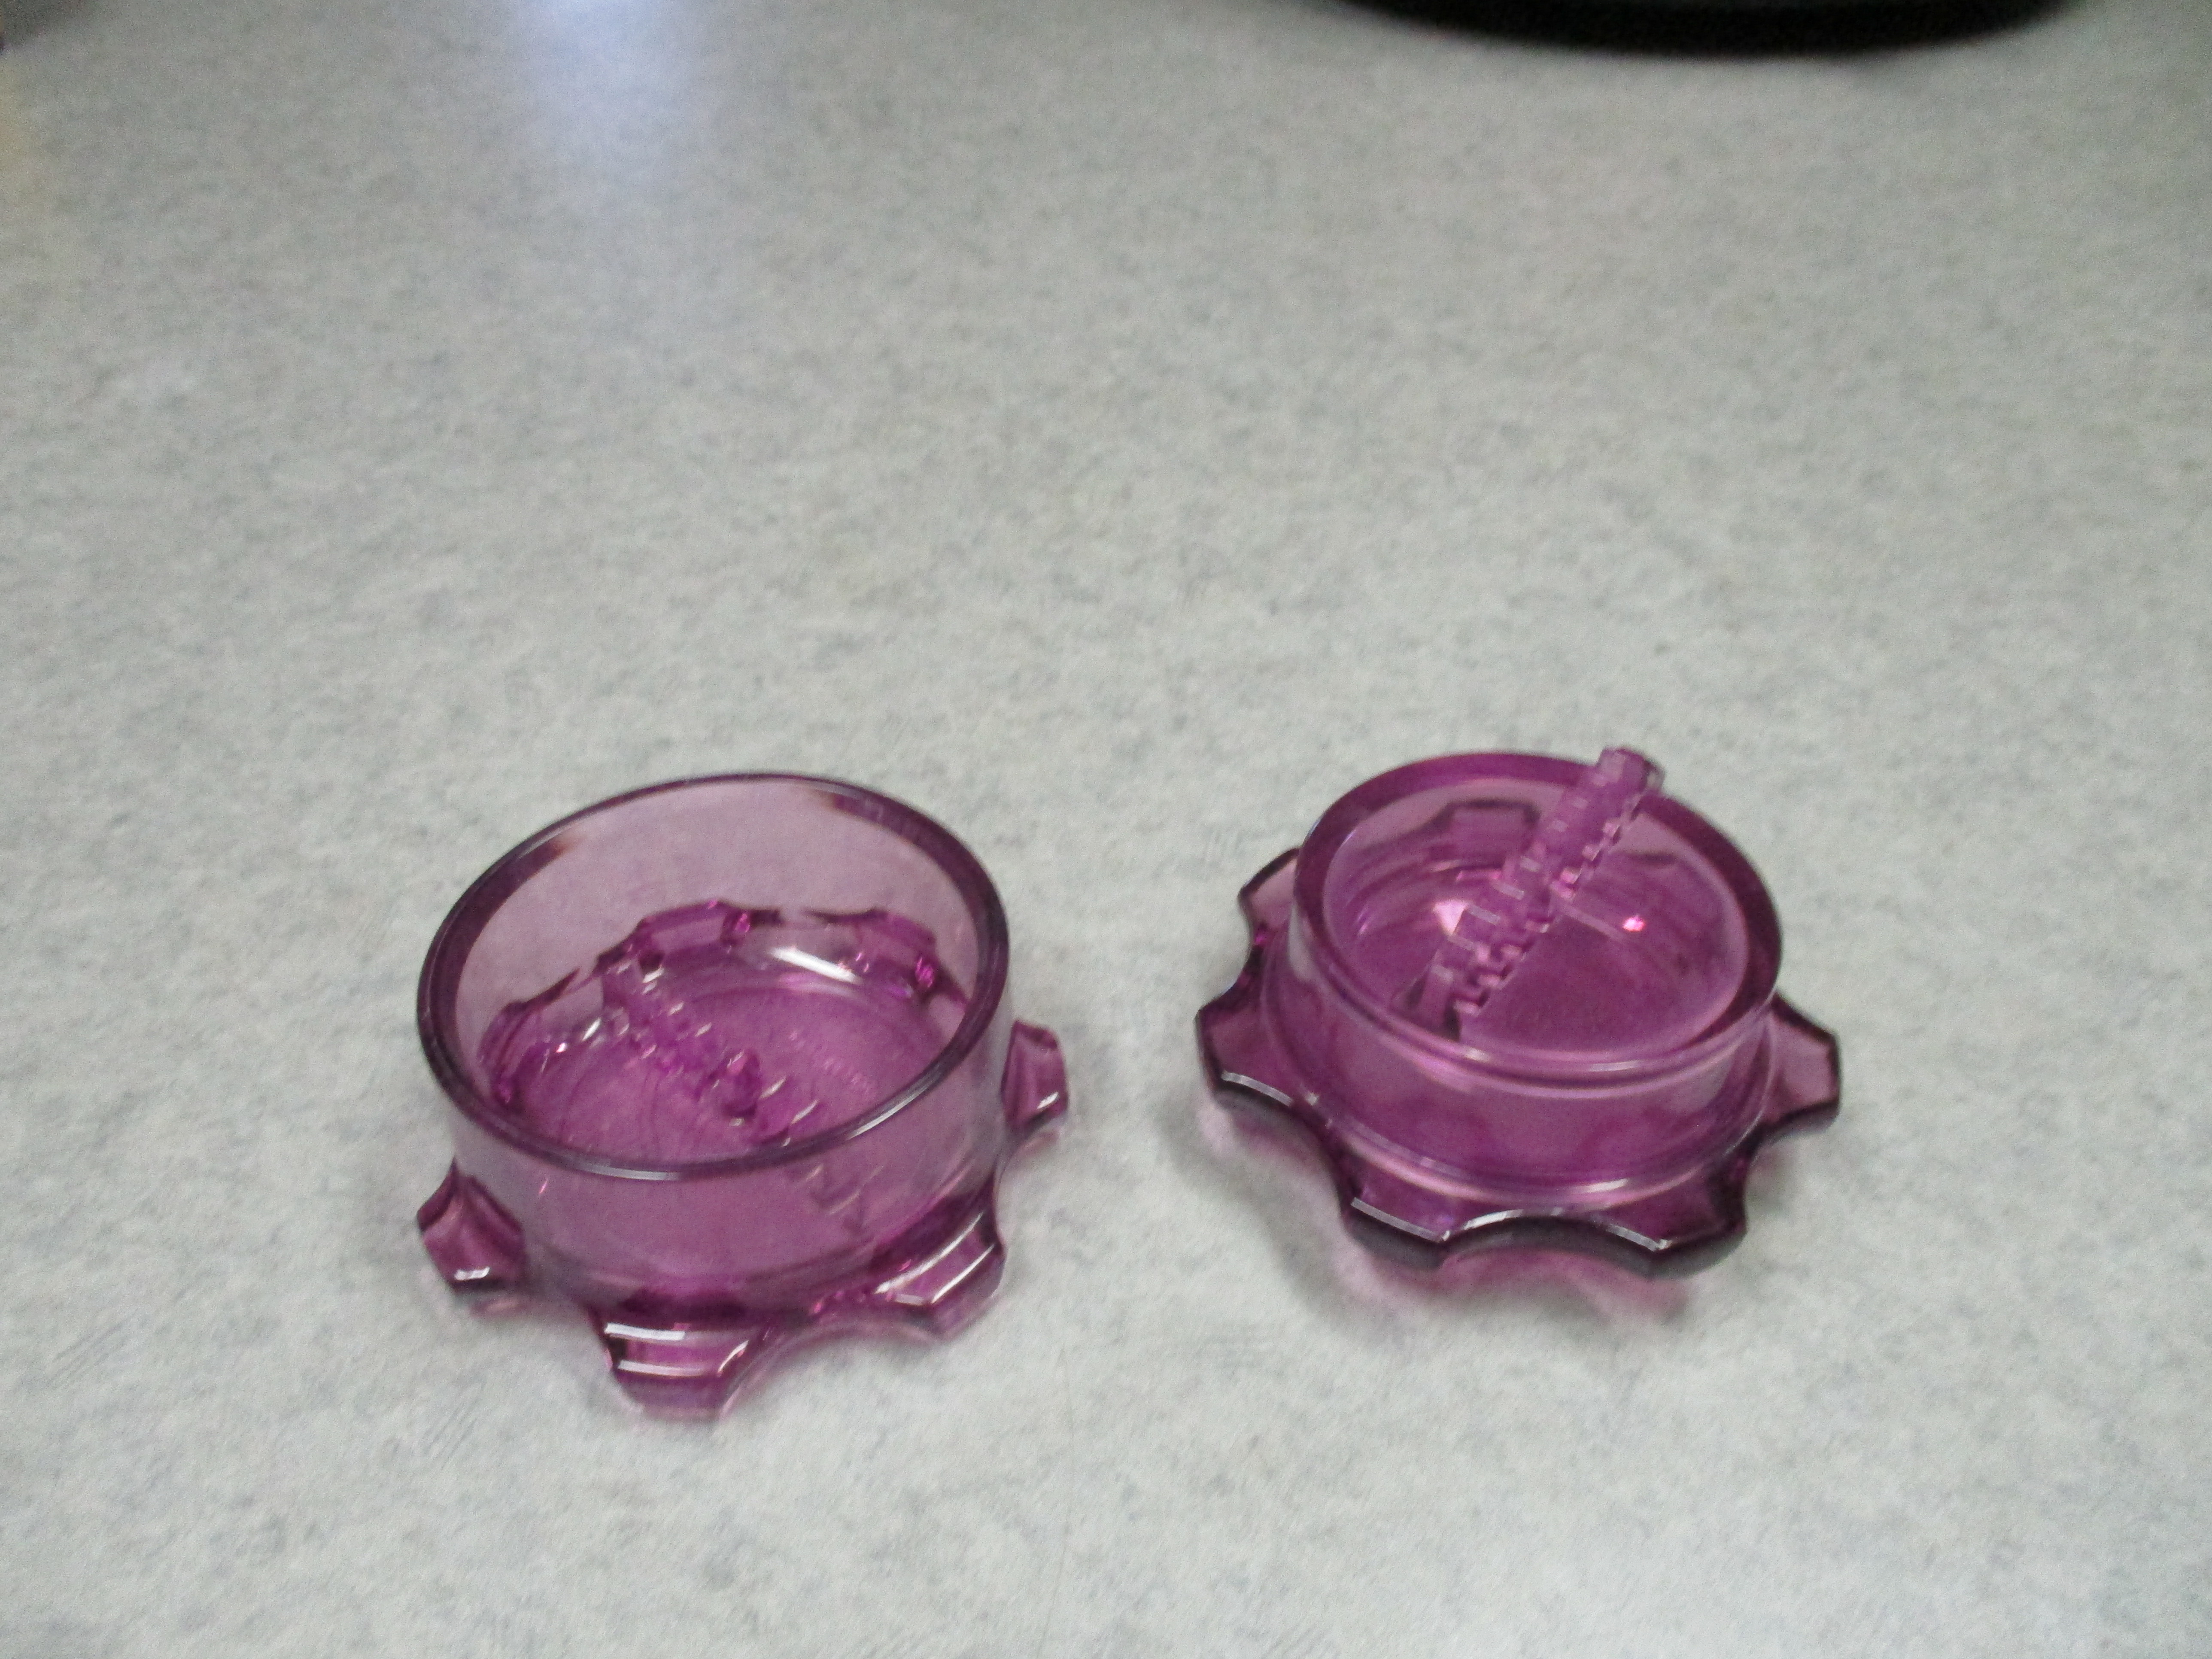
One last garlic gadget I have is called Chef’n Garliczoom.
This tool is strictly for chopping garlic. To use this tool open the top door, put in a peeled clove of garlic, snap the plastic lid shut, and roll the wheels on the counter. The gear turns the sharp blades inside to chop the garlic. To get the garlic out open the bottom door and find a utensil small enough to dig the garlic out. Be careful when removing the blade for cleaning, it’s sharp. The tool will only chop one average size clove at a time and some larger size cloves may need to be cut before putting them inside.
One last tip that I have recently read about is that professional cook often keep a bar of coffee soap in the kitchen to remove odors, including garlic and onion, from their hands before preparing the next dish. Since I now have a new batch of coffee soap ready I intend to try this.
I enjoy making homemade Christmas gifts, so this year I decided to make fingerless gloves and matching ear warmers for my 4 daughters and two sons-in-law.
For the girls I used this pattern http://www.beatriceryandesigns.com/2015/02/09/amazing-grace-fingerless-gloves-free-crochet-pattern/ which was a free online pattern. The first pair were a bit challenging, counting and referring back to the pattern for each stitch, but by the time I got to the fourth pair I pretty much had the pattern memorized. I didn’t use a written pattern for the ear warmers. I simply used the same stitches required for the gloves and crocheted them in the shape of the ear warmer. The challenge to this was getting the appropriate size. I experimented on the first one and repeated that for the other three.
I wasn’t going to make fingerless gloves for my sons-in-law because I thought they might be a bit girly, but then I realized that nowadays practically everyone is carrying a phone all the time that requires the use of their fingers for either texting or swiping the screen so the guys might appreciate this kind of glove as well.
For the guys gloves and ear warmers I used a more masculine and simple pattern, and I regret that I did not get pictures of them, but below are three of the girls modeling their Christmas gifts from mom.