It’s been over two weeks since I’ve posted and for good reason. Although I find it a strange term for being sick, I guess you could say that for nearly that past week I was “under the weather”. I think a more accurate description might be to say the an infinitesimal invader infested my intestines. For a couple of days this minute, maniacal monster quickly disposed of my attempts to ingest any nourishing substance, thus weakening my systems. When I realized after two days that regular defenses of clear liquids, coke and ginger tea were not properly equipped to deal with this tiny tyrant, it was time to bring in the special forces of colloidal silver, electrolyte enhanced drinks, and pepto bismol, which was quickly replaced by the much superior choice of marshmallow root tea http://learningherbs.com/remedies-recipes/marshmallow-root/ . While the special forces were quick to evict the vile villain, it has required additional efforts from electrolyte drinks, aided by probiotics, to repair the damage that was done.
All that is to say that I was sick for about 5 days but am feeling much better now and will now be catching up on writing along with other things that need to be done.
I guess I should define what I mean when I say balm, because the dictionary definitions that I read were very vague. When I say balm I mean a combination of oils, and/or butters, and/or wax used to sooth or moisturize the skin. It could also be called a salve. It differs from a cream or lotion in texture and in most cases ingredients.
The first thing I like about balms is that ingredients can be simple and all natural. I believe that often times less (ingredients) is better. Since oils and waxes are greatly shelf stable they do not require preservatives, unlike lotions where water or other liquid ingredients may introduce and/or allow for bacterial growth. While some oils may eventually get rancid, I have not experienced this. It seems to me that, since rancidity is caused by oxidation then mixing the oil with other substances like, beeswax or coconut oil, that contain antioxidants would counter act this.
I love that I can get a moisturizing effect without getting the burning feeling that I have gotten when applying various lotions and creams to my chapped hands. Applying the balm is soothing to the skin.
I love that I can use my balms without worrying that my nose will stuff up, or that I will begin sneezing from the fragrance.
While some people may prefer the creamy texture of a lotion, I prefer the feel of a balm on my skin. I believe the oily feel of the balm encourages me to rub or massage them into my skin, and massage is always a good thing. 🙂
Lastly, I love that my husband likes using them too.
If you have had problems finding a good cream or lotion for your face, hands, or any part of your body. You might want to check out my “Don’t Eat It!” Balms. https://donteatitsoap.com/store/ then send me an email at ruth20012001@yahoo.com and I will see how it would be best to get it to you.
As I mentioned in my last post, dehydrating garlic was one of the things on my to-do list. I find that having a to-do list helps me focus on the things I need to get done and crossing off things as they get done gives a sense of accomplishment. I have been very lax in making these lists for myself lately, so writing my last post has reminded me of what a great tool this is. It also motivated me to get busy, and that is what I did.
After writing that post I decided that Monday would be a good day to dehydrate garlic. I started with taking apart the garlic bulbs, and I selected a bowl that I thought would hold the right amount, and I filled it up with garlic cloves.
Garlic
The bulbs that I used were mostly smaller bulbs that I had set aside for home use, because I thought they were to small to sell. They were a mixture of all five varieties that we grow. https://donteatitsoap.com/2015/08/09/the-garlic-is-in/
The next step, and certainly the most time consuming, was to peel each clove. I did this using my garlic peeler, and although it took a total of about three hours to peel all of those cloves it didn’t seem too bad once I got into a rhythm.
Garlic Peeler
It actually reminded me, of many years ago, when I worked as a machine operator in a factory. I would challenge myself to run the machine as efficiently as possible. It was always a matter of having things set up properly, and usually doing one thing with one hand while doing something else with the other. Concentration was important.
After I had all of the garlic peeled I decided to weigh it before dehydrating it. It weighed 3 lbs. It will be interesting to see how much it weighs when it is finished.
Peeled Garlic 3lbs.
This certainly would have been quicker if I had been using average size bulbs of garlic, but those are the ones we sell, and even quicker had I used large bulbs, but those are the ones we planted for next years crop.
The next step was to slice the garlic cloves. For this I decided to use my food processor with the slicing blade in it. It was obviously faster than slicing them all with a knife, and I believe they were more evenly sliced than if I had attempted to do them by hand.
Next I spread the garlic slices in a single layer on the trays of the dehydrator.
Garlic Ready To Be Dehydrated
It actually worked out perfectly. 3lbs of garlic filled up all 9 trays of the dehydrator. When I looked online to find out what temperature would be best for drying the garlic I found answers that varied from 105 degrees all the way up to 125 degrees. I decided to go with 110 which was recommended by several blogs that I read. At 7:30 p.m. (19:30 hours) I set the timer for 20 hours, but I knew I would check it in the morning to see how it was coming along.
The smell of garlic quickly filled the house. My husband described it as a little overpowering, and when we went to bed he asked if I thought if we could die from garlic asphyxiation as we slept. I wasn’t worried, but I did keep my nose tucked under the covers most of the night.
By morning the smell was not nearly as strong but it was still very present. As we talked about it I wondered if the smell of garlic dehydrating works similar to aroma therapy. Could the smell have cleansed the home of bacteria or viruses that may have been present, and what potential health benefits could we have reaped from doing this?
The garlic was still pliable in the morning, and since I wanted it to be dry to the point of being brittle, I let the drying continue. I checked it several times throughout the day. At one point I realized that the upper trays seemed to be drying faster then the lower trays so I moved some of the trays around to get a more even drying. Finally when I checked the garlic at around 8:30 p.m. (20:30 hours) I determined that it was completely dry. 25 hours after starting it, I turned off the dehydrator and left it for the night.
Dehydrated Garlic
The garlic dehydrating was done at this point and I could have packaged it in air tight containers and stored it as garlic chips. My husband said I could fool people by offering them a banana chip, but when I offered him a banana chip he said, “No thanks, I already tried one.” Instead of packaging it up like this, I decided to go one step farther and make garlic powder. I pulled out the food processor again but this time put in the sharp chopping blade. I filled the food processor about 1/3 full of garlic chips and turned it on. It was so loud that I turned it off and went to get some ear plugs to wear as I finished this.
Making Garlic Powder in the Food Processor
I did weigh the dried garlic before grinding it. The three pounds or 48 ounces that I started with was reduced to 22 ounces or just under half the weight that it started at. It took several minutes of grinding in the food processor to get it to a powdered texture, and while some of it was such a fine powder that it was seeping out of the food processor and looked like smoke, there were still a few small chunks in it as well.
I divided it into ball jars. The 8oz or 1 cup size jars held 5 ounces of garlic powder.
Homemade Garlic Powder
It is somewhat surprising, consider the strong smell that was emitted during the process, that the flavor was not lost during the process. The garlic powder seems to have the same strong and wonderful flavor as our fresh garlic. While my husband taste-tested it by eating some off a spoon, I decided to test it by making my dill-garlic dip. We agreed, the flavor is superb!
I have given my husband a heads-up that I intend to do another batch or two since I have more fresh garlic than we will use before it goes bad. Now my dilemma is whether to cross “dehydrate garlic” off of my to-do list, or leave it until I am all done.
I started this website because family and friends told me it would be the best way to tell people about the soaps that I make, but when I started blogging I’ll admit that I never thought about the other end, the potential readers.
When I write a blog post I want it to be useful to the reader in some way, informational, educational, entertaining and/or even inspirational. One challenge to this is not knowing the audience. Readers can be male or female, young or old, come from any walk of life, and as I have been seeing lately from any part of the world. In just the past month I have had visitors from the United States, United Kingdom, Japan, Russia, Brazil, Germany, and New Zealand. I welcome you all.
I am just now figuring out that this blog can perhaps be more useful to the readers if I categorize my posts, so I am going back through the old posts and adding the categories. Readers can then click on a specific category to find all of the posts pertaining to that subject. This may take a while but is doubtless a good cold-weather project.
I would love to hear from more readers. If you have suggestions, questions, comments, or even just want to say “Hi” please post them in the comments section on this page, as I am not on Facebook and do not see any comments posted there.
Other things on my to-do list include: 1)Finishing a crochet project that I have started. 2)Dehydrating garlic. 3)Making more soap. 4)Working with my husband to plan this years garden. 5) When the weather and ground conditions are suitable helping my husband hang 600 feet of fence around the garden. So expect to see posts about these things in the future. 🙂
When buying soap you usually don’t find one that is made with only one oil. The rule is generally to use a combination of oils to achieve the desired effects, things such as a good lather, a hard bar, a soap that is conditioning, rinses well and does not go rancid quickly. Each individual oil brings different properties to the soap.
While this may be shocking to my children, I’m sure my dad would attest to the fact that I do not always follow the rules, so when a lady asked me if I could make a soap with only coconut oil, I said I would give it a try. This was probably a couple years ago, but fortunately I was familiar with a handy on-line tool called a soap or lye calculator. This tool allows you to enter the amount of various oils you would like to use in your soap, and it will calculate the amount of lye and water you need to add. Using this very handy tool I was able to come up with a soap recipe that has only coconut oil, water and lye as the ingredients.
The first thing I found out about this soap is that it is a very hard bar of soap. I found this out upon trying to cut the soap into bars. Using various tools I attempted to cut this soap but instead the soap would crack or break into chunks. They were not pretty bars. After approximately 6 weeks of curing I sampled this soap in the shower. I discovered that it was a nice soap with lots of bubbly lather. Not only is this soap nice for a shower, it’s great cleansing properties make it an ideal soap for people who choose to make their own laundry soap.
The second time I was asked, by this same lady, to make this recipe I decided to alter the recipe by adding more water in hopes that it would be soft enough to cut. Less that 24 hours after making the soap it was still too hard to cut, and I again ended up with some odd shaped soaps.
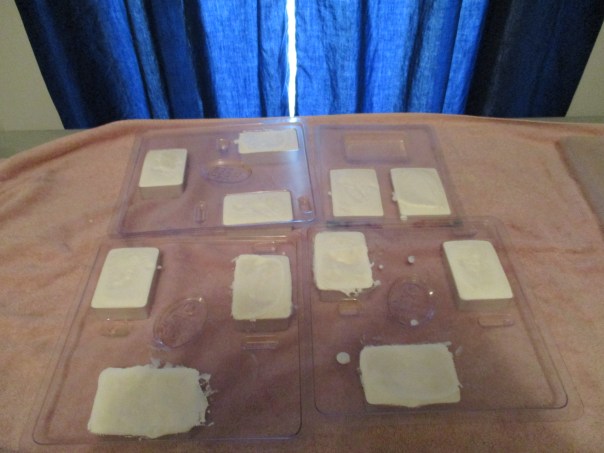
This brings us to today when I made this soap again. I made a small (2 pound) batch and poured it into individual soap molds.
Coconut oil soap in individual molds.
I discovered that this soap was ready to come out of the molds after only about 4 hours. It will still have to sit for about six week before it is ready use or sell.