Category Archives: Reflections

Sisters Day

Before I begin I want to apologize for being away so long. It was a couple of days ago when my most loyal reader, who also happens to be my husband and my editor, mentioned that I needed to get another post up, that I realized that it has been almost three weeks since my last post. I could come up with a whole bunch of excuses but that’s all they would be – excuses. Instead I will beg your forgiveness and hope you enjoy this post. πŸ™‚

β€œSister. She is your mirror, shining back at you with a world of possibilities. She is your witness, who sees you at your worst and best, and loves you anyway. She is your partner in crime, your midnight companion, someone who knows when you are smiling, even in the dark. She is your teacher, your defense attorney, your personal press agent, even your shrink. Some days, she’s the reason you wish you were an only child.”
― Barbara Alpert

I love the above quote as it accurately describes my relationship with my sisters. Honestly there were not many days of “wishing I was an only child” and those days are long gone, but the rest of this quote describes us.

Last Friday was sisters day. What is sisters day??? It’s simply spending time with my sisters. There are no rules for sisters day because we would probably break them anyway. Sisters day might be two, three, or four of us getting together, but it is not exclusive to us sisters. There might be aunts, cousins, daughters, grandkids or friends involved. Husbands, sons, son-in-laws are also welcome if they want to put up with our shenanigan’s. πŸ™‚

Our activities also vary but since they often include some type of crafting it should come as no surprise that last Friday we spent time shopping at Joanne Fabrics. I came home with fabric to make two sewing projects that I have planned; several skeins of yarn that I have no immediate plans for (but if you knit or crochet you’ll understand that you can never have too much yarn); and a hairpin lace loom. Hairpin lace is a method of crochet that I recently learned of and now that I have the required tools I am looking forward experimenting with new creations.Β  (Watch for this in future posts.)

One of the sewing projects that I have planned is a do-over. If you are a long time reader you probably remember that despite not being skilled at sewing I usually dust off my sewing machine and attempt to sew something at least once or twice a year. My sister, Kathy, on the other hand is very skilled at sewing and has been teaching my other sister, Jamie and my cousin Abbey for a while now. In September I decided to get in on the action.

Below are wo of Kathy’s recent projects.

20191116_200646
A perfect fit and the dogs name is Daisy. πŸ™‚


20191115_162601
This shirt is a pattern she would like us all to try. I really like the style but making button holes is scary.


September Sewing

We selected a pattern for a hooded shirt that we all liked and decided that we would each make our own. Kathy had made one for herself and when I tried it on I really liked the look and the way it fit. I was very encouraged when she said it was an easy pattern to make. We then went fabric shopping and each selected our own fabrics. There were so many options and as you will see in the photos below we all had different ideas.

It was a week later when we got together to begin making them. Kathy helped us with laying out the pattern on the fabric, telling and showing us things about the salvage and the stretch of the different fabrics. She also helped with making sure that my fabric was cut properly so I could line up the squares and that the flowers on Jamie’s fabric would all be right-side-up. We also talked about what type of stitch we should use, machine settings, seam allowances, and I assured her I had a ball point needle that she told me I would need.

Before we parted that day Kathy gave us the directions for the first few steps, sewing the front and back together, attaching the sleeves then sewing up both sides of the shirt. If we had time we could complete those steps before we met again. We could also line the hood and attach it if we thought we could do it on our own. If we had questions just give her a call.

By the time we met, a week later, I had completed many of the steps. The body and sleeves were assembled and the hood was lined. I had decided to wait for guidance when attaching the hood. I was glad I waited because I ran into some snags but by the time we parted that day the hood was properly attached and the band around the bottom was pinned in place – ready to be sewn. After that all I would have to do is sew the cuffs on and it would be finished. WOO HOO!

The next day, after I had successfully attached the band on the bottom of the shirt I pinned the first cuff in place and was feeling really excited as I was sewing it in place. I was almost finished! Once I had that cuff finished I held up the shirt and realized I had sewn the cuff on inside-out. Ugh! The seam was on the outside of the sleeve. I wanted to cry.

Instead I got out my seam ripper only to discover that instead of ripping out the stiches I was ripping the fabric, so taking that cuff off and redoing it was not the answer. I talked to my sister Jamie and she said she would probably sew the other on the same way and wear it like it was intentionally done that way. LOL. Since I had quite a bit of fabric leftover from the cuffs I decided to redesign them. It was already messed up so what harm could I do?

Nervously I cut about six inches off both sleeves. I then cut pieces of the cuff fabric that would fit the area that I had cut off.Β  I pinned them to the sleeves so that the seam would be on the inside and sewed them on. I was actually quite pleased with the results. You will see it in the photo below. In fact I liked every thing about the way the shirt turned out – except the way it fit me. 😦

Before you see the results I want to tell you that the photo of me is not very complimentary (it’s a horrible photo of me). Not only does the shirt not fit well I seem to have a Frankenstein thing going on with my hair. I was hesitant to even include it but I didn’t think it was fair to write about it all but not show the end results. So please don’t judge me on this photo.


IMG_5840 (2)
Abbey and Kathy
IMG_5841 (2)
Jamie and Ruth (Me)

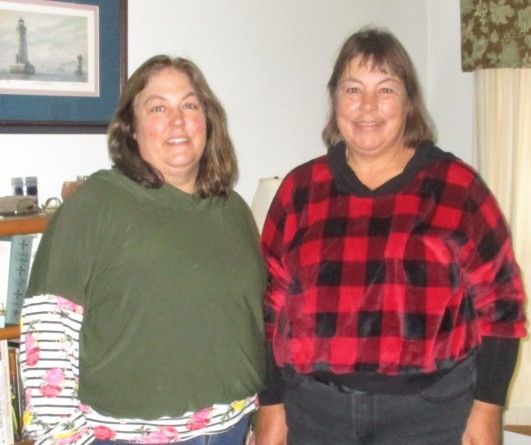
I really learned a lot from this project. Not only about the sewing process but about the way different fabrics act. We all made the same pattern in the same size (Abbey decided not to add the band on the bottom), but each of the shirts fit differently. When I tried on Kathy’s shirt and Jamie’s shirt (it’s a sister thing you know – we grew up wearing each other’s clothes) they both fit me well. My shirt was a better fit on each of them as they are a bit shorter then I am.

Jamie, who had said several times while we were making our shirts how much she liked mine, made me and offer. If I gave her my shirt she would buy me fabric to make a new one, hence the “do-over”. Even though Jamie had mentioned liking my shirt previously, I tend to think her offer had a lot to do with encouraging me not to give up.

It is said that “practice makes perfect” and “if at first you don’t succeed try, try again” so that’s how I will be spending some of my time over the next week or so. Keep your fingers crossed that you will see an updated post revealing great results (and a better hairdo LOL).Β  πŸ™‚

Thanks for reading.

Have you ever tried sewing?

Do you prefer to wear prints or solids?


Our Sweet Potato Harvest

The Harvest

Growing sweet potatoes this year was really just an experiment and unfortunately one that I did not document. While I regret that I don’t have exact dates, time frames and pictures, I was so impressed with the results that I wanted to share the process.

Below is a photo of our sweet potato harvest.

IMG_5776

It might not look very impressive until I tell you that all of those sweet potatoes grew in that pot (approximately 3 gallon).

The Process

I think it was late February or early March when I noticed a sweet potato that I had bought at the grocery store was beginning to grow roots. Rather than send it to the compost heap I decided to let it live.

I poked a toothpick into each side of the sweet potato at about the halfway point then put one end of it into a large mouth jar filled with water where it continued to grow more roots. The toothpicks held the top end above the lip of the jar. It was important to keep the jar filled with water and in a couple of weeks it began to sprout leaves.

I kept adding water and the leaves grew into vines. Once the vines were over 12 inches long I cut six to eight inches off and put them in a jar of water to root. I think it was early April when I planted 4 of them in the pot filled with potting soil. I also gave some to my cousin so she could grow her own.

I kept the pot near a sunny window and kept them well watered and they continued to grow. I think it was mid to late May, when the weather warmed enough and the threat of frost had passed, that I moved the pot to our deck.

From there it was just a matter of keeping them watered. If we did not have rain the soil dried up quickly and the leaves would begin to droop.

It was the first week in October, when we were having cooler overnight temperatures, when I noticed that even though the soil was moist the leaves were drooping. I decided it was time to harvest them. Harvest was as simple as dumping the whole pot out then breaking up the soil and picking the sweet potatoes out.

IMG_5778

Doing It Again

Since this variety grew so well I decided to try to keep it growing. The vine was not dead so I cut some slips from it and have them rooting in a jar right now. Soon I will need to plant them in a pot of soil.

IMG_5937

Eating Them

Sweet potatoes are a great source of many of the nutrients that our bodies need to stay healthy. You can learn more about that here. While searching for a link to provide you with those benefits I discovered something I did not know. Sweet potato leaves are edible. They can be prepared and eaten like other leafy greens (think spinach) and are very high in nutrients. This article explains more.

We usually eat sweet potato baked but sometimes cut it up and add it to soups or stews. I am now planning on adding sweet potato leaves to our diet as well.

Do you have a favorite sweet potato recipe you would like to share? How you ever eaten sweet potato leaves?


Happy Halloween

Since Halloween falls mid-week this year we decided to celebrate early. Saturday we held our second (annual) Halloween party at the farm. Some readers might remember last year we ended up holding the party in our barn as the weather was not conducive to an outdoor party.

This year although we planned and were ready for outdoor activities we again had the barn ready as a back-up plan. The weather is just too unpredictable. Guests were instructed that costumes were optional, but they should dress for the weather (which should always be the case when you visit our farm).

IMG_5890 (2)

By Saturday morning we were certain that rain would be coming later that day. Our party was to start at 2:00 P.M. and we were hoping to get some outdoor activities in before the rain came.

IMG_5861

We spent very little money on decorations. We mostly used materials we had on hand. A few things, like this skeleton (below), we picked up at the dollar store. Looks like he’s been waiting to use the porta potty for a long time. LOL!

IMG_5863 (2)

After my husband and I put the finishing touches on our Trick-or-Treat Trail I took some photos so I could take you all on the walk with me. Don’t worry. The trail was designed to be fun for children so there is no blood and gore, noΒ Freddie Krueger, and no one chasing us with chainsaws.

IMG_5864 (2)

At the entrance of the trail was a graveyard.

IMG_5865 (2)

It was also the first trick-or-treat station. The hanging basket to the left is where the kids could pick a few pieces of candy from the basket (even the big kids got some). The headstones were made out of Styrofoam sheets my husband had collected at the greenhouse job he worked this spring. They were some type of packaging material and were dumpster bound had he not brought them home thinking we might have a use for them.

IMG_5866 (3)

I had to edit the photo in order to see the writing and some are still not clear enough to make out the words. Buried in this graveyard (starting in the back row left side) are Ben Better, the double headstone isΒ Ima GonnerΒ and L.L.Beback, the third one in the back row readsΒ Here Lies Mozart, Decomposing.Β In the front row it appears that Ben was not buried very deep as a skull has emerged from the ground. The headstone to the right is Barry M. Deep and as you can see the last grave is vacant (notice the shovel waiting by the grave). LOL!

While the kids might have been too young to pay attention to the headstones I think the adults who accompanied them enjoyed the humor. This candy basket contained reeses peanut butter cups, Hershey’s chocolate bars, kit kats and almond joys. If you have a favorite help yourself.

IMG_5868 (2)

Just beyond the graveyard this guy was hanging out. He seemed to be the gatekeeper (minus the gate). Although he is by no means frightening, when we first hung him up, several night before the party, he looked pretty creepy from a distance, and several times in the days that followed I would be working in various areas around the farm a catch a glimpse of what seemed to be someone standing there, again very creepy. LOL!


IMG_5870 (2)

A little farther down the trail is our next treat station. I had discovered these two logs laying in the woods and decided to give them some personalities (faces). This basket contained peppermint patties. They seemed to be a favorite of the adults.


IMG_5871 (2)

As we come to the fork in the road we will veer to the right to find our next trick-or-treat station. This time it is both a trick and a treat.

IMG_5874

My husband designed this basket with the glove secured in it and a fishing line attached to it. The fishing line was then run through a pulley that was attached to the tree behind it. He tied a small handle on the line and then ran the line to a stake that was placed along the path. When he pulled on the handle the glove (hand) would rise up out of the basket of candy. Very clever! This basket contained Smarties.

IMG_5876 (2)

We continue to follow the winding path through the woods.

IMG_5877 (2)

Our next trick and treat station is just ahead. This “haunted” rocking chair held a basket of ghost lollipops made from tootsie pops. The chair was also rigged with a fishing line/pulley system that allowed us to make the chair appear to be rocking on it’s own (or was it the ghosts?).

IMG_5878 (2)
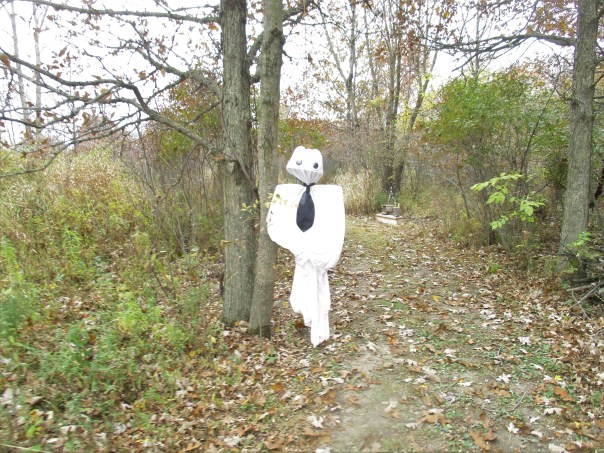
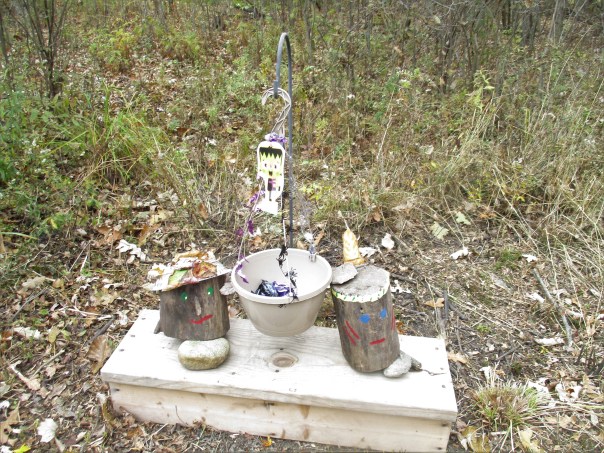
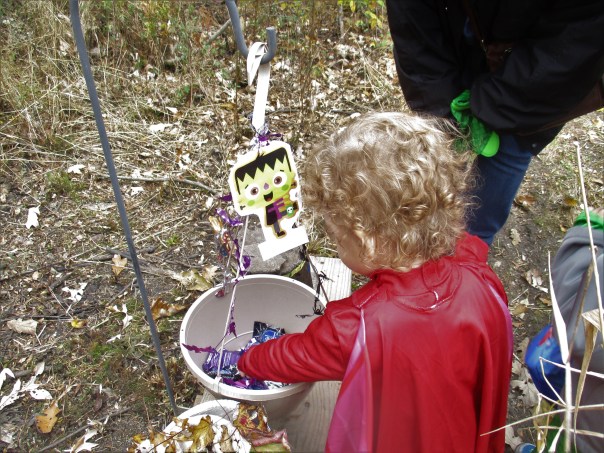
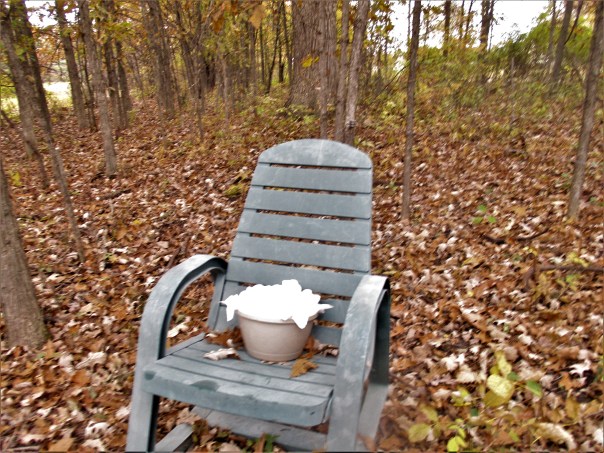
Another treat basket hung from a shepherds hook as we were exiting the woods. This one also held reeses, Hershey bars, kit kats and almond joys.

IMG_5879 (2)

Upon exiting the woods we turn to the right and head north along our west property line. Another treat station lies ahead under an oak tree that appears to be inhabited by bats.

IMG_5882 (3)

This basket contains white chocolate kit kat bars. As we venture up the slight hill and circle to the right we find our last trick-or-treat station.

IMG_5885 (2)

The mummy hanging on this basket is giving out cans of silly string. When the kids took their can of silly string from the basket they were instructed that they could not use the silly string inside the barn. While I didn’t see any adults take a can some how some of them ended up with it. Hmm, I wonder how that happened. πŸ˜‰

IMG_5886 (3)

From this point we could now head back to the barn area where most of the other activities took place, but first I thought maybe you would like to see how the kids enjoyed their trick-or-treat trail.

IMG_5902 (3)

Our Granddaughter, Addy, picking some candy out of the basket.


IMG_5904 (2)

Our Grandson, Jackson, was fascinated with the hand rising out of the basket. He was more interested in how it worked than getting the candy. He did high-five the hand when I suggested it to him. πŸ™‚


IMG_5915 (2)

Before approaching the haunted chair our 5 year old, great nephew, Landon turned and informed us “I’m not falling for your tricks.” LOL!

IMG_5919 (2)

My biggest surprise was how much the kids enjoyed the bats, reaching or jumping up to touch them or giving them a smack to see them fly. They spent a little bit of time playing with the bats before finishing their walk through the trick-or-treat trail.

After trick-or-treatingΒ  it was time to play on/in the straw bales.

party20197


IMG_5925

The rain held off for at least another hour while the kids played on the straw bales and silly string wars took place.

party20194

No one was exempt from getting “stringed”, so grandmas and grandpas and aunts and uncles, some armed with a can and some not, joined in the fun.

party20193

Just before the rains came my husband and son-in-law moved the straw bales to the barn porch. The straw stayed dry as did the kids as they continued to play.

The kids all looked so cute decked out in their costumes. Don’t feel bad if you don’t recognize their characters because I didn’t. I had to get the scoop from those in the know (their parents). I’ll clue you in – Landon, Jackson and Addy are characters from a cartoon called PJ Masks where three children become superheroes at night. Landon is Catboy, Jackson is Gekko, and Addy is Owlette. Kenzie is wearing a Queen Bee costume (appropriate for a visit to the farm). Queen Bee is part of a collection of doll called L.O.L. dolls.

You may remember Peanut, the cat, from the day we harvested garlic, well peanut has become a regular visitor, showing up at the farm almost daily. I had concerns about peanut being at the party because I thought he might jump on the food table.

IMG_5929

It seems that my fears were unwarranted as once the guests arrived Peanut found many a welcoming lap to sit on. Several times I spotted Addy giving Peanut kisses. It was so precious.

While all of our guests followed our instructions to dress for the weather a few came in costume as well. Jinkies! That’s Shaggy, Velma and Scooby Doo in the lower righthand photo.

In case your wondering what was on the menu we decided to keep it simple. We bought fried chicken from our local Meijer deli and I have to it admit not only did that make it easy it was also good and priced right. I made a pasta salad, we had a veggie tray with dip and cheese tray with crackers and apple slices with caramel dip. For dessert Aunt Donna made monster cookies and I made rice crispy treats. I dare say no one should have went away hungry.

It was a great day filled with food, family, friends, and fun. We couldn’t ask for anything more.

Thanks for visiting. Did you get some of your favorite candy? Would you have showed up in costume? If so who/what would you come as?

It Was The Perfect Day For Planting Garlic

Sunday, October 20th the weather was the perfect for just about any type of outdoor activity (except snowmobiling, snow shoeing, ice fishing or anything else the requires temperatures to be freezing or below). We reached a high temp of 70 degrees Fahrenheit (21 Celsius), the sky was mostly clear and there was little if any wind.

IMG_5851 (2)

We were surrounded by beautiful fall colors.

IMG_5849 (2)

The chickens were happily doing what chickens do.

IMG_5857 (2)

Our activity of choice was planting garlic, or playing in the dirt as we prefer to call it. This year planting did not take nearly as long as it has in the past, mostly because of the small amount that we had to plant. If you are a regular reader you probably remember that our harvest this year was much smaller than we had hoped, and that we had fewer bulbs that would be large enough to use as seed. We ended up with between 450 and 500 cloves planted. Much less than we have planted in years past.

A couple other things made our task easier. We try to rotate our crops at least every two years so this year we planted in a new location. We have not used this area for gardening in the past, but when my husband tilled the soil it was a moist loam which made pushing the cloves into the ground very easy. If the soil is too wet or too dry planting can be more difficult.

IMG_5844 (2)

The other thing that made for light(er) work was this weed guard mat that we used. The mat is made from a heavy biodegradable, organic paper. It is pre-scored so that we could simply punch out the hole while pushing our garlic clove into the ground.

In past years we have not used the weed guard because we were concerned the mat would shift and the garlic sprouts would not be able to find their way through the holes.

IMG_5848

To hold the mat in place my husband was able to get these broken or damaged paving stones from his landscaping job. While they might not have been suitable for building walkways or patios they were perfect for our needs. Remember One Man’s Trash Is Another Man’s Treasure.

Once we had the weed guard rolled out we were able to get the planting done much quicker than in past years when we have used 4×8 sheets of lattice for our planting grid.

After we planted all of the garlic we put a temporary fence around it as an added protection, because while the paver stones may keep the wind from blowing the weed guard they may not hold up as well against deer running across it.

Ideally the weed guard will serve to keep the weeds down and help the soil retain moisture, lessening the time and effort that we will have to spend watering and weeding next spring and summer.

So with a “WOO HOO” (I always say that when we finish planting garlic) and a prayer of thanks our 2020 garlic season is under way.

Thanks for visiting.


Fields Of Gold

Perhaps even more valuable than that infamous pot of gold at the end of a rainbow that we all dream of, is the goldenrod that fills the field to the east of our property. Several weeks back (when I started this post) it was in full bloom.

IMG_5758 (2)

Goldenrod Gets A Bad Rap

Before I share with you the virtues of goldenrod I need to clear up a potential misconception. Many people have fall allergies and goldenrod often gets blamed for causing them when it is, in fact, ragweed that is likely the offending party.

I tried to take some pictures of ragweed to show you the difference but found that rag weed is difficult to photograph where it grows.

IMG_5763

It tends to blend right in with everything surrounding it, so I pulled one out of the ground to get a closer look.

IMG_5764 (2)
Ragweed


IMG_5767 (2)
Ragweed

That fact that golden rod grows tall and blossoms into very showy flowers, while rag weed hides amongst it’s surroundings, probably contributes to goldenrod getting the bad rap.

It is my understanding that goldenrod producesΒ  pollen that is very sticky, thus it does not blow in the wind but requires insects for pollination. Ragweed on the other hand produces pollen that is very light and easily carried by the wind where we unknowingly inhale it causing us to be just plain miserable.

What Makes Goldenrod So Special?

Goldenrod has been on my list of things to blog about for a while now, because since we have been raising bees it has be our observation that it is highly foraged by honey bees. A couple of the things that make this plant so valuable to the bees is that it is both high in nectar and pollen, and that it blossoms in late summer and early fall, a time when many of the plants that provide food for the pollinators are finished blossoming.

An interesting thing that we have noticed is that when the bees are foraging in the goldenrod, and turning it into honey, the honey takes on a strong smell. While standing or walking within 20 feet or more from the hive(s) we can smell honey. This is the only time of year that the smell of honey radiates from the hives.

It was an incredible phenomenon that my husband and I observed that finally spurred me to find out more about goldenrod and write this post. It was a sunny Saturday several weeks ago when the goldenrod was in full bloom like in the photo above. We arrived at that farm and as I began my walk around our back field I noticed that the field to the east of us was full of butterflies. They were flitting and fluttering amongst and above the goldenrod and other plants growing in the field. (Wouldn’t it be more appropriate if the were called flutter-bys instead of butterflies? πŸ™‚ ) I couldn’t even guess how many there were – way too many to count. I mentioned it to my husband and we agreed that neither of us had ever seen so many butterflies in one spot. Many of them were the small white and yellow varieties that frequent our farm (I haven’t studied them enough to learn their names). A large majority were also Monarchs. We see many types of butterflies on our farm as they are attracted to the many wild flowers, garden plants and we often see them drinking on our beach, but we have never seen so many as on this particular day.

Thus I decided to do some detective work (which means an internet search of course) to see what may be the cause of this wonderous display. I found that in the same ways that goldenrod serves the bees it also serves the butterflies. I learned that goldenrod is a great source of food for migrating butterflies. We were likely witnessing part of the monarch butterfly migration to Mexico. This article explains thatΒ  A large number of wildflowers are needed so the Monarchs can store nectar in a part of their body called the lipid mass. This carries them through the long winter. Many die if the wildflowers are not plentiful due to heat or drought.Β Another article claimed that Pollinators will come from miles around to visit these nectar and pollen filled jewels, while referring to goldenrod.

What’s good for the pollinators is good for the people.

You are likely aware that many of the foods that we grow are dependent on insects for pollination making pollinators an essential part of our food production, but goldenrod can be of aid to humans in an even more direct manner. Goldenrod is used in herbal or natural medicine for many of the things that ail us. According to this link it is used topically for wound healing, muscle pain and arthritis. As a tea or tincture it has more antioxidants than green tea, some which make it beneficial for fighting free radicals and can even be good for the cardiovascular system, and ironically goldenrod can help relieve symptoms of seasonal allergies.

Lastly, while I’m singing it’s praises, I will also mention that goldenrod can be used to dye fabric. While this is something I have not tried (yet) I found someone who has. You can read about it here.

Does The World Need More Goldenrod?

It has been my observation that in our area goldenrod mostly grows wild along ditches or woodlines. Fields like the one in the photo above are not very common as most large parcels are either used for agriculture (either growing crops or grazing animals) or are residential lots where homeowners have planted grass which is mowed regularly during the warm months.Β  In those areas goldenrod doesn’t have a chance.

I have never heard of anyone planting goldrod. I have never seen goldenrod seed for sale and when we purchased a wild flower seed mix goldenrod was not included in the mix. With it being such a valuable plants I wonder why?

This year we noticed that while our own back field is filled with various pollinator friendly plants, there was only smatterings of goldenrod. We hope to change that. A couple of weeks ago my husband tilled a strip across the field and when we noticed the goldenrod going to seed we began harvesting seed heads and spreading them in the tilled soil. It is our hope some of the seeds will sprout and eventually goldenrod will spread throughout our field so we too will have a field of gold.

Do you have goldenrod growing where you live?