While the calendar says winter is still nearly three weeks away, some reports say that winter may not wait that long to rear it’s ugly head. http://www.climatedepot.com/2016/11/30/climatologist-dr-roger-pielke-sr-i-cannot-recall-last-time-i-have-seen-such-a-cold-anomaly-forecast-across-almost-entire-usa/
Whether you dread the cold, snowy weather that winter brings, or say “bring it on” and are ready to play in the snow; whether you are ready or not here it comes. I personally prefer to be ready.
One of our greatest threats during the winter is a power outage. There is much information out there about how to be ready to survive a power outage and if you are not sure that you are ready for such an event you might want to check out these websites. http://www.theorganicprepper.ca/getting-started-prepping-for-a-two-week-power-outage-06292013-09282014
http://www.backdoorsurvival.com/prepping-for-an-unexpected-power-outage/
I’d like to offer just one suggestion that might make your life during a power outage easier and safer. Have flashlights ready. When I say flashlight, if you think “I have a flashlight – somewhere,” if you have to search for a flashlight when you need it, if you don’t know immediately where to reach for one, or if there is not one within about 5-10 steps from where you are at any given time, then you do not have your flashlight(s) ready.
Lets face it, during the winter the hours of darkness are greater than the hours of daylight, so chances are greater that the power will go out when it is already dark. When you are left in the dark a flashlight is your first line of defense. With flashlight in hand you can then go on to activate your other systems for providing light like lighting candles or oil lamps, or starting a generator .
My advice is to have at least one flashlight in every room. Place flashlights where you spend a lot of time and can naturally reach for them. In our case flashlights are located on a shelf near the main entrance of our home, on my bedside table, in the living room on the entertainment center and one in the drawer of the table between our recliners, and on the kitchen counter. I also carry a small flashlight in my purse and my husband wears one attached to his belt. When the kids were at home I gave them each a flashlight for their bedroom. They were told to put it somewhere in their room where they would automatically know where to reach for it if the power went out. It was to be kept in that spot and if they used it for something it needed to be returned to that spot. They knew the importance of having the flashlight at the ready.
With 100’s or perhaps thousands of types of flashlights on the market you may ask “what is the best flashlight?” If you want good quality, long lasting, bright light, or other such features I suggest you do some research and read some customer reviews. My answer, in this case, is simple, “one that works”. I do suggest that you check your flashlights periodically to make sure that they work, and while having extra batteries on hand is important, having another (working) flashlight near by is just as important. Another thing is to make sure that you know how to use the flashlight. This might sound silly but I have discovered over the past few years that not all flashlights can be turned on and off with a simple slide or click of the button. Figuring out how or where to twist a flashlight to get it to turn on can be tricky. I have actually taken battery covers and light covers off while twisting a flashlight trying to turn it on. So do become familiar with how to use the flashlight before you really need to use it.
Speaking from a previous experience I have one final thought on what type of flashlight(s) to have. It was an evening several years ago when my daughter and I were home and the power went out. We each grabbed flashlights near by and met in the kitchen. I then lit an oil lamp and got a fire going in the fire place. The next thing on my list was to bring in more firewood. I knew that carrying a flashlight and a bin full of firewood was not going to work. I was thankful that I had a headlamp flashlight. I used it to light my path while having my hands free to carry firewood. I realize I could have had my daughter hold a light for me that time, but if I had been home alone that would not have been the case. I don’t use my headlamp very often, but I do consider it a wise investment and I keep it ready for when I need it.
While you may find my advice extreme or think it is totally unnecessary to have that many flashlights sitting around, it is too late to change your mind when you are tripping over the cat, walking into furniture, or falling down the stairs while trying to find your flashlight in the dark.
Whatever this upcoming season brings your way, I do hope you are ready.


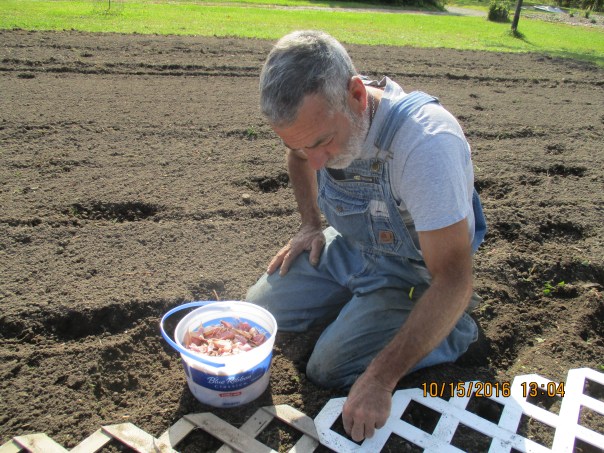
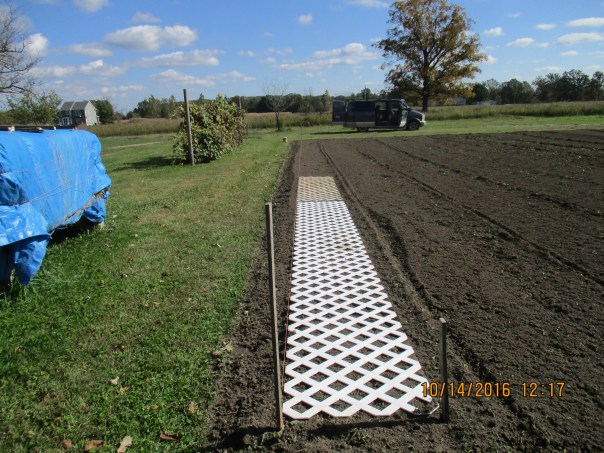 In past years we have used one 8×2 foot piece of lattice to make our four rows. We plant in the rows that had four spaces across this gives us 64 cloves in the ground and then we pick up the lattice and place it in the next (8×2 foot) space in the row. This year we purchased 2 more 8×2 foot pieces of lattice. We placed them end to end in the row and were able to plant 192 cloves before getting up to move the lattice. We found that each row would accommodate eight, 8 foot, lengths of lattice, so our 64 feet long rows contain 512 garlic plants.