All posts by ruthsoaper

Pulling Out All The Stops or Pots

What a busy few weeks we have had. Among the many things we have been doing (some of which will become future blog posts) we have been harvesting and preserving a very bountiful tomato crop. IMG_1751

IMG_1752

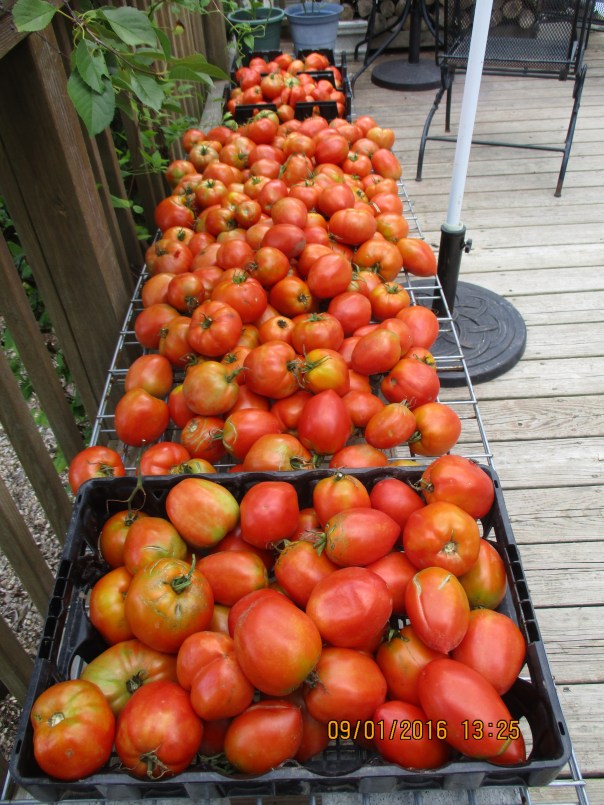
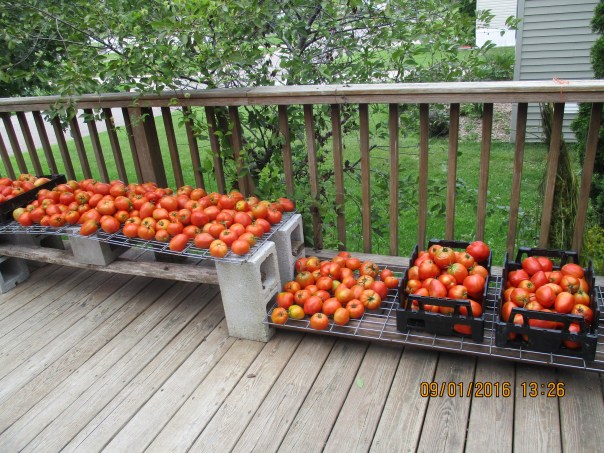
At this point I’d estimate that my husband has harvested between 600 and 700 pounds of tomatoes. Our main goal is in growing tomatoes is preserve enough to get us through the year, with excess being offered to family and friends. This years crop has more than exceeded our goal.

Now when I say preserving I don’t just mean canning tomatoes or making juice. Our tomatoes get turned into tomato sauce and then combined with (mostly homegrown) herbs to make spaghetti sauce. This is what we use, so this is what I make. Turning tomatoes into sauce takes a lot longer than canning whole tomatoes or juice. The tomatoes have been coming in so fast that I haven’t been able to keep up, so I have cut up a lot of them and froze them in gallon bags. They will be turned into sauce at a later date. I have also froze some of the tomato sauce and saved it until I have enough to fill up my seven quart canner.

I have a couple of people ask me about making sauce, so while I am no expert, I will share some things I have learned about making tomato sauce.

First of all it is best to start with a meaty tomato. The Amish paste tomatoes that we have been growing for a couple of years are a great variety for making sauce, as they are a large tomato and have more pulp inside than juice.

Next there are many ways of separating the skins and seeds from the rest of the tomato. In the past I have attempted removing seeds by cutting them out, blanching tomatoes to remove skins then blending tomatoes in the blender and leaving seeds in, and using a $20 food mill that I bought at a big box store. None of these methods are wrong, but the easiest way I have found is to use this tomato juicer that was given to me by my father-in-law. While it is an old piece of equipment, it is a good one.

IMG_1688

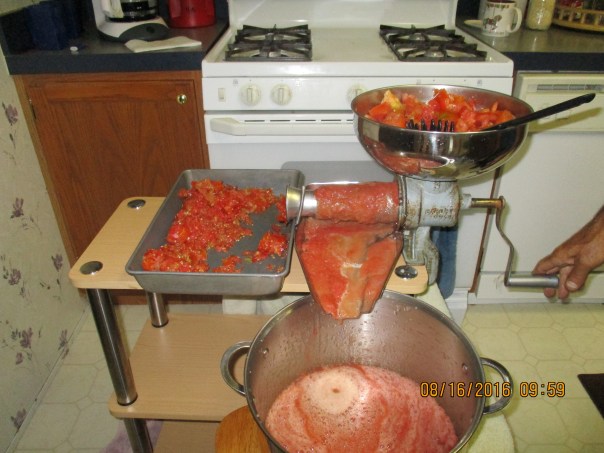
I discover that our (modern) counter tops would not accommodate the clamp that this (old) piece of equipment uses to secure it in place. Fortunately I had a small shelf that would work. When I use the juicer I remove the core of the tomato, then cut them in fairly small (1-2″) pieces. I fill the bowl, or hopper, on the top and as I turn the crank the pieces feed down inside where the juice and pulp are squeezed out. I have my largest kettle placed below the tray to catch the goodies. The skin and seeds continue out the end and will be enjoyed later by the chickens. Usually I stop when I run out of tomatoes or I fill up this (14 quart I think) kettle.

IMG_1799

Sunday, in an effort to get more done, I decided to pull out all the stops, or should I say pull out all the pots, and cook as much as I could at one time. The goal in making a nice sauce is to cook the water out of it. I have found that to get a thick sauce I have to reduce the amount in the pan by nearly 2/3rds. So if I start with 12 quarts of juice I will end up with 4 quarts of sauce. This is a long process and takes patience. I start with the heat up on a medium-high setting but as the water cooks off I gradually reduce the heat since it is more likely to scorch when it is thicker.

Fortunately once the sauce is cooking it does not need constant attention, so while I would not leave home with it cooking on the stove, I can still accomplish other things while the sauce is cooking. The sauce needs to be stirred every once in a while and this is how I measure it’s progress. Before I stir it I look at the top to observe the top layer. It will look like water. If this layer is more than 1/4 inch I will probably keep cooking. Then as I stir I observe how thick the sauce is. Judging when the sauce is done is really about personal preference. If you like a thinner sauce that will be absorbed into undercooked pasta or rice then reducing the sauce by just over 1/2 the amount you begin with might be more appropriate, but to get a thick sauce that will sit on top of a pile of pasta you will probably need to reduce it to 1/3 of what you start with.

One thing to be aware of is that all this cooking with produce a lot of heat and steam, so on a cool day cooking up the sauce might help heat up the house, but on a hot summer day it can turn the place into a sauna. Making tomato sauce with the air conditioning on just doesn’t happen at our house.

Beyond the necessity of having the room to cook up all the sauce, pulling out all the pots taught me something.  While the big kettle took over seven hours to cook down to my satisfaction, each of the smaller pots took only 3 1/2 hours. So doing several small batches at the same time is a major time saver.

Once the sauce is done there are several things to do with it. It can be used immediately in any recipe; it can be refrigerated for a couple of days to use in recipes; it can be frozen (make sure you leave room for expansion in the freezer container); or it can be canned. I’m not going to give the instructions for canning, but instead I will refer you to ball canning website since their recipes and instructions have been safety tested. http://www.freshpreserving.com/basic-tomato-sauce—ball-auto-canner-recipes-br1402.html


A Wise Use Of Resources

Summer is flying by. I can’t believe that it has been a month since I have posted anything but anyone who knows anything about farming can probably figure out that this is a very busy time of year for us. While the gardens are doing well it has taken much watering to keep them alive.

Although the drought monitor listed us as only abnormally dry, for people like us who are trying to keep crops alive it seemed extremely dry. We had a least 3 weeks, maybe even 4 weeks, straight where no rain fell on our farm. Even the days when scattered showers were in the area they went around us to the north, they went around us to the south, or they simply broke apart before the reached us.

My husband spent countless hours watering the gardens. At first our system at the farm https://donteatitsoap.com/2016/06/05/our-off-grid-irrigation-system/   was sufficient. Eventually  some of the plants got too large for individual watering to be feasible, and there were days when the windmill didn’t keep up. He began hauling additional water in barrels in the back of his truck. The barrels are fitted with spigots near the bottom so a hose can be attached and gravity makes the water flow through the hose, but since there was no way to get the hose to every squash and corn plant I saw my husband using five gallon buckets to throw water on the field in an effort to get some water to whatever plants he could. As we prayed daily for rain, the weather forecasts offered little hope, and the task of watering became arduous. My husband was exhausted, frustrated and depressed.

I truly believe that God answers all prayer, and while He doesn’t always give us want we want, He gives us what we need. As my husband expressed his frustration, I continued to pray for rain and wished there was something I could say or do to make things better. Then one morning I was sitting on our deck and noticing that the house needs to be power washed. I got this really crazy idea. Is it possible that that power washer could be operated by hose attached to the barrels on the back of the truck? Would it operate by being gravity fed? If so he could use it to spray water the gardens. “That’s insane” I thought, but it would make things easier. For a couple of hours I argued about it in my mind, before I finally decided to let my husband know that his wife had lost her mind.  I think I started by saying “I have a crazy idea.” As soon as I said it,  he said, “power washer?” Ok, maybe I’m not so crazy. We discussed the idea and decided it was worth a try.

After we returned from grocery shopping he got the power washer out of the shed. It started on the first pull. He hooked it up to one of the barrels, and yes, it worked as we hoped it would. Within an hour he was at the farm delivering more precious, life sustaining water to the foods that will sustain us. That evening I did some of the watering as well. I have to say that I was impressed at how well this worked. It saved time, it saved (our) energy, and we could get the water where it was needed.

Call it a wise use of resources, or maybe it was innovation born out of desperation. While both phrases are fitting I prefer to say, “Thank you God, for giving us what we need”.

For the next 4 days my husband continued to “power water”, delivering enough water to keep things alive. We also continued to pray for rain. On Thursday, August 11 the glorious, life giving rains came. It was a happy time to say the least, not only for my husband and I; but for the lawns as the brown began to turn green again; for the squash plants as, their wilting leaves perked up; for the green beans which had stopped making beans, as they began to blossom again; and even for new life as late plantings of carrots and green beans began to sprout. It was a happy time as (our piece of) the earth was revived. In the past week we have had rain on a regular basis, and while we are still not at levels of what would be considered normal for our area, we thank God for every drop that falls.


A Berry Good Year

Strawberries aren’t the only berry that we have an abundance of this year. Home grown cherries, blueberries, and currants have also found their way into our diets.

Although our cherry tree suffered quite a large fruit drop, and we split the crop about 50/50 with the robins in the neighborhood, I was able to harvest enough to make a cherry crisp and today’s dessert, a cherry pie.

Once our blueberries started to ripen they were disappearing faster than we could pick them. The robins have an advantage of being able to sit on the fence and wait until each berry turns just the right shade and then pluck it from their stem and enjoy it as a meal. We on the other hand show up once a day to pick whatever berries might be ripe, then save them in the refrigerator or freezer until we have enough for a meal. Thus we decided early on that netting the bushes would be necessary if we wanted to harvest any blueberries.

IMG_1517

My husband pulled out this roll of netting that he found in somebodies trash a couple years ago. Last year we were happy to have this stored away, when we found it necessary to net the entire squash bed to save them from the deer. We have since fenced in the field gardens, so the deer eating squash, pumpkins, corn, etc. is not a concern. Cutting up the netting to protect our blueberries was a no-brainer.

The blueberry bushes are small enough that we could drape the netting over the whole bush.

IMG_1518

Even as I wrapped the bushes these thieving little robins attempted to steal our bounty.  Although it appears that this bird is trapped under the net, it is really sitting on the outside on the opposite side of the bush. IMG_1523

Since netting the bushes, we have picked and frozen nearly 4 quarts of blueberries and they are still coming on. There will be blueberry pancakes this year.

IMG_1556

Unlike the robins that seemed to be deterred by the netting, there are a couple of these little birds that keep going at it. They are pretty clever, as they can find a small opening and are not afraid to go in under the net. I’m not sure what type of bird it is but I think it looks like a female Orchard Oriole. http://identify.whatbird.com/obj/564/_/Orchard_Oriole.aspx

You might not think of a couple quarts of cherries or blueberries as being an abundance but where the term really applies is currants.

IMG_1512


Right now we have two red and one white currant bushes that we are harvesting. We have harvested an estimated 12-15 lbs. Currants are not a very popular fruit in our area and I suspect the following reasons. Currants are very tart. Although they are very productive, they are a chore to pick. They are very seedy, and they are a chore to clean.

I also think that people are unaware of the nutrition they offer, http://www.livestrong.com/article/444249-what-are-the-benefits-of-red-currant/    most notable their vitamin C content, and I think that people don’t know what to do with them.

IMG_1554
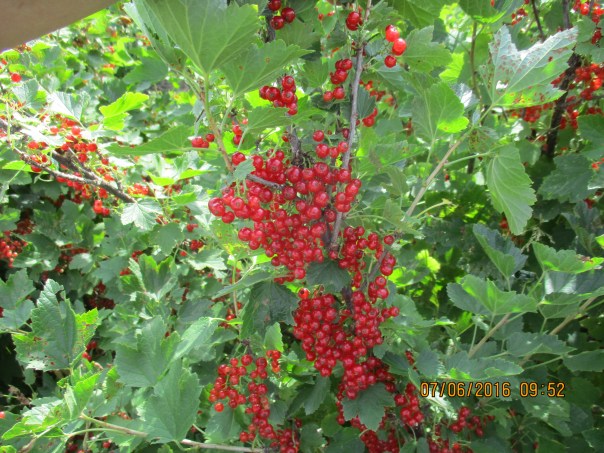
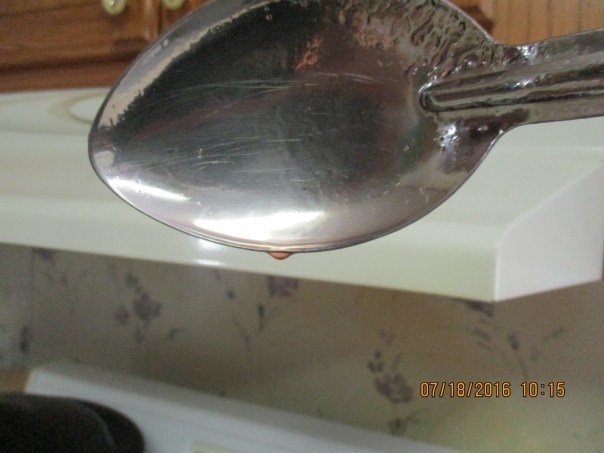
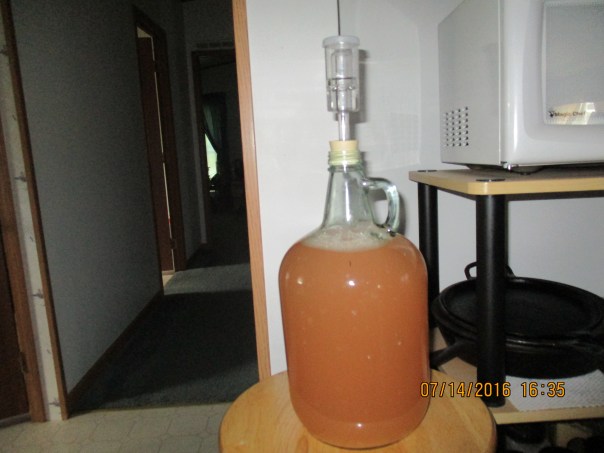
Since the currant wine I made last year was a hit, I started with making wine with white currants and strawberries.

I then made juice with the rest of the white currants and put it in the freezer. I have  also been making juice with the red currants that we have picked, but rather than cook the currants before mashing and straining the juice, I put the raw currants in my Nutri-bullet, blended them up, then strained them. (the chickens love the remaining seeds and pulp) I did this because heat kills the precious vitamin C. I sweeten this juice with honey and we have been enjoying this with our breakfast.

I also made a batch of currant jelly.

IMG_1555

Currants have enough pectin that it is not necessary to add any when making jelly. I ended up with 5 1/2 pints (or so I thought). When you make jelly, that does not require pectin added, testing the jelly for doneness can be tricky. Using a candy thermometer is not an accurate measure, as I found out. 24 hours after I made this jelly it still had not set up. I let it boil for quite a while after it reached 220 F  on the thermometer because it did not appear to be sheeting on the spoon yet, but I was also afraid of it burning.

So a few days later I poured all of the (almost) jelly back in the pan and cooked it down some more. This time I left the candy thermometer in the drawer and decided to use the spoon test, and watch for the jelly to “sheet” off the spoon.

IMG_1600

After I got it to a boil I started doing the spoon test. It was coming off the spoon it drops.

IMG_1607

As it boiled it became thicker and darker in color. It was still dropping from the spoon and I was still concerned about it burning or getting too sticky. So I was continually raising the spoon and letting it drop off. Doing this with my right hand and trying to snap pictures with my left (just as it was dropping from the spoon) was a bit of a challenge.

IMG_1623

At this point the drops were getting wider, more “sheet-like” so I let it go for a couple more minutes and then decided it was ready. I put it into jars, put the lids and rings on and gave it a 5 minute water bath.

IMG_1628

I ended up with 4 pints. After 24 hours they were much more jelly-like. I do think they could have cooked even longer though. I guess I should have follow the advice of one of the blogs I read that said,” when you think it’s ready, keep cooking it.”

I have certainly learned that there it an art to making jelly. I say “Kudos” to anyone who has mastered it, and while our jelly slides off  our PB&J sandwiches this year I will affirm my vow to get it better next year.


Garlic Braids

IMG_1631

I have decided to make some of the Red Toch garlic into braids. I can do the same with S&H Silver when it is ready. I have made a few with 10 bulbs but can do them in different sizes. If you are interested in a garlic braid send me an email at ruth20012001@yahoo.com (put “Garlic” in the subject line) and let me know what size and variety you would like and we can figure out how best for you to get it.