This afternoon as we were driving back from the farm we saw two deer run across the road. Fortunately they were far enough ahead of us that we didn’t have to slow down, but my husband said, “When you talk to the girls remind them that it is rutting season”.
The girls have heard this term before as every year since they have been driving we give them the warning. Rutting or mating season means an increase in deer activity. The deer are often running at full speed, a male chasing a female, and have no awareness of, or regard for, traffic in the area. So when we tell the girls that it is rutting season we warn them to be extra carful when driving.
What should they do to be extra careful?
Focus on driving. Do not allow yourself to become distracted by passengers, eating, cell phones or anything…
It seems that October just flew by. There are several things that I intended to write about but just didn’t get the posts finished, so I decided condense them into this not-so-short but sweet post.
Little by little my blog is acquiring new readers, so I want to start by welcoming newcomers to my blog. Feel free to look around and explore previous posts. Please leave me a comment if you find something you like or just to let me know you were here. I always enjoy hearing from readers.
October 2018 Highlights
The Garlic Is Planted!
October is the month for planting garlic in Michigan. The objective is to plant the garlic 4-6 weeks before the ground freezes in order to give the garlic time to establish roots. If you would like to more about our garlic planting process you can check out these two posts from our 2016-2017 growing season.
This year our wet weather and mostly below normal temperatures in October made for less than ideal planting conditions. We watched the weather forecasts for our best opportunity and the week beginning October 21st, with several dry days predicted, seemed to be it.
Early that week my husband began preparing the garlic for planting (separating the bulbs into cloves). We, but mostly he, worked on this on Monday, Tuesday and Wednesday while we gave the ground time to dry out. By Thursday we could wait no longer – the garlic had to be planted because there was rain in the forecast beginning late Friday.
Despite the ground not being as dry as we hoped, Thursday morning my husband got an early start and planted garlic until nearly dark. For several reason we decided to use a divide and conquer approach so while I attended to other projects my husband worked diligently in the garlic field. Friday morning he again got an early start. When I took the boys (dogs) to the farm for their midday walk he asked if I had checked the radar. Not having done so I couldn’t offer him any idea how long it would be before the rains came. It was late afternoon when he called me. “I just got the last clove planted he said – then the first raindrop fell.” “God is good!” we agreed.
Coincidently, or perhaps by God’s design, we ended up planting during the full moon. We have talked about experimenting with planting by the phases of the moon in past years, but weather and soil conditions have always been more of a priority.
We did scale back on our garlic planting this year. We still planted enough to meet the demands of the markets we currently supply and have seed for the following year. We hope in scaling back on garlic we can put more time and effort into areas where we have not been able to meet demands, namely honey and strawberries.
An Apple A Day
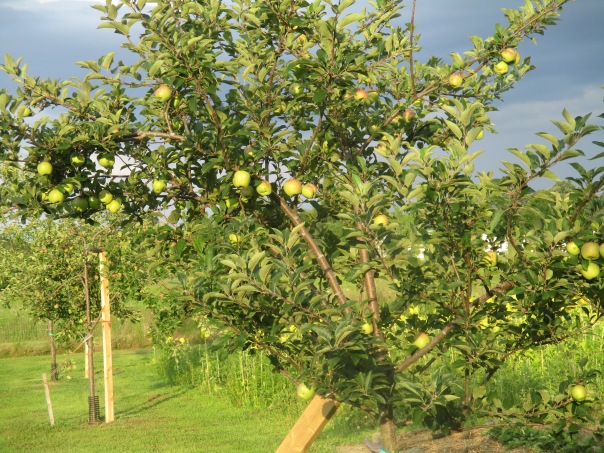
This year we had our best apple crop thus far. While not all of our eight trees produced well, two trees produced more than their fair share. The branches on these young trees were so heavily laden with apples that my husband built posts to brace the branches so they did not break due to their heavy load.
We harvested 4 milk crates nearly full (we didn’t weigh them). Here’s what I’ve done with them –
Apple Sauce – I’ve canned 22 pints of apple sauce.
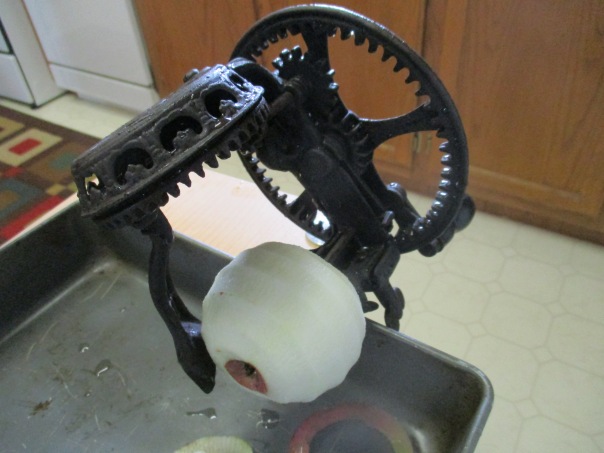
Apple Peeler
When I told my sister I was making apple sauce she asked if I had an apple peeler/corer/ slicer. I laughed and said “Yep, it’s called a paring knife.” LOL. Then as I started peeling all those apples I remembered this antique that I had tucked away on a shelf and had never used. I decided why not give it a try.
One of the problems I have with this and some similar kitchen tools that I have is that they are designed to clamp onto a counter. My kitchen counters were not designed for such uses as they have about a two inch lip that the clamp will not fit over. To accommodate these tools I use a stand alone shelf, but since I don’t often use these tools that shelf is also used to store things. I first had to clear off the shelf and move it to an accessible area. I rinsed the dust off the old apple peeler then clamped it to the shelf. I placed an apple on the prongs of the peeler and began turning the crank. As I turned the crank the blade removed a thin layer of peel from the nice round apple. When it got to the end the apple was pushed off the prongs and popped into the pan I had placed on the shelf to catch the peels. The second apple I tried was not perfectly round and the blade did not touch the flatter areas, so it left strips of peel behind. Considering this, and that I still had to use the paring knife to core and slice the apples, I cleaned up this antique and put it back and the shelf. Lesson learned: My paring knife seemed the better way to go.
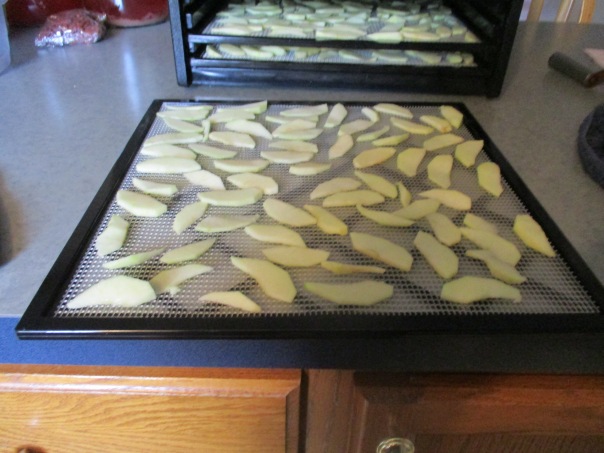
Apple Chips – Last year, when we had our first decent apple crop, was the first time I made apple chips (dehydrated apples). We discovered that apple chips make a wonderful snack.
This year I have filled up my 9 tray dehydrator twice. Each tray holds 3-4 apples and it takes about 20 hours to dehydrate them. When they are finished I store them in small sealable bags usually putting one tray (about three or four servings) per bag. When eating apple chips it is important to consider portion size because they are so good it would be easy to eat too many. It is also important to drink lots of water because they still contain lots of fiber.
Apple Vinegar – This is something I have been reading about and wanting to try for a while. I have seen recipes posted on several blogs and had bookmarked Home and Harrowto return to when I was ready. My vinegar is still fermenting so I’ll let you know how it turns out in a future post.
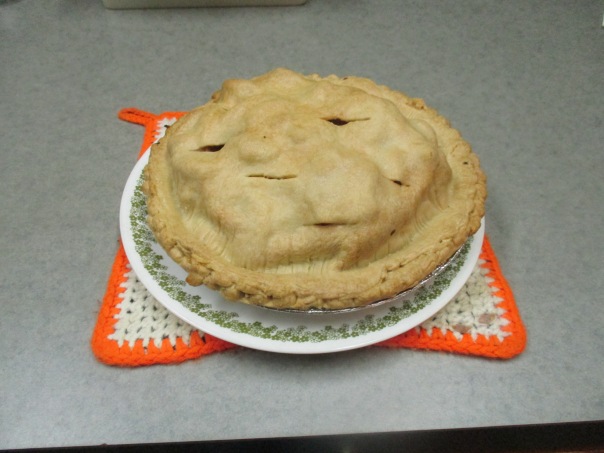
Apple Pie – Yesterday I made our third apple pie from this crop. There is just nothing better than homemade apple pie, except maybe homemade pumpkin pie, or homemade blueberry pie or homemade cherry… well you get the point. It is just so good. I also froze enough pie filling to make six more pies.
–
Coffee Cake – Even with all of that I was still looking for ways to use apples so when I made this coffee cake, which is a recipe that we really enjoy, I decided to add apples. I peeled, cored, and diced three apples and added a layer of apples on top of the streusel in the cake. It turned out fabulous.
I think we are now down to our last 7 or 8 pounds of apples and our plan for those in the next few days is to start a batch of apple wine. Cheers!
Making Soap – You may remember from this post that I consider this time of year soap making season. I haven’t yet come up with any new recipes but I did upgrade a couple of recipes that I have previously made. Perhaps I should add “version 2.0” to their names. :)Let me tell you what I did.
Cocoa Soap– My cocoa soap is made with olive oil and coconut oil as the base oils and coco powder, powdered milk and sugar as additives (just like a cup of hot cocoa might be made). When I first decided to make cocoa soap it was really just for fun. I mean how many of you would love to just bathe yourselves in chocolate? or maybe have dreamt about swimming in the chocolate river on Willie Wonka and the Chocolate Factory? Fun eh? According to this article cocoa may actually have some benefits for the skin, but when it is made into soap I am skeptical as to whether any of those benefits remain. It does however make the soap a deep brown color. The milk adds a creaminess and sugar makes for an extra bubbly lather. What more could you want right?
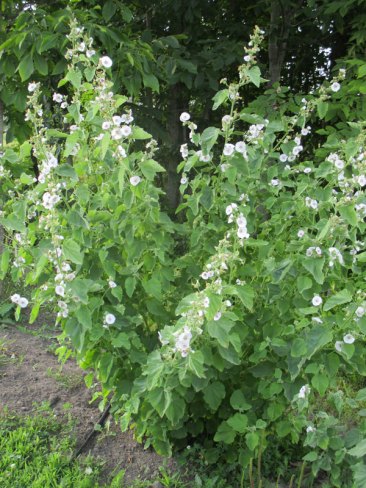
Actually there was one other ingredient that I use in another soap recipe that just needed to go into this soap, because what goes better in a cup of hot cocoa than ——————————marshmallow. In case you are thinking that I have totally lost my mind – no, I don’t use those sweet little sugary puffs that we all know as marshmallows. What I use is marshmallow root from the marshmallow plants that we grow.
I have been using this herb in my hair care soap for several years now. The marshmallow root is said to add conditioning properties. For the past four years I have exclusively used my homemade soaps (usually hair care or coffee) when washing my hair and in all honesty my hair is healthier than it has ever been. Don’t Eat It! Cocoa Soap (2.0 🙂 ) should be finished curing around November 23rd, so we will have to wait to find out how it turns out.
Coconut Soap– Like my Cocoa Soap the base oils used in this soap are olive oil and coconut oil. The additive in this case, however, is shredded coconut. The coconut, while gentle on the skin, adds a little extra scrubbing power. It really is a nice soap, but I decided to make it even nicer this time around by adding yogurt. In the past year I have discovered that adding yogurt to soap gives it a super rich creamy lather and who doesn’t love that?
Incidentally, I once had a lady ask me “Doesn’t the coconut clog up the drain?” and you might be wondering the same thing. The answer is No – nor do the coffee grounds in the coffee soap or the oatmeal in the breakfast bar soap. What does clogs up the drain is hair. Being the mother of 4 daughters, and all of us having long hair at various times in our lives, I can attest to the fact that hair is what clogs drains.
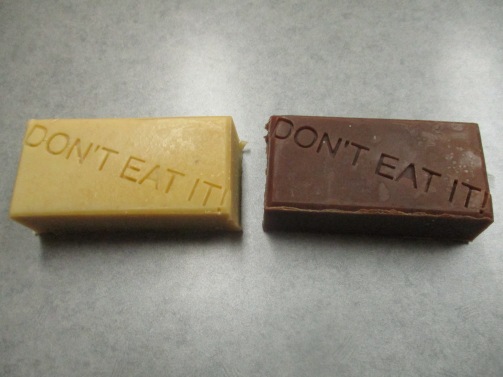
Coconut Soap and Cocoa Soap
I also decided to stamp all the bars of these two batches. What do you think?
With mid-term elections just around the corner I wanted to know ahead of time what all was going to be on my ballot. Through an internet search I discovered these two links that I thought I would share. The first is for the State of Michigan and the second I believe is a national site. With either site I can put in my address and it will show me all of the candidates for each position and all of the issues or proposals that will be on my ballot. (Who knew there are really 6 candidates running for Governor of Michigan?)
I will be doing some studying of these sites before going to the polls next week, and if you are going to cast your vote you might find these sites useful as well.
Planning a party at the farm has always been at gamble – being outdoor parties we have always been at the mercy of the weather and parties need to be planned well in advance of any weather forecast. Mostly our parties have been in the summer and at least 90% of the time the weather has been perfect.
For several years we have talked about doing a Fall/Halloween party with a campfire and walk through the woods that we would decorate and pass out treats for the kids along the way. Several weeks ago we decided this would be the year. The party was planned for October 20th and we started watching the weather forecast 10 days before. It didn’t look promising – chilly, windy, chances of rain – not exactly what we were hoping for.
Early in the week my husband suggested we move the party into the barn. We could decorate inside, put the picnic table inside, use the propane lantern for light and set up a space heater. He would grill the hot dogs outside and keep a campfire going incase anyone wanted to sit by the campfire. I was thrilled that we would not have to cancel the party.
By Wednesday I had finished making my Halloween costume (costumes were optional) so I got busy making some decorations. I first searched the internet for some ideas then I searched my boxes of craft supplies to see what I had on hand that could be turned into Halloween décor. I had tissue paper in black, green, orange, red, blue, yellow and white. I found some Styrofoam balls and pipe cleaners. I also pulled out markers, glue sticks and a hot glue gun, a twist up glue stick, some yarn and ribbon.
We wanted orange and black crepe paper so we made a trip to the dollar store. While there I purchased a black poster board and besides a bag of tootsie pops that would be all that I needed to complete this project.
Below are some of the decorations I made.
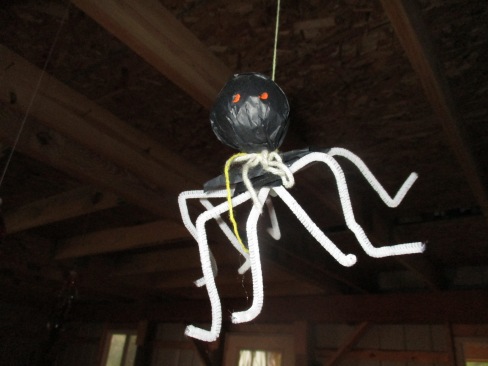
Spiders – I twisted four pipe cleaner together and shaped them. I covered a Styrofoam ball with black tissue paper then tied a piece of yarn around it to hold it in place. I left one long end of yarn to hang the spider from like it was dropping from a web. I used hot glue to glue the head to the legs. I tried using marker to add eyes but it did not show up on the tissue paper, so I found an orange paint pen that worked perfectly.
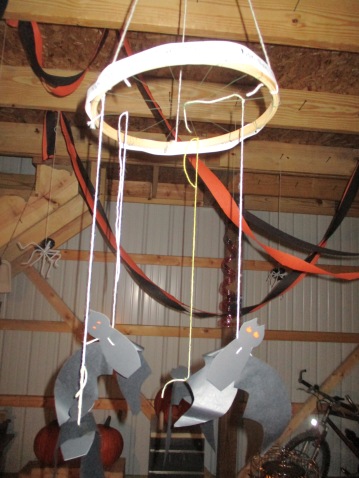
Bats – I cut wings out of black tissue paper and bodies out of black poster board. I used a glue stick to attach the wings to the body then used a sharp tapestry needle to run the sting through the bats body, again leaving a long end to hang it from. My orange paint pen was again used for the eyes.
Do You Know What This Is?
Four of the bats were hung over the center of the table from this ring. The white strip around the ring says “nah nah nah nah nah nah nah nah” all the way around it. All of our guests were asked “Do you know what that is?” Some got it very quickly. Others couldn’t figure it out. If you can’t figure it out keep reading and I will tell you at the end of this post.
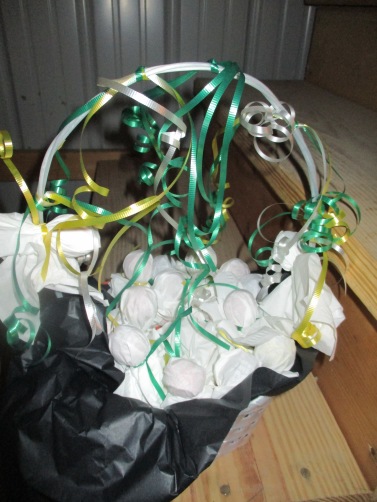
Ghosts – I covered the tootsie pop suckers with Kleenex and tied it with ribbon to make ghosts. Originally I planned to hang the ghosts so I left a long end on the ribbon. When we tried hanging the ghosts I we found that they would only hang upside down because the head (sucker) was so heavy. I decided to put them in a basket since I wanted to give them to guests anyways. I found an old Easter basket and decided that would work. I stuffed it with black and orange tissue paper and so the ghosts would stand in the basket. I cut the long part of the ribbons off each ghost. I then decided to tie them onto the basket handle to make the basket look a little less Eastery.
This basket of boos (LOL) was used as a center piece and guests could help themselves.
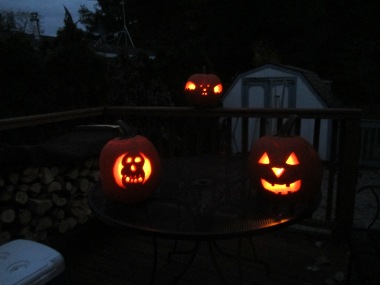
My husband and I usually carve pumpkins together each year even since the kids have moved out. This year was no exception. I started out carving the basic jack-o-lantern because I am really not very artistic but after seeing my husbands skeleton I decided to try to make a bat. I think they all turned out pretty cute.
The Party
Saturday came and the weather was erratic. Sunshine, cloudy, rainy, hail, more sunshine, windy, more rain and it seemed to change from one to the other in a matter of minutes. Despite the weather most of the people we invited showed up.
Below are a few photos from the party.
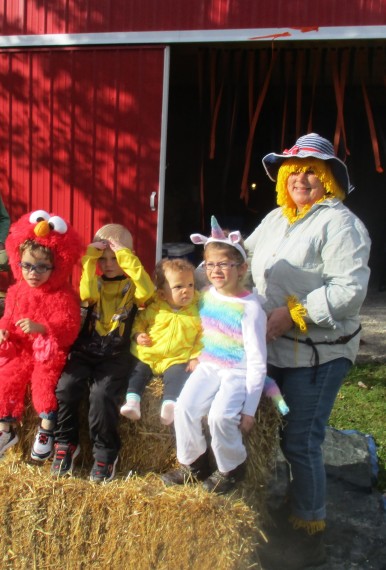
A few guests (mostly the kids) came in costume.
In the above picture our Grandson Jackson is dressed as Elmo. Dressed as Bumblebee (The Transformer) is our Great Nephew – Landon. Our Granddaughter Adeline is dressed as a pineapple but she didn’t like her hood on. Our Great Niece – Kenzie is the unicorn. In case you haven’t guessed I am the scarecrow on the end. 🙂 I think Aunt Donna (our Christmas Elf ) was snapping photos instead of having hers taken.
The straw bales that the kids are sitting on also served as their play ground. My husband had them covered with a tarp during the morning rains and when the sun was out and the kids arrived he set them out for the kids to play on. Each time a rain shower would come up the kids would retreat into the barn and my husband would cover the straw only to uncover it again when the sun came back out.
Elmo and our pineapple with her Momma. 🙂
Our menu was simple – home made potato salad, grilled hot dogs, baked beans, chips and dip, and Aunt Donna’s Monster Cookies served with apple cider to drink. We also uncorked and shared a couple bottles of my father-in-laws wine – a sweet wine he calls Tom’s Blend. It was a big hit.
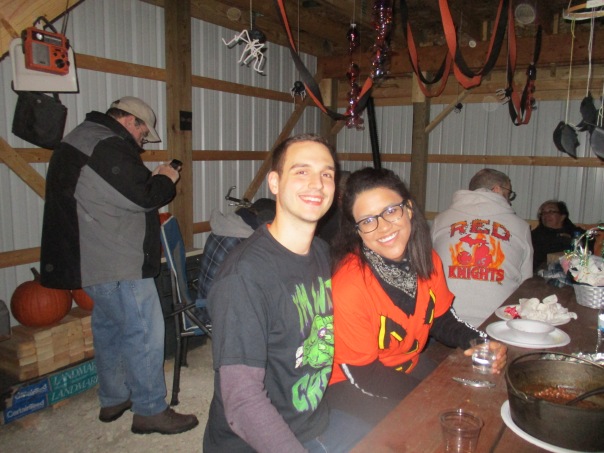
Daughter Lindell and Her Boyfriend Brycen
Talking, laughing, hugging, loving – four generation of family – Aunt Donna, all three of my sisters with all four of our husbands together (that doesn’t happen often) – some of our kids, some of our grand kids, the young ones playing on the straw bales and being excited about the treats we passed out. It wasn’t the food, or the decorations, or the costumes that made it a great party – it was the people and the time we shared together and I am so thankful we didn’t let it rain on our party.
Thanks for visiting and in case you haven’t figured it out – It’s a bat mobile – LOL.