Category Archives: The Farm

A Year In Growing Garlic Part X

We are wrapping up 2016-2017 garlic season and at the same time preparing for the next planting so this will be my final post in this series. I’ll start where I left off. We began harvesting garlic in mid July and although we had stopped watering the garlic two weeks prior to that, as is recommended, the soil was saturated from the rains that finally came.

Though larger garlic producers may have other methods, harvesting garlic for us means digging each individual bulb by hand. My favorite tool for digging garlic is this shovel with a narrow blade, a short shaft and a D-grip. It is a comfortable height for digging the garlic and the long but narrow blade can get close to each bulb and dig deep enough to loosen the soil under the roots. We bought a second, similar shovel this spring so my husband, who did most of the digging, would have one as well.

IMG_1534

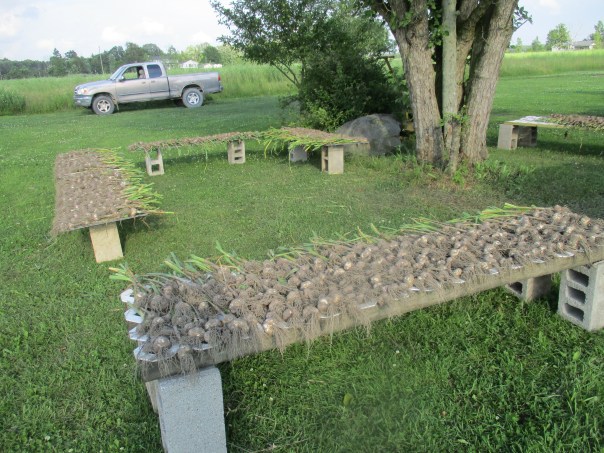
My husband and I started together digging the garlic but before we got our first hundred bulbs out of the ground I needed to shift gears. I began laying the garlic  on racks so that the bulbs were exposed to the air in order for the dirt to dry, while he continued digging.
IMG_3034

When we ran out of room on the racks my husband began tying the garlic in bundles and hanging them from the fence posts. They still had good air exposure this way.

IMG_3035


IMG_3036

and when we needed even more room he set up this system on the trailer hooked to the tractor which he could then park in the shade until we could get to them to brush and bundle them.

IMG_3039

The garlic coming out of the ground this year was very wet as the rains came just when we didn’t want them too. Once the dirt on the bulbs had dried it was time to remove it.

I have discovered that the easiest way to remove the dried dirt clumps from the roots and bulbs by hand is to wear garden gloves and just rub it off the bulb and roots. In the past years I would where cotton gloves and usually ended going through a several pair of them, ending up with hole in the right glove and a left glove that was still intact. (Yes I am right handed.) This year we used leather garden gloves and they held up much better.

After we rubbed off all of the dirt that was loose enough to come off we used twine to tie them into bundles of 10-25 bulbs so they could dry or cure. The garlic needs to cure in a dry, area with good air flow and out of direct sunlight for the next three weeks or so. The large bundles were hung from rafters to dry and smaller bundles were dried of shelves.

Since many factors contribute to how quickly the garlic will cure I would check different varieties, when I needed garlic for a meal, to see how they were coming along. To check them I would snip a bulb from its stem, clip the roots and peel it. When the bulb is cured all of the layers of peel inside should be completely dry and papery.

It was about three and a half weeks after we first began digging the garlic that some of the garlic was cured and I started the final cleaning. The finale cleaning prepares the garlic to be sold or stored. It involves clipping the dried leaves and stems as well as the roots. It also involves removing any dirt that still remains.

If you are growing garlic just for personal use there is really no hurry to do this. In fact leaving the stems and roots intact and even a little dirt on the bulbs, right up to the time you want to use it, will probably prolong the life of the garlic.

These are the tools I prefer to use for clipping and cleaning.

IMG_3291

On our first day of clipping and cleaning I was blessed to have my sister Jamie, and cousin Abby here to help. Abby is a farmer too and is always eager to help out if I say I need a hand, and while Jamie may not claim the title of farmer, she has done her share of farming related activities. Things such as growing her own vegetables and fruits, raising her own chickens and now she can add cleaning garlic to the list.

Working as a team seems much more efficient than each person doing their own pile of bulbs, so I clipped while Jamie and Abby cleaned. We all gabbed and the time flew by. I was even more grateful when they offered to come back to help one day the following week.

When I refer to clipping I am talking about removing both the leaf end of the garlic and the root end from the bulb. At the leaf end I usually cut 1/4 to 1/2 inch above the top of the bulb being carful not to clip the tips of any of the cloves. On the root end I clip as close to the bulb as possible but some of the roots still remain. It is my understanding that any garlic that is imported into the United States must have the entire root plate removed but garlic that is grown in the US can be sold with roots still attached. I am not sure why this is but since it is easier to just clip the roots down that is what we do.

As for the final cleaning we start by brushing each bulb with the scrub brush. Sometimes this is sufficient to remove the dirt and make the bulb look presentable. Sometimes the outer wrapper is dirt stained and one layer needs to be removed. Our goal is to get the bulb as clean as possible while keeping much of the outer wrapper in tact.

While cleaning the bulb I also give them a quick inspection for quality and sort them by size. To inspect the bulb I feel for firmness. Each outer clove should be firm. I also look for bulbs that may have been accidently sliced or dented while being dug and bulbs that do not have the outer wrapper in tact. Any bulb that does not pass inspection is set aside along with the very small bulbs. These will be used in my kitchen or dehydrated for powder. For sorting by size I am first looking for next years seed. Approximately the largest 15% of this years crop will be saved to replant in October.

Since we don’t punch a time clock I really don’t know how many hours my husband and I put into clipping and cleaning the 5000+ bulbs we grew this year, but I can say it was a long and monotonous process and I am thrilled that it is done.

I hope you have enjoyed following us through this year in growing garlic and if you haven’t been following along but would like to find out what you have missed you can find the whole series here https://donteatitsoap.com/a-year-in-growing-garlic/ . If you have any garlic related questions or comments be sure to leave them in the comments section below and I will be happy to respond.

I will conclude this post by responding to some of the things people have said or asked about growing garlic.

Comment: “Garlic is easy to grow.”

My Response: We have had much success in growing garlic but since I have had many people tell me that they tried growing it without success I am not sure that it is so easy. I do agree that given the right planting time, the right weather and soil conditions and the proper TLC garlic is easy to grow, but this seems as if it could apply to most crops.

I do find that people who make this statement are growing garlic only for personal use, and as a garlic farmer I need to add that while each step in the garlic growing process is easy enough that it could be performed by a 10 or 12 year old, growing 1000’s of garlic bulbs becomes both time and labor intensive.

Comment: I didn’t know that there were different kinds of garlic.

Response: I’ve read that there are as many as 600 different varieties.

Comment: I like the ones with the red coloring.

Response: There are many different varieties that have red or purple coloring on the skin. My varieties may be different then ones you have had before.

Question: “Does garlic really keep vampires away?”

My Response: – “I assume that it does since our farm and home are completely vampire free,” or if garlic is present at the time of questioning I say, “look around, do you see any vampires?”

Additional Statement: “No vampires  were harmed in the growing of this garlic.” I guess I just needed to satisfy any potential readers who belong to Vampire Rights Coalitions and such.

Thanks for reading. 🙂

Coming Soon…

This is a busy time of year for us. We are wrapping up our garlic season https://donteatitsoap.com/a-year-in-growing-garlic/ and I will be putting up the final post in that series soon. I have created this page that links to all the posts in that series and added it to the menu at the top of my home page so you can read through them at your leisure.

It is also harvest season and along with harvesting food comes preserving it, so I will be writing several pieces on what we are harvesting and how we are preserving it. Check out the pictures below for a sneak peak at what’s coming up.

I will share how we will enjoy this years apple crop.

IMG_3225

Some different methods for making tomato sauce,

IMG_3268

VS

IMG_1688

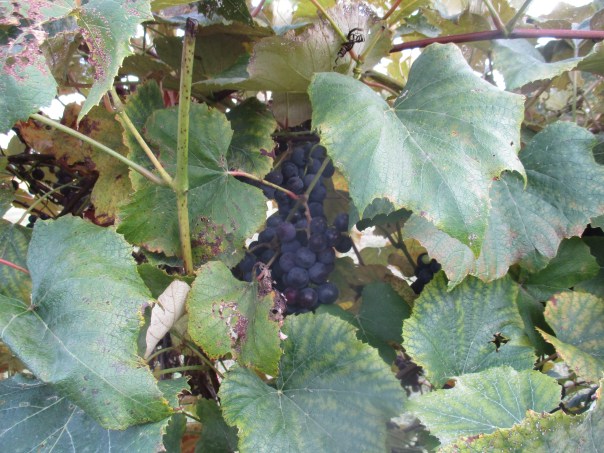
What I am doing with our beautiful grapes this year,

IMG_3270

And a write about wildlife on the farm – friend or foe.

IMG_3283

To make sure you don’t miss out on these or any future posts you can sign up at the bottom of this page to follow along via email and if you like what you read don’t forget to share it with your friends.

Our Harvest Picnic

Sunday we invited friends and family to the farm for a picnic. While many of those invited could not make it for various reasons everyone who came seemed to have a great time.

IMG_3192

My husband added some seasonal decorations to welcome our guests.

IMG_3203

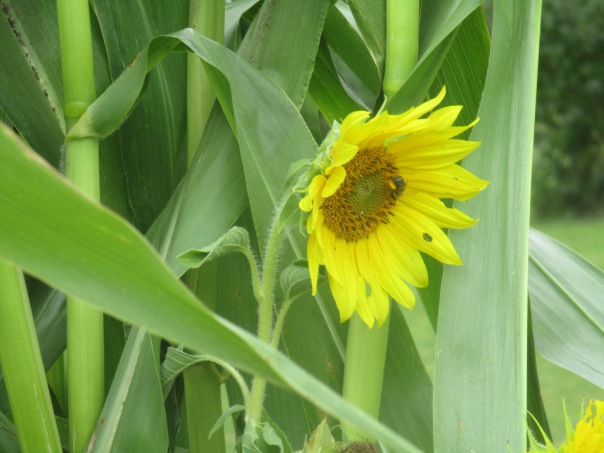
The bees wasted no time finding the sunflowers he picked.


The chickens roaming around, pecking and scratching, added to the ambience.


As summer nears it’s end Black Eyed Susans, Hibiscus and Phlox continue to adorn the farm.

When we host guests this time of year we like to make it a harvest party that includes foods from our garden. Included in yesterdays meal was potato salad – with homegrown potatoes, celery and chives along with our farm fresh eggs; apple crisp – with apples from our trees; pickled garlic scapes  https://donteatitsoap.com/2017/06/15/a-year-in-growing-garlic-part-viii-garlic-scapes/ ; and my garlic and dill chip dip https://donteatitsoap.com/2015/08/14/simple-and-fun-recipes/ . We also had fresh lettuce leaves and sliced tomatoes to top the burgers which were made with locally raised grass fed beef.

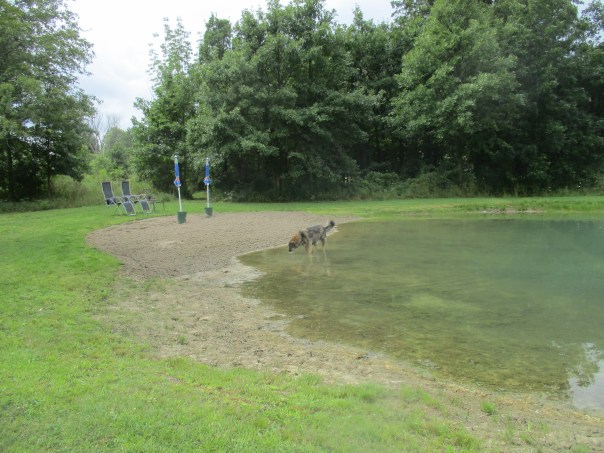
While I took many pictures of the scenery before our guests arrived I somehow forgot to take pictures our guests and the activities they enjoyed.IMG_3200Trooper played in the pond early in the day, but later on some of our young guests enjoyed catching perch in the pond and building sand castles on the beach.
I also neglected to get photos of my brother-in-law flying his remote control airplanes. He brought two planes and was able to use the path which we keep mowed around our back field as a runway. He also brought equipment that enabled him to allow others to participate. It’s called buddy boxing. To really explain buddy boxing you probably need someone who understands technology better than I do, but since I’m the one writing I’ll tell you my simplified understanding of how it works. Two transmitters or controllers are linked together and set to operate the plane. The student’s controller is allowed to operate the plane unless the teacher feels the plane is in trouble at which point the teacher has the ability to override the student’s system and take control of the plane.

I think this is a great way to be able to teach kids, or even adults, who want to learn to fly remote controlled planes without having to worry about damaging the plane or endangering objects, people or pets on the ground. Pete was certainly a great teacher and the kids had a great time flying the planes.

Other activities included greeting everyone with hugs, catching up with friends and family, most of whom we haven’t seen in a year or more, my husband gave garden tours and showed off the huge, mammoth sunflower which came up as a volunteer this year. “If it’s not the biggest sunflower you’ve ever seen I’ll give your money back,” he told people. Maybe he should have charged because everyone agreed that it was the biggest they had ever seen.

IMG_3216

While it wasn’t a homegrown water melon, it was among the produce that our grandson (and future farmer) Jackson, enjoyed. He also got excited about watching the chickens eat corn on the cob.

Some guests left with garlic and some with honey and several left with regrets about having to leave so early and hopes of returning soon. It was a great day filled with friends, family, food and love and we are grateful for all those who visited.

Unfortunately we were so busy and having such a great time that we forgot to hold one of our planned events. The rock picking contest. Participants were to be given a milk crate, shown to one of two areas that have been plowed this summer and told fill their crate with as many rocks as possible.  Cash prizes were to be awarded. Oh well guess we will be picking up rocks this week. 😉

Okay, I’m just kidding about the rock picking contest, but we will be picking up rocks this week. Have a great day.


Gone Fishing

Recently we have been spending some of our evenings fishing in our pond. When we stocked the pond we wanted fish that were good for eating, so we chose catfish, perch and walleye. We also put in a few pike and lots of fathead minnows.

When we tell people that we have perch and walleye in our pond we get mixed reactions. Those, like me, who know little about fishing and fish habitat take us at our word. They have a simple “that’s nice” attitude about it, but it is not a big deal. More seasoned fishermen, however, have one of two reactions. Some are extremely interested in how we have accomplished this. They begin asking questions like how deep is the pond (20+ feet), what kind of structure have we put in it (piles of rocks), we talk about using the windmill for aeration and the sandy bottom in the beach area that provides habitat for perch to lay eggs. Other knowledgeable fishermen don’t believe us. “No Way!” is their reply when we say we have perch and walleye in the pond. It is their belief that ponds like our only support bass and blue gill.

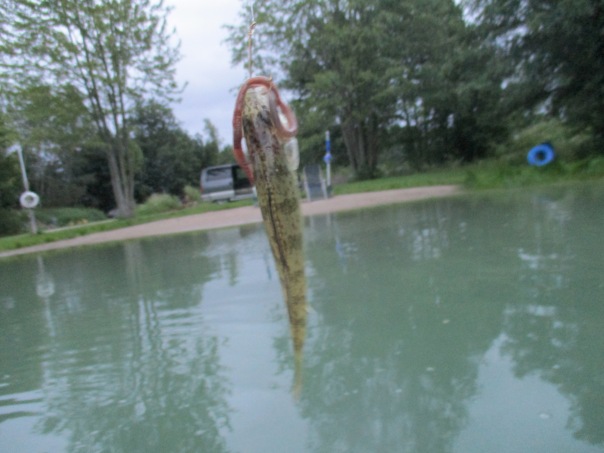
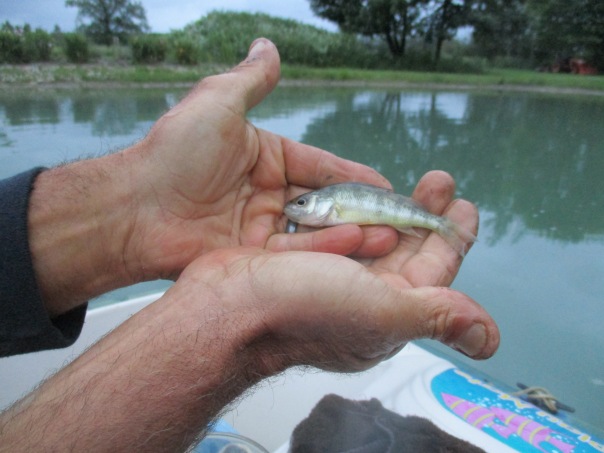
After catching a 15″ walleye on two consecutive nights I decided I needed to start taking my camera with me while we were fishing. Since then all we have caught are perch. We have been catching perch as small as 2″

IMG_3112 This photo is a close-up of the small fish in the next photo. It is a bit deceiving.
IMG_3114

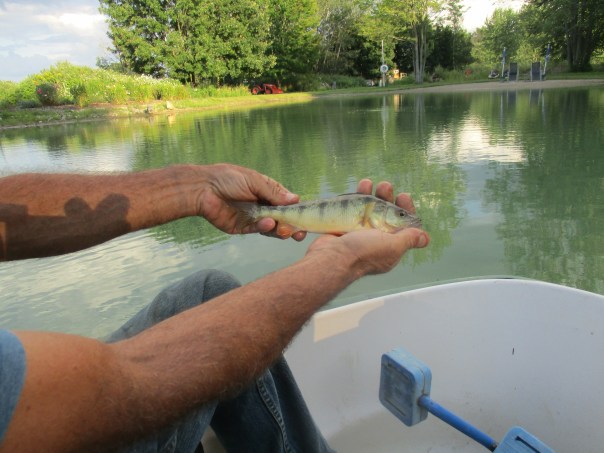
We have also caught perch as large as 9″.

IMG_3123

While catching a large fish is always exciting, catching the small ones is confirmation that the perch are reproducing in the pond. We have yet to catch a small walleye, so it may be that the environment is suitable for walleye to live but does not meet their needs for reproducing.

Now I did say that we have only caught perch since I started taking my camera along, but like every good fisherman I do have the story of the one that got away. We were catching only small perch that evening, so it was a shock when the large fish hit my hook. It hit hard and fast (as walleye do) and I caught only a glimpse of the fish as it neared the surface attached to my line. My husband immediately realized my shock. “Don’t panic” he said as he reached to help me set my drag. Then, as quickly as the fish was on my line, the line snapped and it was gone. That’s my story; a true story. I am not asking you to swallow it hook, line and sinker because a monster walleye already did.


Mystery Solved -Thank You Lisa!

Our Mystery Plant is a Mountain Mint.

https://garden.org/plants/view/78608/Narrowleaf-Mountain-Mint-Pycnanthemum-tenuifolium/IMG_3088This plant attracted my attention when I saw our honey bees heavily foraging in it. We are in a wildflower transition period where the blossoms on the Sweet Clover and Canadian Thistle are waning and the Golden Rod is just beginning to open. It seems the bees are foraging mostly on white clover which we have much of but we were happy to find something else that they loved.

IMG_3117

My husband and I searched all of our plant reference books and several online data bases and were unable to identify this plant. The plant had grown up in an area where we had planted a wild flower seed mix several years ago. So I decided to go to what I assumed was the source. The wild flower seed mix we planted was from American Meadows https://www.americanmeadows.com/wildflower-seeds . We first search their website and were unable to find any plant that resembled our mystery plant. I then decided to contact the company. I used the contact form on their website and included a picture of the plant I was trying to I.D. This was on Sunday. I received an automated reply that day saying they received my message and would try to respond within 48 hours.

My husband and I continued to search online wildflower data bases to no avail and on Monday I received an email from Lisa at American Meadows. She thought the plant in the photo was Yarrow. I replied immediately. At first glance the plant may look like Yarrow, but we also have Yarrow growing on the farm and there are several differences in the two plants. The flowers are different, but more noticeable is the difference in the leaf structure and I have never seen the bees visit Yarrow.

I sent Lisa a second photo of our mystery plant which showed the leaves more clearly. Lisa replied that same day. From this picture she could now see that the plant was not Yarrow. She could not identify the plant but if I could send a close up of the flowers she would “call in the troops” to help find our answer. On Wednesday I sent a couple more photos, described the light scent of the flowers and told her we lived in South-East Michigan.

Later that day I was surprised and excited to receive Lisa’s email. It read: “Success!

The plant is Mountain Mint, probably Pycnanthemum virginianum, which is the common species in Michigan. There is a related species that is much less common, called Pycnanthemum tenuifolium. The main difference is that P. virginianum has pubescent stems, whereas the stems of P. tenuifolium are glabrous (i.e., not hairy). I can’t see the stems well enough on your photos to tell whether the stems are pubescent or not.”

Lisa said her source of this information was a botanist here in Michigan.

I did an internet search and found photos of Mountain Mint and discovered that it was indeed what we had. I at first believed it was Pycnanthemum virginianum, the more common species. On Thursday after I read Lisa’s message a second time I began to question that. I didn’t remember this plant having hairy stems. On my next trip to the farm I confirmed this. The stems of our Mountain Mint are smooth. We have the less common of the two, Pycnanthemum tenuifolium. Common names for this plant are Narrow-leaved Mountain Mint,  Common Horsemint, and Slender Mountain Mint. My husband and I could not be more thrilled than to have this mystery solved. We will encourage this plant to spread and perhaps even propagate it.

This might go without saying but in a day and age where good customer service is hard to find I have to say that we greatly appreciate the help that we received from Lisa at American Meadows. She certainly could have determined that our plant was not something that came in the seeds we received from them an left us on our own. Instead she went the extra mile to help us solve the mystery. At this time we do not have a need to purchase wild flower seed but if we ever do we will return to American Meadows and perhaps if you decided to purchase wild flower seed you will consider them as well.