Category Archives: garden

Our Harvest Picnic

Sunday we invited friends and family to the farm for a picnic. While many of those invited could not make it for various reasons everyone who came seemed to have a great time.

IMG_3192

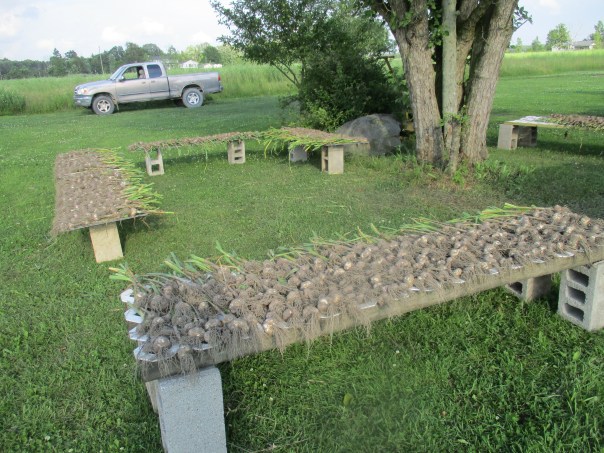
My husband added some seasonal decorations to welcome our guests.

IMG_3203

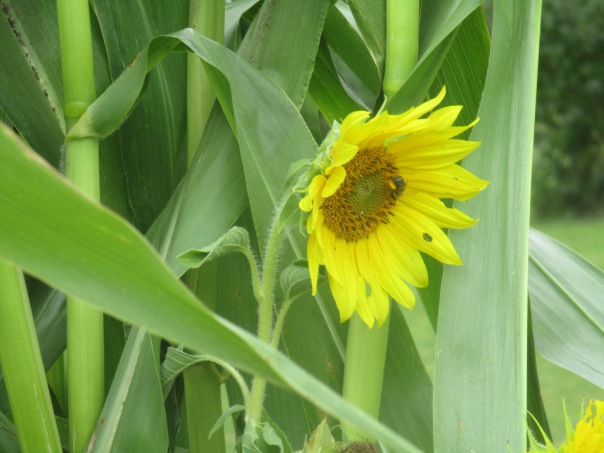
The bees wasted no time finding the sunflowers he picked.


The chickens roaming around, pecking and scratching, added to the ambience.


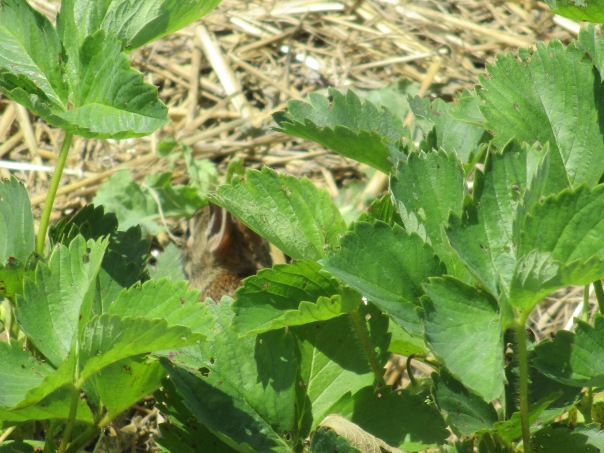
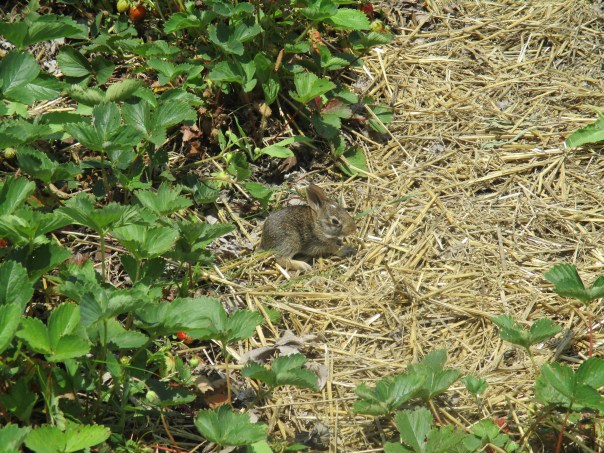
As summer nears it’s end Black Eyed Susans, Hibiscus and Phlox continue to adorn the farm.

When we host guests this time of year we like to make it a harvest party that includes foods from our garden. Included in yesterdays meal was potato salad – with homegrown potatoes, celery and chives along with our farm fresh eggs; apple crisp – with apples from our trees; pickled garlic scapes  https://donteatitsoap.com/2017/06/15/a-year-in-growing-garlic-part-viii-garlic-scapes/ ; and my garlic and dill chip dip https://donteatitsoap.com/2015/08/14/simple-and-fun-recipes/ . We also had fresh lettuce leaves and sliced tomatoes to top the burgers which were made with locally raised grass fed beef.

While I took many pictures of the scenery before our guests arrived I somehow forgot to take pictures our guests and the activities they enjoyed.IMG_3200
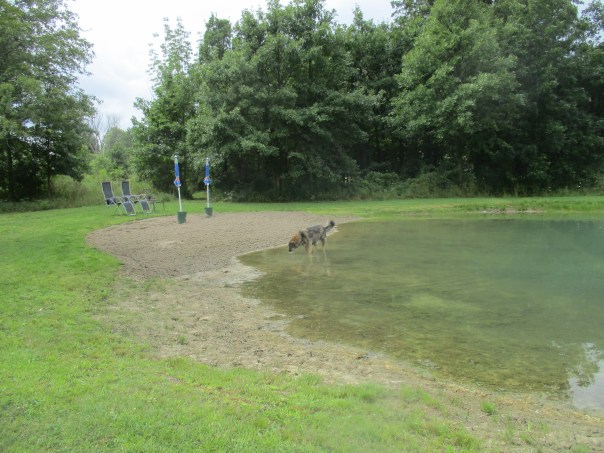
Trooper played in the pond early in the day, but later on some of our young guests enjoyed catching perch in the pond and building sand castles on the beach.

I also neglected to get photos of my brother-in-law flying his remote control airplanes. He brought two planes and was able to use the path which we keep mowed around our back field as a runway. He also brought equipment that enabled him to allow others to participate. It’s called buddy boxing. To really explain buddy boxing you probably need someone who understands technology better than I do, but since I’m the one writing I’ll tell you my simplified understanding of how it works. Two transmitters or controllers are linked together and set to operate the plane. The student’s controller is allowed to operate the plane unless the teacher feels the plane is in trouble at which point the teacher has the ability to override the student’s system and take control of the plane.

I think this is a great way to be able to teach kids, or even adults, who want to learn to fly remote controlled planes without having to worry about damaging the plane or endangering objects, people or pets on the ground. Pete was certainly a great teacher and the kids had a great time flying the planes.

Other activities included greeting everyone with hugs, catching up with friends and family, most of whom we haven’t seen in a year or more, my husband gave garden tours and showed off the huge, mammoth sunflower which came up as a volunteer this year. “If it’s not the biggest sunflower you’ve ever seen I’ll give your money back,” he told people. Maybe he should have charged because everyone agreed that it was the biggest they had ever seen.

IMG_3216

While it wasn’t a homegrown water melon, it was among the produce that our grandson (and future farmer) Jackson, enjoyed. He also got excited about watching the chickens eat corn on the cob.

Some guests left with garlic and some with honey and several left with regrets about having to leave so early and hopes of returning soon. It was a great day filled with friends, family, food and love and we are grateful for all those who visited.

Unfortunately we were so busy and having such a great time that we forgot to hold one of our planned events. The rock picking contest. Participants were to be given a milk crate, shown to one of two areas that have been plowed this summer and told fill their crate with as many rocks as possible.  Cash prizes were to be awarded. Oh well guess we will be picking up rocks this week. 😉

Okay, I’m just kidding about the rock picking contest, but we will be picking up rocks this week. Have a great day.


Using Garden Veggies – Two Recipes Worth Sharing

‘Tis the season of vegetables fresh from the garden, so I thought I’d share a couple of recipes that I made last week that we really enjoyed.

The first one was made with yellow squash. Generally it only takes one or two yellow squash plants to produce enough squash that you can eat it every day. More plants will have you sending it home with friends and family or the delivery man, and when no one shows up at your house you might resort to leaving a few on the doorsteps of random strangers and rushing off before you are caught.

With the yellow squash coming on fast and furious, and with no visitors in sight, I decided to look for new recipes for yellow squash. An internet search led me to this recipe.  http://diethood.com/garlic-parmesan-yellow-squash-chips/

I decided to make this (or something similar) as a side dish for our dinner one night. The ingredients were simple –

Yellow Squash cut into 1/4 inch slices

About 3 Tablespoons of Olive Oil

1 cup Parmesan Cheese

1 cup bread crumbs (I used Italian seasoned bread crumbs)

1 Teaspoon garlic powder

I put the olive oil in one bowl and mixed the bread crumbs, parmesan cheese, and garlic powder in a second bowl. I dipped the squash slices first in olive oil coating both sides, then in the bread crumb mixture.

At this point my instructions vary from the original recipe. Rather than a metal baking pan lined with parchment paper, I placed the slices in my 9×13 Pyrex  baking dish. Since I didn’t know if my Pyrex could handle the 450 cooking temperature, I set my oven at 350. I baked them for about 15 minutes flipped each one over and baked for another 15 minutes.

These didn’t turn out crispy like the original recipe, nor did I want them to. Since they were a side dish we would be eating them with a fork not as a finger food. The breaded yellow squash was a delightful side dish.  When my husband repeated several times how good it was and went back for a second helping, I decided this recipe was a keeper and good enough to share with you.

Swiss chard is another garden vegetable that is very prolific. We start picking the green leaves when they are young and tender and they continue to grow back throughout the summer. We sauté them with garlic, use in stir fries and soups and eat raw in salads. If we try to give swiss chard to friends or neighbors they often reply that they don’t know what swiss chard is or have never eaten it. We describe it as being like a hardy spinach. That’s what trigger this next recipe idea.

We do like a good spinach artichoke dip but we don’t grow spinach. I decided to find a good recipe for spinach-artichoke dip and substitute swiss chard for the spinach. I started with this recipe   http://www.food.com/recipe/spinach-artichoke-dip-1209 . I read the reviews and suggestion’s for changes that people made then I came up with this recipe.

1/2 cup grated Asiago cheese

1/2 cup grated parmesan cheese

1 cup grated mozzarella cheese

10 oz. fresh swiss chard finely chopped

1 can artichoke hearts drained and chopped

8 oz. cream cheese softened

2/3 cup sour cream

1/3 cup mayonnaise

several garlic cloves minced equal to about 2 or 3 teaspoons

about 1/4 teaspoon crushed red pepper flakes

I mixed together the first 5 ingredients in one bowl and mixed the last 5 ingredient in a second bowl. Then I mixed the two mixtures together. I put it in a one quart casserole dish and baked it at 350 degrees for 30-35 minutes.

We ate this with tortilla chips. “That’s really good” was my husbands response. He was right. “I’m not sure I will ever want to order spinach dip at a restaurant again” he said. We both had seconds and left overs were eaten the following day with lunch. Can you make it and freeze it he asked me last night, and I am planning on doing just that later this week. Obviously this is another recipe that I want to keep around, and in recording it here I have accomplished that and shared it with you as well.

If you decide to try either of these recipes please let me know what you think by leaving your comments on this page, and if you have a recipe that is worth sharing I would love for you to do so.


Making Pickles

IMG_3062

In the past my attempts to make dill pickles by canning, using vinegar recipes, have resulted in pickles with that have a decent flavor but are too mushy to really enjoy. I really haven’t even attempted to make pickles in a several years because we have had horrible cucumber crops. We had pretty much decided not to grow cucumbers as it seemed that no sooner would the cucumber start growing well then the cucumber beetles would arrive, the cucumber plants would then begin turning brown, apparently from bacterial wilt, and dying before we could harvest more that a couple of cukes.

When starting plants this spring my husband came across a packet of pickling cucumber seeds and decided to give it one more try. We aren’t really sure what has made the difference this year but the cucumber plants are flourishing. It could be that this variety of cucumbers is disease resistance, or that the cucumbers were planted later and the cucumber beetles missed out, or possibly a combination of the two. No matter the reason, we are grateful for the productive crop.

It was about three weeks ago when my husband brought me a bag with more than a half dozen nice size cukes from our garden. With more cucumbers than we would eat in a couple of days I knew I needed to make pickles. There were not enough to can a batch of the vinegar pickles, and as I said I was never happy with my past results, so I decided to try fermented pickles.  I use this recipe. http://www.culturesforhealth.com/learn/recipe/lacto-fermentation-recipes/lacto-fermented-kosher-dill-pickles/  I didn’t have enough to warrant the use of my 2 gallon crock so I decided to use a 1/2 gallon canning jar. I picked a horseradish leaf to use to add tannins, my husband picked me some dill and I peeled a couple bulbs of garlic to add. I didn’t add any other spices because in my opinion garlic and dill is all that is needed to make a great pickle.

Since I didn’t have a fermenting weight that would fit inside a jar to hold the vegetables down under the brine, I read about using a smaller jar to nest inside the wide mouth jar and decided that would work. It would have worked perfectly well except I discovered that all of my smaller canning jars were in use. I needed to improvise.  I used an ice tea glass and although it sat quite above the rim of the canning jar, it was heavy enough to hold the pickles under the brine. I then covered the jar, glass and all, with a dish towel.

I left them on the kitchen counter where I could keep an eye on things. By the next day I could see bubbles in the liquid and on the following day the liquid began turning cloudy. This is what should be happening. I wasn’t sure when they would be done, but since the temperature in my kitchen these days is higher then the recommended 60-70 degrees Fahrenheit, I decided that two more days on the counter was enough. My goal was nice crispy pickles. I removed the towel and the glass, put a canning lid on the jar and put them in the refrigerator.  Meanwhile I read a few more article about fermenting cucumbers and when my husband brought home another batch of cukes I immediately washed them, trimmed the flower end and put them in a bowl of ice water, until I was ready for them.

For the second batch I used the same recipe and the same process except I didn’t have any more 1/2 gallon jars so they were split between two wide mouth quart jars. The second batch was basically the same as the first – they began bubbling on day two, turned cloudy on day three and on day five I refrigerated them.

IMG_3060

The third batch of cucumbers that my husband brought home had gotten quite large so I decided to experiment with cucumber spears and slices. I used the same recipe and the same method. At this point they are cloudy and bubbling on my kitchen counter. I will refrigerate them tomorrow.

As for the taste test, last weekend we decided just to have cold turkey and swiss sandwiches for dinner and my husband decided that we had to have a pickle with our sandwich. I cut one in half and placed a half on each of our plates. I waited for him to try it first. “You nailed it!” he exclaimed after taking the first bite of his pickle. These pickle turned out just as I hoped, crisp with the garlic and dill flavor.


A Year In Growing Garlic (Part IX)

IMG_3039

I just wanted to do a quick update to let you know that we have started our harvest and at this time we are up to our ponytails in garlic. Well, I am up to my ponytail in garlic, but my husband who doesn’t have a ponytail is in just as deep.

IMG_3034

To harvest the garlic we have to dig it out of the ground, remove most of the dirt from each bulb, tie the bulbs in bundles the store them in their drying area where they will remain for about three weeks or so until the bulbs are cured. There really is a lot of work involved, at least if you are growing 1000’s of bulbs of garlic.

So if I seem to be MIA for the next week or so there is no need to worry or send a search party or anything. If you do send a search party we will probably hand them a shovel or give a quick tutorial on how to clean and bundle the garlic and put them to work. Hmm, on second thought, go ahead and send the search party. 🙂

IMG_3036

I will do a more in depth post about this as time allows, but I just though I would let you know that if you are growing garlic and have not yet dug it up, you probably want to do it soon. If the bottom leaves are turning brown and drying up it is probably time. A good way to be sure it to do a test dig. If the bulbs are a decent size and have formed cloves it is time to harvest.


Who’s Eating Our Strawberries?

When we discovered that some of our ripe strawberries were being eaten, before we had a chance to pick them, I assumed it was slugs.  Slugs are notorious for invading strawberry patches.  I began saving our coffee grounds separate from the other compost and spreading them around the strawberry plants to deter the slugs. Since I didn’t have enough coffee grounds to do them all at once I wasn’t surprised that I was still seeing eaten berries.

Earlier this week while I was watering garlic and my husband was watering strawberries, he called me over to the strawberry patch. “Want to see some baby bunnies?’ he asked. I grabbed my camera.

IMG_2749

There are at least four of them. My husband found their nest, a small hole in the ground, hidden in an area where the strawberry plants are thick. It is well camouflaged as are the baby bunnies. They are very difficult to see until they start moving around.

IMG_2751

I can’t say for sure that there are no slugs eating the berries, and I have also found a few bugs which I assume are sap beetles, http://extension.psu.edu/plants/gardening/fphg/strawberries/insects-mites/sap-beetle  but I suspect the majority of the eaten berries are providing yummy meals to these cute little critters who couldn’t care less about the coffee grounds.