Category Archives: The Farm

Our Christmas Tree

For the second year in a row we decided to cut our own Christmas tree. Last year, and again this year, we cut spruce trees from the farm. When we purchased the farm in 2011 there were many deciduous trees growing on the property but there were absolutely no evergreens. The following spring we placed an order with our local conservation district spring tree sale and amongst the things we ordered were 50 spruce trees, 25 Blue Spruce and 25 Norway Spruce. When the 12-15 inch seedlings arrived we had no idea where we were going to plant them, so we made a nursery area for them within our fenced garden area where they were well tended through the summer. It was a hot and dry summer, and the garden required much watering. It was the summer before we had the pond or the windmill so we carted many barrels of water in the back of the truck, from our house to the farm, in order to keep our garden alive. Having these seedlings in the garden area, where it was convenient to water them, proved to be a blessing and allowed them to flourish. By the fall of that year we were ready to plant them in their permanent places. We decided to line the North and East sides of the back field with some of them, as they would eventually provide privacy and wind breaks.

Over the last five years these trees have received much TLC, they have been fenced during the winters to protect them from the deer, they have been weeded and mulched, and during the droughts of summer we have driven the truck around the outskirts of the field delivering water to each of these trees in attempts to keep them alive. Not all of the trees have survived, but most have with some doing better than others.

We have continued to order Norway Spruce and Blue Spruce seedlings each spring and place them in a temporary nursery area until we decided where we want to plant them. Some of them have replaced spruce trees that we lost, we use some to replace dead Ash and Elm trees that we cut down, and we will also replace the trees that we cut for Christmas trees.

IMG_3491
Spruce Trees Line The East Side Of Our Field

It was about 10 days before Christmas, and we had gotten our first decent snow fall, when we went out to cut our tree. My husband and I walked the path along the East and North of the property and examined each tree before we decided which one to cut.

IMG_3492

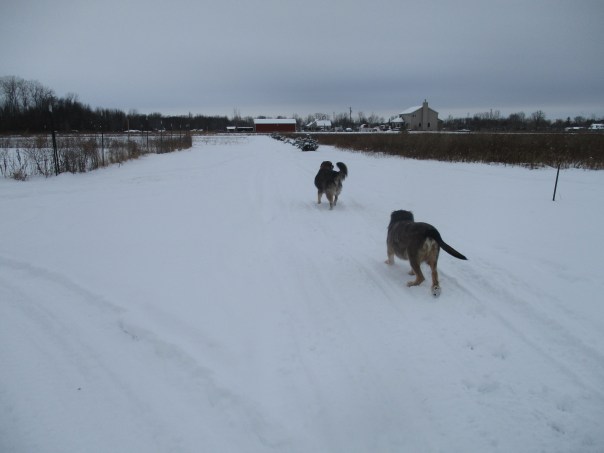
Scout and Trooper were happy to be with us.

IMG_3495

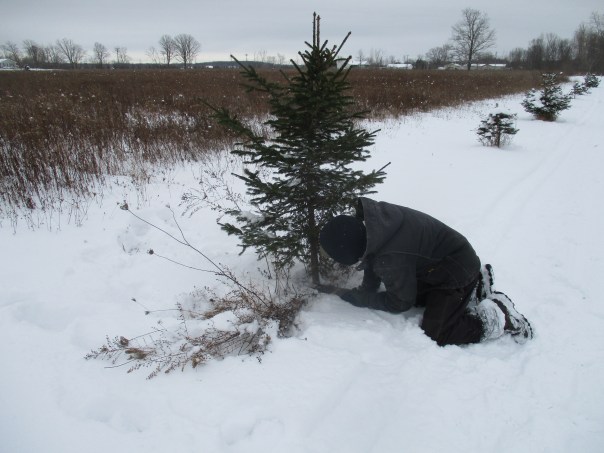
We selected this Norway Spruce. We didn’t measure it but I’m sure it was close to 5 feet tall. It took my husband less than a minute to saw through the trunk.

IMG_3505

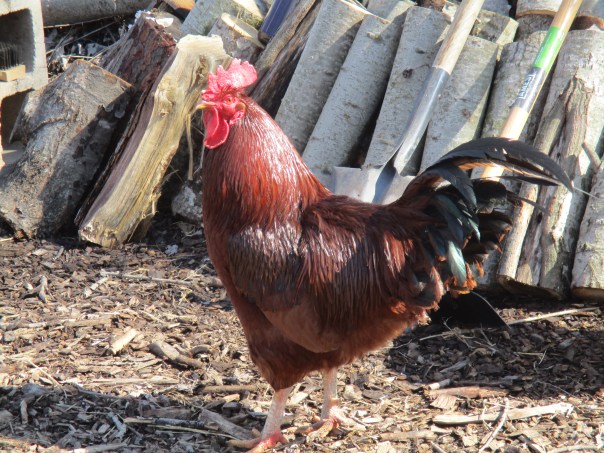
As we walked back from the field we spotted this hen who had made her way through the snow out to the field. We were really surprised to see her there because chickens do not like to walk in snow. My husband picked her up and we gave her a lift back to the coop.

IMG_3514

We opted not to trim the longer, upper branches to achieve the “prefect” Christmas Tree shape, but left the tree in it’s natural God-given shape. The short needles and less than crowded branches made adding lights and hanging ornaments easy. And we have been enjoying the simplicity and beauty of our homegrown Christmas tree.

IMG_3611

On Christmas Day we added one final ornament after opening the gift from Tina and Ken. We hung the new “Ciani Family” ornament next to the “God Bless the Farmer” ornament they gifted to us last year. I think I am seeing a theme here to complement our new tradition. 🙂

Rescue Rooster

We’ve been raising chickens on our farm since 2013. Having a free range flock of egg layers was one of our priorities when we bought the farm and everyone that knows us knows how much we love our chickens. You can read some of my previous posts about chickens here https://donteatitsoap.com/category/chickens/ .

Ever since we put our first flock of chickens in the coop our lives have revolved around chickens. Every morning without fail, we (nowadays my husband) open up the coop as the sun is coming up, and provide fresh food and water for the flock. On days that he or we are not working at the farm it is necessary to make at least one, but usually two, midday runs to the farm to check on the chickens. Our presence helps to deter predators. Every evening, after doing a beak count,  the chickens are closed in the coop for the night. If any chickens come up missing a search ensues, sometimes resulting in finding that a hen has gotten into one of the fenced in gardens and can’t find her way out, or one has decided to roost in a tree for the night. Other times we have found that, sadly, a hen has fallen prey to a hawk or a fox, and some times they just disappear with out a trace.

Our vigilance has been rewarded with being able to maintain a flock of happy, free range, egg layers, who provide us and others with delicious, healthy, farm fresh eggs. The insect control and entertainment they provide are supplementary benefits.

One thing that we have learned over the years is that while it may be a good idea to keep a rooster to protect and service the flock, having more than one rooster causes disharmony and stresses the hens. Thus we have agreed to only keep one rooster.

IMG_2346
Meet Cocky

Earlier this year I was talking to my dad on the phone and he told me that he had picked up a statue of a rooster that someone was getting rid of. Destined for a dumpster, it was tattered and warn, but since it was not broken dad figured he could clean it up, give it a new coat of paint and bring it back to life-like. He thought this rooster would be a nice addition to our farm. I didn’t tell my husband about the gift dad was planning to give us, because I think surprise gifts are always better.

One day in August when dad stopped by to pick up some eggs and honey I carried the bag to his car and as he put the bag in the back, he took out the life-size rooster statue and handed it to me.  He had done a nice job at repainting it and not only was it as big as a real rooster, it was at least as heavy as a full grown bird.

IMG_3429
Our Rescue Rooster “Jim”


I held the statue tucked into one arm and supported by my other hand, much like I would hold one of our chickens, as dad and I stood by his car talking. I noticed my husband driving up and was happy that dad would be able to present the gift to him as well. As my husband drove closer I could see that he was shaking his head adamantly “No”. I was trying to figure out what he was upset about as he got out of the van and from across the street announced, in no uncertain terms, “it’s not staying!” I couldn’t understand his reaction and as he walked toward us I quickly explained, “dad found this rooster statue and restored it for us.” I thought that he was being rude and going to hurt my dad’s feelings.  About the same time I got the word “statue” out of my mouth my husband had walked close enough that he could get a good look at it. “Oh, it’s not real!” he exclaimed laughing in relief. Dad and I joined in the laughter as my husband explained that from a distance he thought it was a real rooster especially because of the way I was holding it.

Our rescue rooster now resides high atop the oak entertainment center in our living room. (We have kept our agreement of only one rooster at the farm.) A few nights ago my husband and I were laughing about the rooster’s arrival and my husband decided that since we hadn’t given the rooster a name yet and it will always be reminder of the unintended prank my father played on him, the roosters name would be “Jim” (my dad’s name).


Getting Ready For Winter

Fall is a transitional period and much of our time recently has been spent getting ready for winter. Today I’m going to share just quick overview of some of the things we have been up to.

IMG_3400

The driveway needed more gravel so my husband had 30 tons of 21 AA, also known as road gravel, delivered. 30 tons or 60,000 pounds doesn’t really look like a lot. It certainly didn’t cover our whole driveway but we were able to fix the bad spots.

IMG_3397

IMG_3401

This job meant I got some tractor time as we worked together to get the stone spread.

IMG_3404

I LOVE Tractor Time!

Another thing that my husband put a lot of time into is getting all of the equipment winterized and stored. Over the last few years we have acquired quite a collection of motorized equipment. The tractor, lawn mowers, rototillers, chainsaw, power washer and more, all requiring maintenance in various forms.

IMG_1658

My husband had mentioned several times that he needed to put together a Preventative Maintenance Schedule, he also referred to it as a PMS, and I laughed. When I saw him winterizing the equipment I decided to make him a preventative maintenance schedule. Even though my computer skills are not that good I was able to make him a chart that can be used as both a reference document and working document for all of the equipment. As a reference document we can record the name and #’s of each piece of equipment, as well as fuel requirements, spark plug numbers, and numbers of other parts that need to get replaced on a regular basis. With all of this information in one place he doesn’t have to pull out the manual for each piece of equipment to find this information. As a working document he can record the dates that any maintenance is preformed on the equipment.

Here is a link for the PMS document that I made pms feel free to save it, print it, or change it, if you think it would be useful.


Stocking firewood for the winter is another task that we, but mostly my husband, have been putting a lot of time and effort into. For us this involves cutting down trees, mostly dead ash, then removing the limbs from the tree, cutting it into approximately 18 inch logs that will fit into our fireplace, then splitting and stacking the logs. Since the trees that we are cutting are dead we have found that they don’t need to be seasoned. They are already dry enough to split and burn.

One of the things that has always concerned me is watching my husband cut up logs with a chainsaw. First of all the bending is not good for his back, but mostly my concern is the way the logs tend to slip while they are in contact with the chainsaw. It just seems so dangerous. A while back I was reading an article in Countryside Magazine that talked about a sawbuck for holding the logs while they were being sawed. I had never heard of this before, so I did an internet search to see what I was missing. I came across this site http://www.firewood-for-life.com/sawbuck-plans.html that had complete plans, including a list of materials and detailed instructions, for making a sawbuck. It looked easy enough and quite affordable so I decided we were going to make one. I showed the plans to my husband and he agreed it was a good idea. He had a better idea. A few days later he showed up with a sawbuck. It was a different design from the one above, and it has definitely been used, but it meets his needs. Apparently when visiting a neighbor earlier this year he had noticed this piece of equipment. At my mention of his needing one he decided to inquire about the one he had spotted. When he asked the neighbor if he could rent or buy the sawbuck from him, the neighbor told him he could have it. 🙂 Sometimes all you have to do is ask.

IMG_0394

When I talk about firewood I always like to mention our log splitter. https://www.northerntool.com/shop/tools/product_200640136_200640136 I bought this log splitter several years ago when I wanted to be less dependent on my husband for splitting firewood. My husband had always used a maul to split the wood and had pretty much mastered the art. I, on the other hand, found using a maul a struggle. It took a lot of searching to find a log splitter that was not electric or gas powered and this is the only one that I came across. That’s why I like to tell people about it. Although it’s capabilities are limited to logs with a 6 1/2 inch diameter, it works for most of the logs we are trying to split.

Cutting fire wood is something we will continue to do throughout the fall and probably into the winter. If you burn wood for heat, you can never have too much firewood.

While tomorrow we will take the day off to celebrate our Thanksgiving Holiday with family, I wish all of my readers a Happy Thanksgiving, and if you are reading this but not celebrating the Thanksgiving Holiday I hope that you, too, have blessings to celebrate. 🙂

Our Homemade Halloween Costumes

In the 17 years we have been together my husband and I have never been to a Halloween costume party before.  A few weeks ago we received a flyer in telling us that our community was having a Halloween party with food, games, and prizes for the best costume. I set the flyer aside and didn’t think much about it until a few days later when my husband, who had been weeding the strawberry patch all day, told me that he knew what he was going to dress up as for the party.

When he shared his idea with me I thought that it was very clever and would be a lot of fun. I wasn’t surprised that he came up with this cute idea because when you spend all day on your hands and knees pulling weeds you really do have a lot of time to think. Pulling weeds is a very mindless task. I am glad he didn’t want me to guess what he was planning because even though I was certain it would be farming related and that it wasn’t going to cost much, if anything, I would never have thought of this (unless maybe I had spend all day on my hands and knees pulling weeds).

He told me he was going to be a Boo Keeper – think Bee Keeper + Ghost Buster. “I’ll wear my bee suit and carry a net and have little ghosts flying around me and some in the net,” he said. My wheels started turning and in my mind I already had the little Kleenex ghosts made.

About a week later my husband asked what I was going to dress up like for the party. I was just thinking of putting together a scare crow costume out of some of the clothes I have on hand. “You could be a Boo Keeper too he offered, or how about the Queen Boo.” Okay, I liked the idea of Queen Boo. We created both of our costumes mostly with things we had on hand. So here is what we did.

I started with making little ghosts (boo’s). IMG_3355

We decided to make them bee-like so I first used markers to put some black and yellow stripes on them. When I went to my craft supplies I discovered that I had some Styrofoam balls that were the perfect size for the head. If I did not have the Styrofoam balls I would have just balled up a piece of newspaper. I centered the Styrofoam ball on the Kleenex then gather the Kleenex around the ball and tied it with thread. I think I learned to make these little ghosts when I was in grade school. I left the thread long enough that I could thread it through a needled and attach it to the costume.

I then cut some wings out of tissue paper and glued them on.

IMG_3367

Our little ghost bees became known as boo BEES. Warning: Please be careful how you pronounce that lest you get the wrong idea.

Next I made my Queen Boo wings. My husband had a spool of wire, so I used the wire to form a frame for the wings. After forming the first wing I twisted the wire around itself then made the second wing and again twisted the wire together in the center. I covered the twisted ends of the wire with duck tape so I would not get poked or scratched with the ends of the wire.

I glued one wing to a full size piece of tissue paper. When the glue was dry I glued a second piece of tissue paper to the other side of that wing. When the second side was dry I cut the tissue paper in the shape of the wing leaving about 1/2 inch overhang. I repeated the process with the second wing.


IMG_3369

My crown was made of poster board. I wanted it to have a honey comb pattern. To make the honeycomb pattern I decided I could use a wax foundation that we use in the beehives. The bees use these foundation as a base for building their comb. Since the poster board was too thick I decided to use printer paper the make the honey comb design. I placed the printer paper on the wax foundation then colored over it with a brown crayon.

I then  removed the paper from the foundation and colored over the brown honeycomb with a yellowish crayon to give it a honey-like color. I glued the printer paper onto the poster board strip then waited for the glue to dry before cutting out the crown points. I fitted the crown to my head and used tape to hold it’s circular shape.

My husband suggested using glitter on the crown to give it some glitz, but I don’t do glitter. In my personal opinion glitter is an invasive species. Once glitter is introduced into an environment it will spread like wildfire and it seems you will spend the rest of your life trying to get rid of it.

I wore a black turtle neck and black leggings with an oversized white t-shirt that I picked up at Joann Fabrics for $3.00. My husband wore a pair of Tyvek coveralls that he had on hand, then put his bee suit over top. I attached some of the boo BEES to his suit and net and attached some of them to my t-shirt as well. (It’s the worker boo’s job to protect the queen.)

I put on some white face paint to look more ghost-like and my husband picked up some Bit-O-Honey candies for me to pass out.

IMG_3364

Here we are at the party on Friday evening.

IMG_3365

Our neighbor, Maggie, won first place for her wonderful witch costume. My husband won second place a $25 gift certificate and, to my surprise, I one third place a $25 gift certificate as well.

I love that we were able to put a Halloween spin on something that we do in our daily life and were able to create the costumes at little expense. The only money we actually spent on these costumes was the $3 for my t-shirt and a few $ for the Bit-O-Honey candies.

We enjoyed a fun time with some of our neighbors but had to excuse ourselves as darkness fell and duty called. Once out of public eye the Boo Keeper mysteriously morphed into Chicken Farmer and rushed off to close the chickens in the coop where they would be protected from any dangers that were lurking in the darkness.

Note: This is  not an advertisement but years ago I discovered that I can often find t-shirts on sale for $3.00 or less at Joann Fabric. At that price it was worth stocking up so when the kids were in school I would keep a supply of these shirts in various colors. When the kids would come home from school needing a special color shirt for a school activity or project I usually had what they needed. These shirts are designed to be used for craft projects such as tie dye, painting, iron-on, cross stitch and more but are also suitable for wearing just as a regular t-shirt. I in fact have a few in my wardrobe.

I would love to hear your creative ideas for Halloween costumes. Have you ever added a ghostly or funny twist to something you do everyday? Have you made a clever costume out of things you have on hand? Please share your ideas in the comments section below.

Thanks for reading and Happy Halloween!

Celebrating

Woo Hoo! I exclaimed at 1:46 P.M. as the last bulb of garlic was planted. My husband chimed in with a Yee Haw! We began preparing bulbs last Monday and have been working towards todays finale all week long. We were blessed with a week of beautiful weather. We finished up today with 7700 cloves planted, and none too soon as tomorrow’s forecast is for cooler temperatures and lots of rain 🙂

It was 1:56 P.M. while I was cleaning up some of the area when I spotted the Blue Bird. Yes! Our Blue Bird of Happiness paying us a visit to share in our celebration. This evening we wrapped up a few things like running wire and twine around the area to hopefully deter deer and chickens. We would like to invite you to share in our celebration. You can do so by pouring a glass of your favorite beverage and raising it as a toast and/or saying a simple prayer of thanks to God and asking that He bless us with a bountiful crop in 2018. You could also hit the like button at the bottom of this page or leave your comments to let us know you care.

If you would like more information about what was involved in our garlic planting activities this week please check out this page https://donteatitsoap.com/a-year-in-growing-garlic/  that details our 2017 garlic growing season.

Thanks for reading and God Bless.