Category Archives: homemade

Our First Apple Crop

This has truly been a wacky year for food production at the farm. Some things that normally grow in abundance have floundered and some things that have never produced before have done well. Apples were among the crops that did relatively well this year.

We have seven young apple trees of various varieties that we have planted in the past six years, three of which we planted in April of 2011 before we even closed on the property. Each year the apple trees have had had at least some blossoms in the spring but they never developed into more than a few apples. Last fall, as an experiment, I put a small amount of wood ash around the base of three of the trees. This spring nearly all of the trees blossomed heavily so I am not certain how much effect the wood ash had.

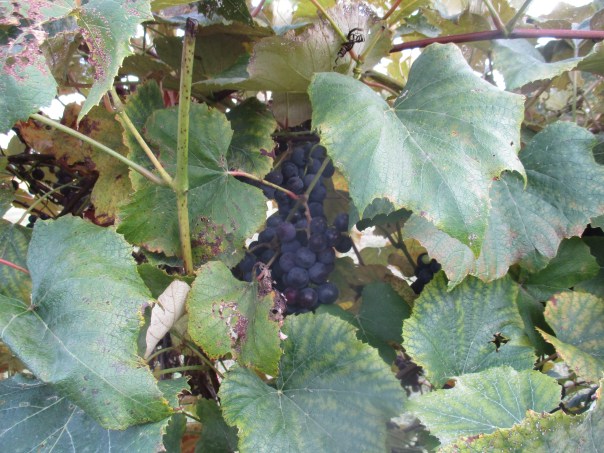
In May, when the apple trees were in full bloom, we had several mornings of heavy frost. Since the frost damaged asparagus, rhubarb and grape leaves, I am still stumped that our apple trees were unaffected.

Our honey bees were more that happy to do their part in our apple production, flying from blossom to blossom and tree to tree collecting pollen from one blossom and redistributing a portion of it on the next blossom while they collected their pollen from that one.

IMG_2573
Honey bee – too busy to pose for a picture

Being our first apple crop we didn’t know what to expect and it seems that our apples fell victim to bugs, worms and disease.  Then to add insult to injury the crows  decided to make our apples part of their diet.

A couple weeks ago when my husband was tired of watching our apples being destroyed he decided to pick what might still be good before the crows got anymore. He first brought home a bag of red apples and since I was busy that day, probably cleaning garlic, I put them in the refrigerator and half forgot about them. A couple days later he brought home these golden delicious.

IMG_3223

He had been talking about dehydrating apples or making apple chips for a few weeks so I decided to use the useable part of these apple to make chips.

When I peeled the apples I was pleasantly surprised to see that the blemishes, which I have not positively identified but might be apple scab, were only skin deep. Once I removed the peel there was no evidence of disease.

IMG_3225

I peeled, cored and sliced the apples. I placed the slices in a single layer on my dehydrator trays. Each tray held about four apples.

IMG_3227

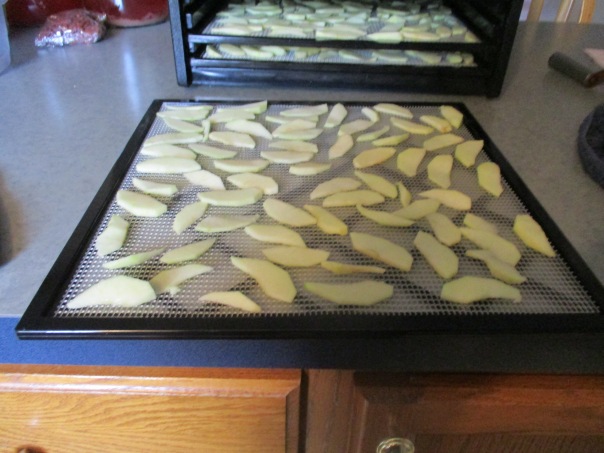
I filled up all nine trays and realized I had peeled way too many apples. So I needed to come up with a semi-quick or easy way to use the other half of those apples. Since fruit pies are a favorite dessert here and pie filling freezes well I decided to make apple pie filling.

I know that golden delicious apples are not necessarily a cooking apple so I was happy to find a recipe for pie filling that just called for apples instead of “cooking apples” or a specific variety of apples. Not that it would have mattered because I often change up recipes, substituting what I have on hand for what is called for in the recipe. Sometimes it turns out really well and sometimes not so good. The apple pie filling is in the freezer for now but I am certain that we will enjoy the apple pie that it makes.

The apple chips on the other hand are disappearing quickly. They make a nice snack.

IMG_3233

When I took them out of the dehydrator, after about 18 hours, I packaged each tray of apple chips in a sealable plastic sandwich bag. This way I know that the package contains about four apples or four servings. Then I put the bags in jars for storage. It is important to know an approximate serving size because these apple chips are so good that it could be easy to get carried away and eat way too many. I warned my husband that eating a whole bag at one time was not a good idea, and that you need to make sure you drink enough water when eating dried fruit. He told me that this was a lesson he learned as a kid – the hard way.

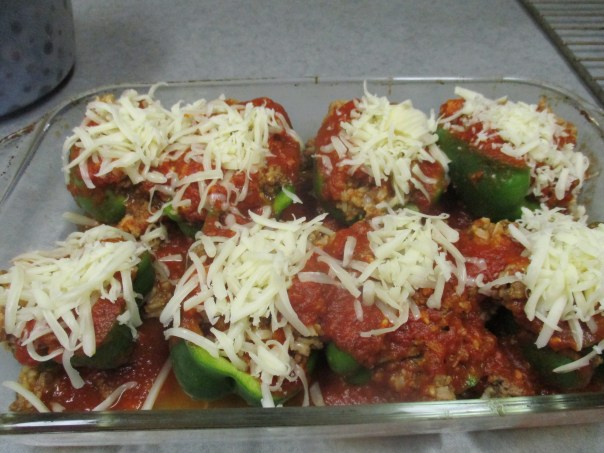
A few days ago when I was looking for a side dish to go with the stuffed green peppers I made for dinner, I came across the “half forgotten” bag of apples in the refrigerator.

IMG_3293
Stuffed Peppers

I decided to cook up some apple sauce. I didn’t need a recipe for this because I have cooked and canned apple sauce many times in the past. Although many of these apples had bites taken out of them (crows) and a few had worms in them, I was able to cut away enough of the bad parts and cook up a wonderful dish of apple sauce. To make apple sauce, after I peeled, cored and cut away any bad parts, I put the apples in a pan with a small amount of water. I brought it to a boil then turned it to low and let it simmer until the apples were very soft. I then mashed the apples with a potato masher. I then continue to let is simmer and thicken up a little. There was no need to add sweetener. I put it in a bowl and chilled it before dinner and it made the perfect side dish.

Over the next few months we will be researching natural options for controlling disease and insects on the apple trees with hopes of growing even better crops in the future, and who knows we might even build a scarecrow or two. https://www.todayshomeowner.com/scarecrows-in-the-garden/

Coming Soon…

This is a busy time of year for us. We are wrapping up our garlic season https://donteatitsoap.com/a-year-in-growing-garlic/ and I will be putting up the final post in that series soon. I have created this page that links to all the posts in that series and added it to the menu at the top of my home page so you can read through them at your leisure.

It is also harvest season and along with harvesting food comes preserving it, so I will be writing several pieces on what we are harvesting and how we are preserving it. Check out the pictures below for a sneak peak at what’s coming up.

I will share how we will enjoy this years apple crop.

IMG_3225

Some different methods for making tomato sauce,

IMG_3268

VS

IMG_1688

What I am doing with our beautiful grapes this year,

IMG_3270

And a write about wildlife on the farm – friend or foe.

IMG_3283

To make sure you don’t miss out on these or any future posts you can sign up at the bottom of this page to follow along via email and if you like what you read don’t forget to share it with your friends.

Making Pickles

IMG_3062

In the past my attempts to make dill pickles by canning, using vinegar recipes, have resulted in pickles with that have a decent flavor but are too mushy to really enjoy. I really haven’t even attempted to make pickles in a several years because we have had horrible cucumber crops. We had pretty much decided not to grow cucumbers as it seemed that no sooner would the cucumber start growing well then the cucumber beetles would arrive, the cucumber plants would then begin turning brown, apparently from bacterial wilt, and dying before we could harvest more that a couple of cukes.

When starting plants this spring my husband came across a packet of pickling cucumber seeds and decided to give it one more try. We aren’t really sure what has made the difference this year but the cucumber plants are flourishing. It could be that this variety of cucumbers is disease resistance, or that the cucumbers were planted later and the cucumber beetles missed out, or possibly a combination of the two. No matter the reason, we are grateful for the productive crop.

It was about three weeks ago when my husband brought me a bag with more than a half dozen nice size cukes from our garden. With more cucumbers than we would eat in a couple of days I knew I needed to make pickles. There were not enough to can a batch of the vinegar pickles, and as I said I was never happy with my past results, so I decided to try fermented pickles.  I use this recipe. http://www.culturesforhealth.com/learn/recipe/lacto-fermentation-recipes/lacto-fermented-kosher-dill-pickles/  I didn’t have enough to warrant the use of my 2 gallon crock so I decided to use a 1/2 gallon canning jar. I picked a horseradish leaf to use to add tannins, my husband picked me some dill and I peeled a couple bulbs of garlic to add. I didn’t add any other spices because in my opinion garlic and dill is all that is needed to make a great pickle.

Since I didn’t have a fermenting weight that would fit inside a jar to hold the vegetables down under the brine, I read about using a smaller jar to nest inside the wide mouth jar and decided that would work. It would have worked perfectly well except I discovered that all of my smaller canning jars were in use. I needed to improvise.  I used an ice tea glass and although it sat quite above the rim of the canning jar, it was heavy enough to hold the pickles under the brine. I then covered the jar, glass and all, with a dish towel.

I left them on the kitchen counter where I could keep an eye on things. By the next day I could see bubbles in the liquid and on the following day the liquid began turning cloudy. This is what should be happening. I wasn’t sure when they would be done, but since the temperature in my kitchen these days is higher then the recommended 60-70 degrees Fahrenheit, I decided that two more days on the counter was enough. My goal was nice crispy pickles. I removed the towel and the glass, put a canning lid on the jar and put them in the refrigerator.  Meanwhile I read a few more article about fermenting cucumbers and when my husband brought home another batch of cukes I immediately washed them, trimmed the flower end and put them in a bowl of ice water, until I was ready for them.

For the second batch I used the same recipe and the same process except I didn’t have any more 1/2 gallon jars so they were split between two wide mouth quart jars. The second batch was basically the same as the first – they began bubbling on day two, turned cloudy on day three and on day five I refrigerated them.

IMG_3060

The third batch of cucumbers that my husband brought home had gotten quite large so I decided to experiment with cucumber spears and slices. I used the same recipe and the same method. At this point they are cloudy and bubbling on my kitchen counter. I will refrigerate them tomorrow.

As for the taste test, last weekend we decided just to have cold turkey and swiss sandwiches for dinner and my husband decided that we had to have a pickle with our sandwich. I cut one in half and placed a half on each of our plates. I waited for him to try it first. “You nailed it!” he exclaimed after taking the first bite of his pickle. These pickle turned out just as I hoped, crisp with the garlic and dill flavor.


A Garden Dinner

Over the last week we have been so busy with digging and storing garlic to dry that some of the things we would normally do fell by the wayside. Two of those things include planning and preparing a good dinner and tending the garden. We finished up the garlic tasks yesterday morning and decided it was time to play catch up. My husband worked in the garden – weeding, harvesting, and thinning rows. He brought home a nice size bag of fresh veggies that we decided to incorporate into our dinner. I cleaned the veggies and prepared them for our meal. This is what was on the menu. All of the vegetables and herbs were home grown.

Salad – Three types of lettuce, radish, cucumber

Salad Dressing – Basil, oregano, parsley, rosemary, garlic, onion powder, sea salt, olive oil, red wine vinegar, white wine vinegar

Garlic mashed potatoes – I minced several cloves of garlic, mixed the minced garlic with 1/2 stick of butter, then mixed it into the mashed potatoes.

Baby beets with beet greens – The beets in the garden needed to be thinned so even though the beets were only about 1 inch my husband brought them home. After cleaning them I trimmed the long roots off the cut the leaves off leaving a couple inches of the stem attached to the beet. I put the greens and the beets in the steamer and cooked until the beets were tender.

Grilled pork chops – Since we don’t raise our own pork (yet) the pork chops were not something we produced, but they were seasoned with minced garlic and fresh dill. They complimented our garden dinner nicely.

My husband and I MMM’ed and wowed as we ate our dinner and even after dinner we continued to rave about how much we enjoyed the meal. We could truly taste the nutrition in the foods we were eating. Honestly, my favorite fresh garden vegetable is probably potatoes. They have flavor and texture that I have never found in store bought potatoes and are definitely worth the work it takes to grow them.

If you are growing a garden this year I hope that you too are enjoying the fruits or vegetables of your labor.

Tonight’s menu will include potato salad, sautéed swiss chard with garlic and grilled Italian sausage.

Two New Soap Recipes- The Results Are In

In April I posted about the two new soap recipes that I had made. One was made with   dandelions infused in the water and oil. Honey was also added. The second was made with maple sap and maple sugar sand. https://donteatitsoap.com/2017/04/29/two-new-soap-recipes/?iframe=true&theme_preview=true

My husband and I have now sampled both of these soaps and we are extremely happy with the results.

The dandelion soap, which I am now calling Sweet Dandelion, has a deep golden color to it. I used this soap before my husband and fell in love with it. “Silky” was the term I thought of when I felt the lather on my skin and though it rinses off well it leaves my skin feeling soft. I did not share my thoughts with my husband before he used it. Once he had showered with it I asked what he though. “Good lather, smooth, and rinses off well, I like it!” were his comments. I then shared my thoughts and we agreed my description “silky” translated to his use of the word smooth.

A few days later one of my sisters (J.B.) stopped by so I gave her a sample bar. I told her what it was and asked for her opinion. She said she would try it the following morning. Around 9:00 a.m. the following morning J.B. called me. She loved this soap. She agreed with our descriptions of silky and smooth and told me she would like two more bars.

After my husband mentioned several times that he wished I could make another batch of the dandelion soap I found myself walking our back field in search of dandelions. By this time the dandelions which had blanketed our property a few weeks earlier were now few and far between. I was able to collect a couple cups of dandelion blossoms. I used half to make a tea-type infusion, which I put in the freezer, and the other half are infusing in oil as I write. I will be able to make one more batch of Sweet Dandelion soap between now and next spring.

We were also pleased with the maple soap which I have decided to call MMMaple Soap. I am not surprised that maple sugar sand which is made up mostly of calcium salts and malic acid seems to have dissolved, nor am I surprised that this soap has incredible lather since sugars added to soap have that effect. I do have some of the sap that we saved for this recipe in the freezer yet so I will also be able to make this recipe one more time before next spring.

Anyone interested in purchasing either of these soaps may contact me by email at ruth20012001@yahoo.com and put soap in the subject line.