Category Archives: Dandelion Soap

Spring Happenings

The last weekend in May is known as the unofficial start of summer and the weather last weekend played right along. Temperatures were around 90 degrees Fahrenheit for several days. Time seems to being going so fast that I am wondering how I missed spring.

I went back and looked at some of my photos from the last few weeks for a reminder.

IMG_4094
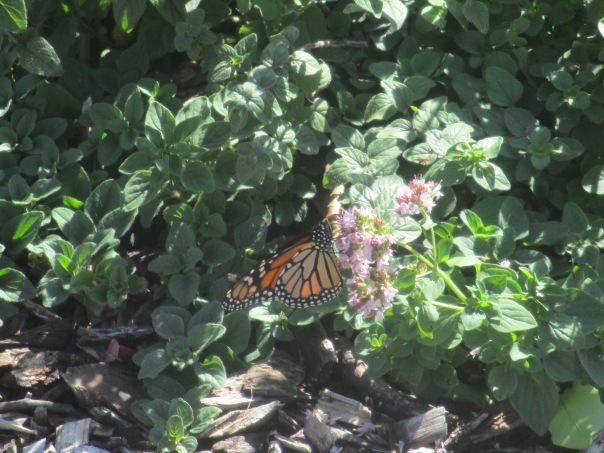
The fruit trees, including apple, pear, and tart cherry all blossomed and are now setting fruit. Berry bushes, including our blue berry, raspberry, currant and grapes are setting fruit as well.

IMG_4091
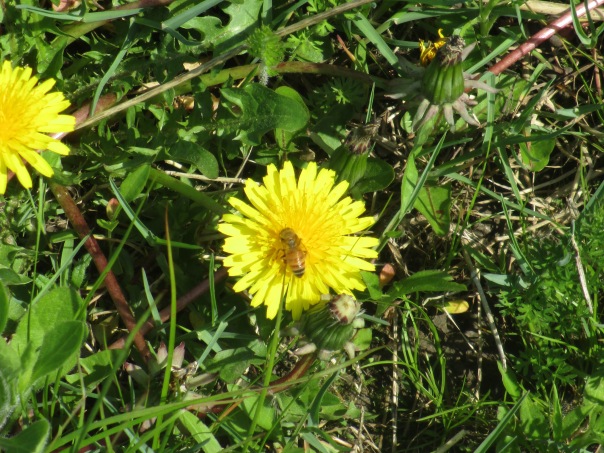
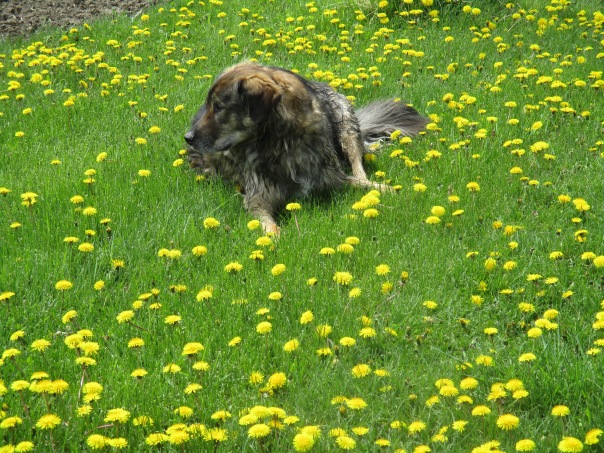
The dandelions blossomed and my husband helped me pick a bunch for soap making before they went to seed. I have enough for two batches of sweet dandelion soap. Trooper didn’t help pick dandelions but he enjoyed being there.

Speaking of Sweet Dandelion soap, I had just made a batch in May when I received the Mother’s Day gift my girls bought for me. It is a soap stamp. So I began playing with it as this batch was curing.IMG_4128It will be tricky to figure out when the soap is the correct degree of hardness for the stamp to work just right and challenging learning to apply the right amount of pressure to the stamp so I don’t squish the soap. I thought about using some type of coloring to add contrast, but it has to be something natural since I do not use artificial coloring in my soap. In the above photo I used cinnamon in one and turmeric in the other. Learning to use this will be a lot of trial and error.

The dandelions have now gone to seed and last week when I was mowing the lawn I was getting bombarded with dandelion seeds. They were flying everywhere and they were stuck to my clothes and in my hair. I told my husband I wouldn’t be surprised if I end up with dandelions growing out of my ears. He thought they would probably grow from my belly button because “you know everyone has a little dirt in their belly button.” LOL!IMG_4106
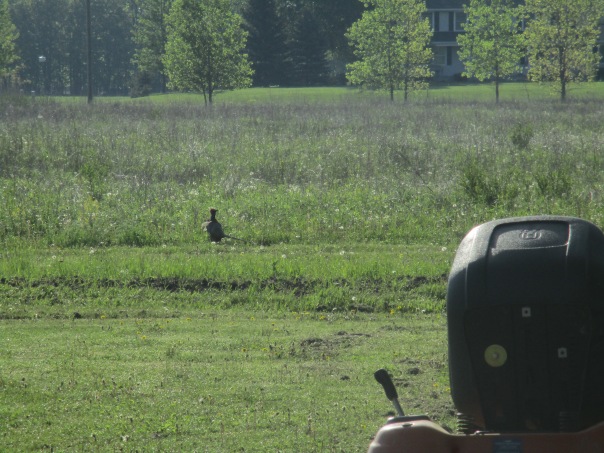
We have been hearing  pheasants a lot on the farm and in the neighboring field and every now and the we get a glimpse of one. We are glad to see them as it had seemed that the pheasant population had all but disappeared over the last thirty or so years.

IMG_4102
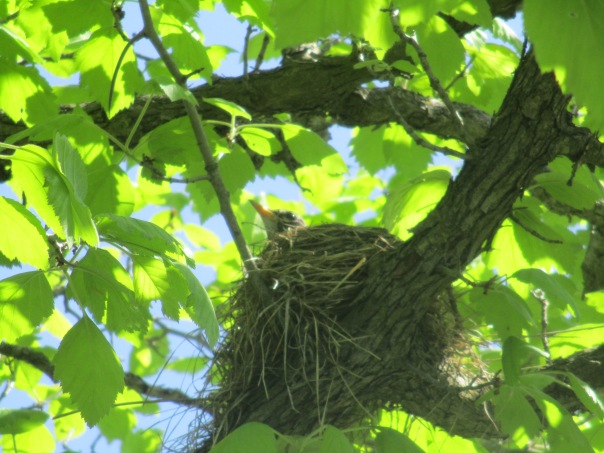
We have spotted many new nests around the farm this spring mostly they have been empty when we looked but one had robin eggs in it and I did spot this momma sitting on hers.

IMG_4127
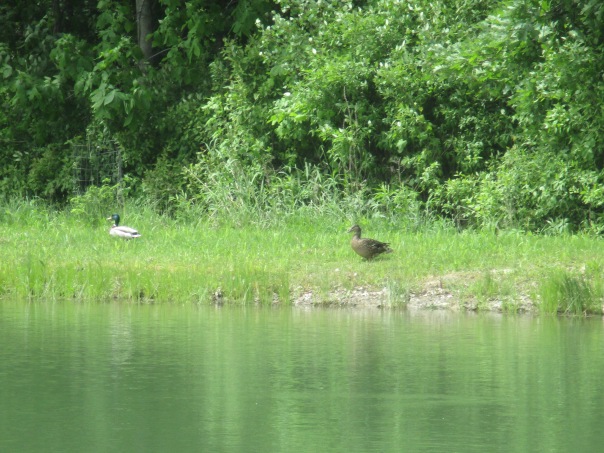
We also have a pair of ducks who have been frequenting the pond this spring. My husband and I agree that we will not be surprised if we find out that they have a nest in the woods next to the pond. I guess we will know if they show up with babies.

IMG_4097This past winter was a bad one for bees in our area. We lost four of our five hives so we bought two more packages and installed them into hives. Since my husband installed them on his own I didn’t get any photos.

The garden has been planted. We have tomatoes, bell peppers, hot peppers, egg plant, potatoes, cabbage, cucumbers, cantaloupe, water melon, lettuce, Swiss chard, celery, basil, parsley, carrots, beets, green beans, corn, winter squash and pumpkins.

Along with the hot weather came a dry spell – we weren’t really expecting it because the weather forecasters had predicted that we would get rain and storms as the remnants from tropical storm Alberto made it’s way North into our part of the country. Somehow all that rain missed us.

IMG_1233
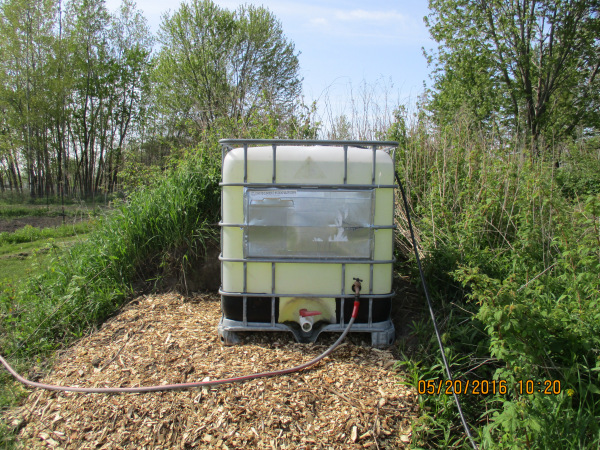
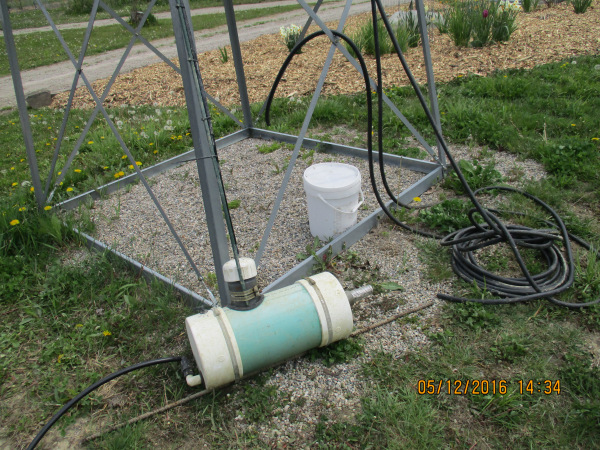
Fortunately my husband had put the pump in the pond and we were able to take advantage of the wind that we had last week to get the tanks filled and keep things watered as we awaited the rain.

IMG_1281

We finally got rain this morning and what a blessing it is. Not only will it give all of our crops the boost that they need right now, and give us a break from watering, it makes pulling weeds much easier. Pulling weeds is one of the thing we have been spending much time doing this past week as weeds were threatening to take over the strawberry patch, the garlic field and the asparagus patch. Pulling weeds out of dry clay soil is next to impossible so that task will go much quicker now.

IMG_4124.JPG
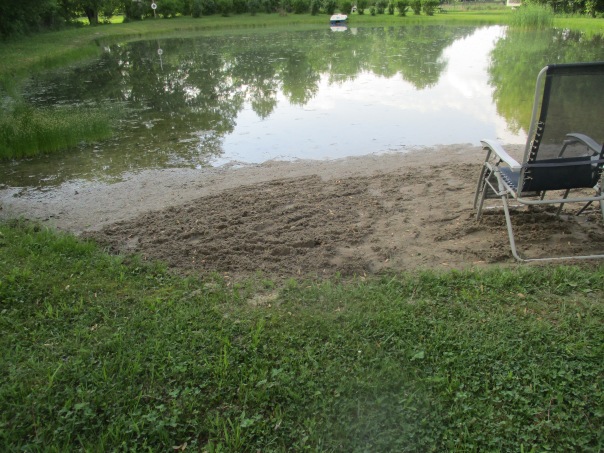
Since the temperatures were so warm (hot) I did spend some time last Friday raking the beach area. If I have to work on a hot day cleaning the pond is the perfect job. 🙂 After I raked the leaves out of the beach area and used our small rototiller to rough up the sand we set up our beach chairs and umbrella. Woo hoo we are ready for summer!!!

The following day when the sun was high in the sky and temperatures soared, a dip in the pond was a refreshing treat.

Thus far we have picked and eaten and froze lots of asparagus and I picked some rhubarb and put several packages in the freezer as well. When I was freezing the rhubarb I discovered one small package of rhubarb from last year. I decided I needed to use it up. I also found the last of my strawberries from last year – another small package. Since there were only about a cup of each there was not really enough to make this into a pie or crisp, so I decided to make strawberry-rhubarb sauce. I put both the strawberries and the rhubarb in a sauce pan then added a bit of water – maybe a half cup. I wasn’t too worried about having too much because I could cook it off to get the sauce to thicken. I simmered this until the fruit was soft. I then mashed the mixture with a potato masher. I continued cooking it until it was thick and added sugar to taste. I can’t really tell you how much sugar to add because everybody likes a different degree of sweetness and some strawberries are much sweeter than others. I just started with a couple tablespoons and tasted until it was right. While this fruity dessert was good eaten plain, my husband used some as an ice cream topping and I mixed some with some vanilla yogurt as well.

They say that time flies when you’re having fun, and I have always believed that time seems to go faster as I get older, so I think both of these combined explains why it is June already and I feel like I missed Spring. Thanks for sticking with me for this recap.

Just curious – does time seem to be flying by for you as well?

The Soap is Curing

I am sure anyone who makes cold processed soap will agree that the hardest part about it is waiting for the soap to cure.

Maybe I should backup a step for anyone not familiar with soap making. There are basically three methods that can be used for making handcrafted soaps. There is the melt and pour method which involves buying a premade base soap and melting it to add ingredients such as fragrances and colorants then remolding it perhaps into pretty or cute shapes. The other two methods are hot process and cold process. Both of these methods involve mixing lye with liquid and oils. With hot process, once the ingredients are combined the soap is heated in order to speed up the chemical reaction, known as soaponification, which must occur in order for the soap to be safe to use. This soap can be ready to use in a matter of hours. Cold process soap, on the other hand, is poured into the mold after the lye/liquid is mixed with the oils. While it can usually be taken out of the mold in 24 to 48 hours it needs to cure for several weeks while the soaponification takes place. Many factors can effect the speed which soaponification takes place including the soap recipe, the size of the soap bars and the temperatures in which the soap is curing. I allow my soaps to cure for a least six weeks and have almost always found this period to be sufficient.

I have several batches of soap in various stages of curing right now including the soap I made a few days ago by request https://donteatitsoap.com/category/lard-soap/ I honestly found it difficult to make that batch of soap because it was such a simple recipe. It lacks the creativity and experimentation aspects that I find so challenging and fun. While it was very tempting to add extra ingredients I restrained myself because this, three-ingredient, soap was what the person who requested needs.

Some of the other soaps that I have curing have allowed me to be more creative so I will tell you about those. Both the Sweet Dandelion and Coffee soap that I made a while back are cured and ready to use. I have made both of these recipes in the past and they are both favorites.

This time when I made the coffee soap I decided to experiment with it. I have been having some success at getting light fragrances and or colors in my soaps by infusing herbs into the oils. I wondered if this would work for coffee as well. In the past when I have made coffee soap I used brewed coffee for the liquid, I also added coffee grounds. This time in addition to using brewed coffee I added the coffee grounds to my oils. I knew that in order to release the oils from the coffee grounds the coffee would need to be heated much higher than I normally heat my soap oils. I put the coffee grounds into my oils and heated them about 190 degrees Fahrenheit. I then let the coffee infused oils cool.  As usual I mixed my oils with my lye/liquid (brewed coffee) when both were cooled to about 100 degrees Fahrenheit.

IMG_3461
Coffee Soap

The coffee infused oils gave the soap a dark, rich coffee color but the fragrance that I had hoped for is still largely absent. I have since read that the optimal temperature for brewing coffee is between 195 and 205 Fahrenheit so next time I will heat it just a little bit more.

I have had positive feedback from a few people who have used this soap. Comments were things like “it’s a really nice soap” and “I really like it” and my sister who called me yesterday said “I love the coffee soap” and she found it to be “refreshing”.

Among the other soaps that are curing is a completely new recipe. I decided to try this back in the summer when we were harvesting our beautiful cucumber crop. I know that cucumber is often used in skin care products so I wanted to give it a try. I don’t usually make a lot of soap during the summer so I pureed a couple of cucumbers and put them in the freezer until I was ready to make the soap.

About 5 weeks ago I was ready to use the cucumber puree in my soap but I wondered what ingredients would pair well with the cucumber. The most common way we eat cucumbers is as pickles but for more than one reason that doesn’t work for soap. It took me a while to figure it out but I eventually decided to try yogurt. Since milk based soaps are known to be gentle and creamy I though yogurt could add this as well. I also wanted to add an herb to this soap so I decided to infuse my oils with rosemary that I had harvested from our garden. I didn’t want to leave the rosemary leaves in the soap so I put them in a teabag then placed the teabag in the oils as I heated them. I again brought the temperature up higher than I would normally heat them for making soap in order to draw out some of the rosemary properties. When adding the cucumber puree and yogurt I knew that they should be counted as liquid. Since I didn’t know how they would react to being mixed directly with lye I decided to add them later in the process. In order to do this I discounted the amount of water I was mixing with the lye. I decided that the combination of cucumber puree and yogurt should equal 1/3 of my total liquid, I divided the amount of water my recipe called for by 3. I then measured my cucumber puree and added enough yogurt to bring this mixture to 1/3 of my total liquid. I set that mixture aside then measured the other 2/3 water and added my lye to it.

Once the lye/liquid and the oils cooled to around 100 Fahrenheit I removed the rosemary from the oil then I mixed the lye/water with the oils. I blended this mixture until it came to a light trace (started to thicken) then I mixed in the cucumber/yogurt mixture. I continued to mix until the mixture had come to a full trace ( the consistency of a thick gravy) then I poured the mixture into the molds. I am excited that this soap will be ready for testing this week.

I don’t have a formal testing process. It basically goes like this – I use the soap first. I pay attention to it’s properties – hardness, creaminess, lather, does it rinse off well, does it leave my skin feeling soft or dry, is there any scent. I then give my husband a bar to use and get his opinion. With new recipes I generally like feedback from a couple more people, so a friend or family member who stops by when I have a new soap ready will likely be given a bar to try with the condition that they provide me with honest feedback about the soap. I’ll be sure to let you know how this soap turns out.

I do have one major concern about this new recipe with cucumber, yogurt and rosemary.Maybe you can help. The  problem is what the heck do I call it? You can leave your suggestions and any other questions or comments about this post in the comments section below.

Thanks for reading.

🙂 until next time.


Fall Activities

To start off this post I want to send a great big Thank You to anyone reading this. My readership is growing and in the past few months the number of people who are following my blog has doubled. It’s still not a big number but it is very encouraging. Having followers is kind of like making new friends. Followers can visit our farm through many of the pictures I post and can keep up with what we are up to just by reading along. It’s always exciting when somebody hits the “like” button or I get hits off Facebook indicating that somebody liked my writing well enough to share it with their friends. Best of all is when someone takes the time to leave a comment.  It’s almost as good as having friends stop by for coffee and a chat. So again thank you to all those who are reading.

This is a quick update on some of our fall activities before we begin planting garlic this week. If you are interested in what we will be doing with garlic planting you can check out this page https://donteatitsoap.com/a-year-in-growing-garlic/ .

IMG_3325

My husband has been working on expanding our strawberry patch. He first weeded  them then cut and transplanted runners before mulching with straw. Since this picture was taken he has finished the center so there is now 7 full rows of strawberry plants. We are praying for a bountiful crop in 2018.

After finishing the strawberry patch he moved on to the asparagus bed. We added to the asparagus this spring so we now have around 100 plants. Over the past few days he has cut down the ferns that were dead leaving a few that were still green. With hands and knees in the dirt he weeded the areas directly around each plant. He then tilled in between the rows. Since I didn’t get a picture you’ll have to trust me when I say it looks beautiful. Straw will also be used to mulch the asparagus before winter sets in.

He has cleared out most of the garden since nearly everything is done producing. He cut corn stalks and gave some to friends and neighbors to use for fall decorations.

While he has been busy with all of the fall farming activities my time has been split more between the farm and the house. My activities at the farm were mostly preparing the prayer garden for winter.

IMG_3329

I gave it a good weeding, then I trimmed dead foliage and blossoms from most of the plants. I left any blossoms that were still open, as they were being used by bees and butterflies in search of food. I also dug out some Irises because they were spreading beyond where I wanted to go. I gave the dug up Iris bulbs to a neighbor who was happy to receive them.

At home I cooked up and froze pumpkins from our one volunteer pumpkin plant that produced this year. It was not a pie pumpkin but it made a fabulous pumpkin pie.  You can find my pumpkin pie recipe here https://donteatitsoap.com/2015/09/22/pumpkin/   I froze several packages of eggplant and I turned some of the strawberries, that I had froze in June, into jam. I also filtered the beeswax that had been tucked in the freezer after the our honey harvest.  Check out this post to see how I filter beeswax. https://donteatitsoap.com/2016/06/06/filtering-bees-wax/

After several months of not making soap, I made two batches last week. The first one I made was Sweet Dandelion. Since it was such a big hit when I made it in the spring, I knew that I would want to make another batch so even though they were nearly done blossoming, in late June I walked the farm in search of dandelions. I was able to find enough to make a pot of dandelion tea and infused the rest in some sunflower oil. I froze the dandelion tea and I had both of my key ingredients ( tea and oil) last week when I was ready to make this soap.

The other soap I made was coffee soap. I am really looking forward to trying this soap because I used a new and (hopefully) improved method. I will post about it in the future, probably in six weeks or so when the soap is ready.

For now I must refocus on the task at hand – garlic planting, so until next time I wish you well.

Two New Soap Recipes- The Results Are In

In April I posted about the two new soap recipes that I had made. One was made with   dandelions infused in the water and oil. Honey was also added. The second was made with maple sap and maple sugar sand. https://donteatitsoap.com/2017/04/29/two-new-soap-recipes/?iframe=true&theme_preview=true

My husband and I have now sampled both of these soaps and we are extremely happy with the results.

The dandelion soap, which I am now calling Sweet Dandelion, has a deep golden color to it. I used this soap before my husband and fell in love with it. “Silky” was the term I thought of when I felt the lather on my skin and though it rinses off well it leaves my skin feeling soft. I did not share my thoughts with my husband before he used it. Once he had showered with it I asked what he though. “Good lather, smooth, and rinses off well, I like it!” were his comments. I then shared my thoughts and we agreed my description “silky” translated to his use of the word smooth.

A few days later one of my sisters (J.B.) stopped by so I gave her a sample bar. I told her what it was and asked for her opinion. She said she would try it the following morning. Around 9:00 a.m. the following morning J.B. called me. She loved this soap. She agreed with our descriptions of silky and smooth and told me she would like two more bars.

After my husband mentioned several times that he wished I could make another batch of the dandelion soap I found myself walking our back field in search of dandelions. By this time the dandelions which had blanketed our property a few weeks earlier were now few and far between. I was able to collect a couple cups of dandelion blossoms. I used half to make a tea-type infusion, which I put in the freezer, and the other half are infusing in oil as I write. I will be able to make one more batch of Sweet Dandelion soap between now and next spring.

We were also pleased with the maple soap which I have decided to call MMMaple Soap. I am not surprised that maple sugar sand which is made up mostly of calcium salts and malic acid seems to have dissolved, nor am I surprised that this soap has incredible lather since sugars added to soap have that effect. I do have some of the sap that we saved for this recipe in the freezer yet so I will also be able to make this recipe one more time before next spring.

Anyone interested in purchasing either of these soaps may contact me by email at ruth20012001@yahoo.com and put soap in the subject line.


Two New Soap Recipes

I am really excited about the two new soap recipes I made this week. The soap I made on Monday was inspired by the dandelions that are popping up everywhere screaming “spring is here.” I decided that those yellow beauties might just make a nice soap.

Usually before I try something new with a soap recipe I do an internet search to see if others have done similar. Artisan soap makers are a creative bunch and it seems there is not much they haven’t tried and wrote about. I did indeed find several sites with dandelion soap recipes, stories, and for sale. I do not use other peoples recipes but I like to get an idea of how others have used particular ingredients, what the results were and if there is anything major that might go wrong.

By this time I have learned that when adding botanicals to cold process soaps you will very rarely capture any fragrance and I have no way of testing to see if any potential therapeutic benefits from them survive the process. The most I could hope for is to capture some of the cheery yellow color. Hoping to double up on any benefits I infused both the water and the oils with dandelion flowers. I decided to add honey as well.

This recipe is now out of the molds and has a deep yellow color. It still has to cure for about six weeks and doubtless the color will change as the soap cures. I’ll let you know how it turns out.

Todays soap experiment is maple. When I did my internet search for maple soap I found that maple syrup is often used as an ingredient in handcrafted soap. My plan was a little different. When my husband was collecting sap to make syrup this spring I asked him to save me a couple of quarts so I could make a batch of soap with it. “Are you sure you know what you are doing?” he asked. I explained that I plan to use the sap in place of the water in my soap recipe. He graciously obliged my request and I have kept the sap in the freezer waiting to be turned into soap.

One morning when we were having our homemade syrup on our pancakes and I looked at the sugar sand that had collected at the bottom of the jar and wondered about using it in soap. Will the sand particles remain sand or will they dissolve during the processing. I remembered reading that it is mostly composed of calcium salts and malic acid. It is not harmful to eat and upon further research I learned that those ingredients can be beneficial for skin care. Again I can’t make any claims about my soap providing these therapeutic benefits because it is questionable whether they survive the soap making process. The sand in that jar was gone before I had a chance to tell my husband that I wanted to save some for making soap. We had a few more jars with sand at the bottom, so I opened one this morning, poured most of the syrup into an empty jar and put it in the refrigerator for future breakfast. The sand and a small portion of the syrup that was left in the bottom of the jar were added to my soap.

The maple soap, if it turns out well, will definitely be a seasonal soap and I expect the sweet dandelion soap will be as well. Although they won’t be ready for 6+ weeks you can contact me by email ( ruth20012001@yahoo.com) if you are interested in purchasing either of these soaps. 🙂