Tag Archives: Homesteading

Dehydrating Garlic Again

I first wrote about this topic in January of 2016 but I tried some new methods this year and thought I would give you an update.

Peeling the garlic is the longest part of the process and is probably the reason most people will choose to buy garlic powder rather than make their own. Peeling garlic is not a hard job, if fact with this handy silicone garlic peeler, that we highly recommend, it is so easy that a child can do it. However, peeling large amounts of garlic to dehydrate is still a big and seemingly never ending a chore.

IMG_0552

In a quest to find an easier or at least quicker way I did an internet search. I found a few methods that looked promising so I tried a couple. I first tried putting the garlic in a bowl and placing a second bowl on top and shaking it. The video made this look so easy that I figured I could have all my garlic peeled in no time. My attempts at this were futile. I ended up with one or two cloves partially peeled and the rest of the peels clung tight to the cloves.  😦 I really don’t think it was anything that I did wrong or that these videos are fake. I suspect it has everything to do with the variety of garlic that they were using verses the varieties of garlic that I was using. Yes, in case you are wondering there are many (I’ve heard as many as 600) different varieties of garlic.  While I can’t endorse this method of peeling garlic I would say it is probably worth a try before you move on to something else. It might just work for you.

The other method I decided to try was blanching the garlic. I didn’t want to cook the garlic so rather than put it in boiling water I decided to immerse it in hot (probably about 180 F) water for 1-2 minutes I then put the cloves in a bowl of cold water until I was ready to peel each one. This method produced better results in that once the skin was pierced or broken it easily slipped off the clove. I pierced the skin using a paring knife while cutting off the root end.  Even though it seemed easier I’m not sure that it was any quicker than peeling each clove with the handy little garlic peeler shown above. It is also worth mentioning that I would only recommend this method if you are peeling a large amount of garlic.

Another thought came to my mind as I was writing this and it may just be the answer you/we are looking for – purchase several of the silicone garlic peelers and get the whole family or even the neighbor kids involved. Many hands make light work. (See why my kids moved out. LOL)

There was one other thing I did differently this year. Last year I wrote that I used the slicing blade in my food processor to slice the garlic. For some reason my slicing blade is missing so I decided to use the shredding blade. This actually turned out really well. It was difficult to spread the garlic evenly on the dehydrator trays but even in small clumps the garlic dried in about 1/2 the time as it did last year.

Lastly I will leave you with a warning. Dehydrating garlic in a food dehydrator produces a strong and somewhat overpowering garlic odor. This is a job that is best done in outdoors, in an out building, or in a closed off room with an exhaust fan.

I hope you find these tips useful and if you have any tips to share please leave them in the comments section below.


Making Maple Syrup

It doesn’t seem like a whole year has gone by since we last tapped maple trees and made our maple syrup. Maybe that’s because it hasn’t really been a whole year. While I didn’t remember the exact date that we tapped trees last year I was able to review the post I wrote about it, and I discovered that last year we tapped the trees on February 13th. Last year’s sap flow was considered early and we read that some syrup producers actually missed the season because the were not expecting the season to come so soon.

It was only January 20th according to the calendar but nature doesn’t necessarily go by the calendar. Despite the brutal cold we have had this winter we had been watching the forecast and preparing for the sap season to start. This is only our third year making syrup, so we don’t have much experience to go by, but since temperatures were forecast to be in the high 30’s and low 40’s Fahrenheit (between 3 and 7 degrees Celsius) 7 out of the next 10 days we thought this might be the right time. My husband thought that it would be a good idea to do a few test taps to see if the sap was flowing. So we took supplies for four taps to the farm.

IMG_3685
January 20, 2017


The day was very reminiscent of the day we tapped last year. The sun was shining, there was still a thin layer of snow on the ground, and the pond was mostly still frozen.

IMG_3681
Happy Hens


The chickens were happy to be out scratching , pecking and even dusting themselves.


My husband and I worked together, taking turns drilling the holes and setting the taps.

IMG_3696
First Drop Of Sap


When the sap began running within seconds of being tapped we knew we were on the right track. After setting the first four, we went home, gathered the supplies and returned to set the remaining 13.

A couple days after tapping the trees the high temperatures again stayed below freezing so no sap was flowing. Then we had a couple more day where temperatures reached into the 40’s F so the sap began to flow again. By Friday my husband determined that he had collected enough sap to make syrup. We would cook it Saturday.

My husband had the cooking station set up in the driveway. Because cooking sap produces so much steam cooking it the house would be a horrible mistake, and we are not equipped with a sugar shack so we do it much the way we imagine our ancestors  would have – outdoors over a wood fire.

The fire pit is simple – made of two layers of concrete blocks on three side

IMG_3704

He spaces the concrete blocks so that the shallow stainless steel pan sits on the edges of the blocks. We build the fire within the blocks and continually feed wood into it from the open side.


IMG_3702

We used a mixture of hardwood limbs and logs that we had cut on the farm and some scrap lumber my husband had picked up from the local sawmill. We began cooking the sap around 11:30 A.M. and by 4:30 P.M. we had reduced the estimated 23 gallons of sap  to the point that we could finish it on our kitchen stove.

Before cooking it on the stove we poured it through a sieve to remove some of the ash that was floating in it. I then brought it back to a boil and continued cooking it until it reached 7 degrees above the boiling point on the candy thermometer 219 degrees F.

Filtering the sugar sand out of the syrup is something that we have struggled with the past two years, so I decided to pay close attention to the temperatures while doing this. I let the syrup cool to between 180 and 190 F. For a filter I used one layer cheese cloth with one layer of felt placed on top of it. I placed the two layers together in my canning funnel then poured the syrup through the fabric lined funnel directly into the jar.

After pouring each jar I needed to change the filter, so I put the pan of syrup back on the stove over a low flame so I could maintain the proper temperature. The syrup flowed easily through the filters. I sealed each jar as soon as it was poured. We ended up with just a very small amount of sugar sand in the bottom of the jars. There is no harm in eating sugar sand as it is said to be made up of calcium salts and malic acid, so filtering out this sand is purely for aesthetic reasons (it does look like muck in the bottom of the jar).

IMG_3724

Even though once sealed the syrup should not spoil, I like to bottle the syrup in wide mouth mason jars, because as long as I leave the proper amount of head space the syrup can be stored in the freezer.  We ended up with nearly four pints of beautiful, sweet maple syrup.

What the rest of the maple syrup season will bring is anyone’s guess. Our weather forecast for the next 10 days shows daytime temperatures below freezing for all but one day, so we are not expecting the sap to run again for a while. When the temperatures do warm again, if the trees bud out quickly the sap will turn milky and is not good for making syrup, so we are grateful that we tapped the trees early and at least have some syrup this year.

I also made an interesting observation as I looked back at my post from last year, “The Sap is Flowing and the Hens are Laying”.   Again this year, as we tapped the maple trees we noticed that the hens have began laying more eggs. For five or six weeks we were getting an average of four eggs a day, this was enough to keep us in fresh eggs through the winter. On January 20, the day we tapped trees, we collected six eggs, then over the next week the amount increased so that we have collected 12 eggs each of the last two days. I honestly expected that the increase in egg production was more related to the number of hours of daylight and similarly to last year would occur in the middle of February. Perhaps it is more about the warmer temperatures we have been enjoying, I’m really not sure, but I do think I will attempt to track these two events in future years to see if they continue to coincide.

Until next time be well. 🙂


Welcome

IMG_3674 (2)

Welcome Friends!

I have to start with a huge THANK YOU to everyone reading this. When I first started writing this blog, about two and a half years ago, I never imagined it would be what it has become. I figured I might have a few people who would read it regularly – friends and family that know and love me. For quite a while that was the case. Occasionally I would look at my stats and see that no one had viewed my blog for several days and I wondered if it was worth writing, then a friend or family member would mention how much they enjoyed reading it. That was all I needed to inspire me to keep writing.

Today I am amazed as I look at my blog stats and see that people from all over the world, 67 countries at last count, have visited my little piece of the internet. Since visiting my blog is often much like a visit to our home or our farm it occurred to me that many visitors probably have no idea where in the world we are at, so if you are curious I will give you some direction. I will start by saying that we are in Michigan which is a state in the USA.

pexels-photo-269646.jpeg

If you are not familiar with Michigan you can find it easily on the map above. Michigan is the state that is shaped like a mitten, well at least part of Michigan is. Our state is unique in that it is made up of two peninsula’s. The lower peninsula is shaped like a mitten and the upper peninsula, you can see on the above map, is the piece of land to the North that extends Westward or to the left (its upper border is outlined in red). Interestingly, while lower Michigan is bordered by the U.S. States of Indiana and Ohio to the South and Upper Michigan is bordered by the U.S. State of Wisconsin to the West, Michigan’s two peninsulas do not share a common border. They are separated by the Straits of Mackinac, which are a series of narrow water ways that connect Lake Huron and Lake Michigan. To travel from one peninsula to the other, by car, you must cross the Mackinac Bridge, which is nearly 5 miles long and said to be the forth longest suspension bridge in the world.  http://www.mackinac.com/about/mackinac-bridge Because Michigan is surrounded by the Great Lakes and adjoining waterways there are also many islands that are part of our state.

To give you a better idea of where we are in Michigan I would hold up my right hand with the palm facing you and my fingers held tightly together (like a mitten) and point to an area near the bottom of my thumb. Michiganders are known for using their hand as a map. Our little piece of the earth is 7.6 acres of farm land in a rural area North East of  Detroit and South West of Port Huron. Some of it is wooded and some of it is open field. We put in a pond as a source of fresh water in 2012, but have yet to build a house on the property.

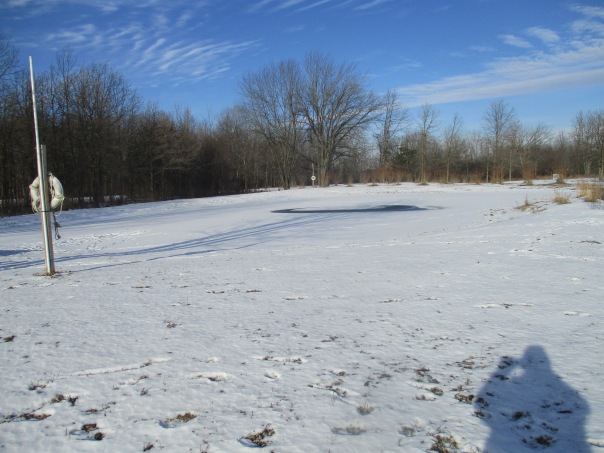
Like much of the U.S. this winter has been brutally cold here in Michigan, but I thought today I would invite you to take a walk with me. Don’t worry we won’t have to put on an extra 10 lbs. of gear to survive the freezing temperatures and trudge through the snow, because this part of the post I actually started writing last summer.

During the warm seasons, spring after the snow melts, summer, and fall until the snow gets too deep, I like to walk our back field. We keep a path cut around the outside of the field and two paths that cut across the middle. We allow the rest of the field to grow wild during the summer and we mow it each fall. It’s interesting that each year different plants seem to dominate the field. This field, which many people would view as a field full of weeds, we see as a field full of wild flowers. Not only does it provide habitat and food for countless bunnies, birds, rodents, toads and insects, the deer graze it regularly, and it is home to many plants that our bees love to forage.

I usually start my walks on the East side of the property, heading North and off to our left you will notice a large fenced in area. This is our main garden, where we grow much of our own produce in the summer. We also have 5 apple trees growing within this area and we moved our entire blueberry patch in here as well. It didn’t take us long to learn that fencing is the best way to protect our vegetation from deer.

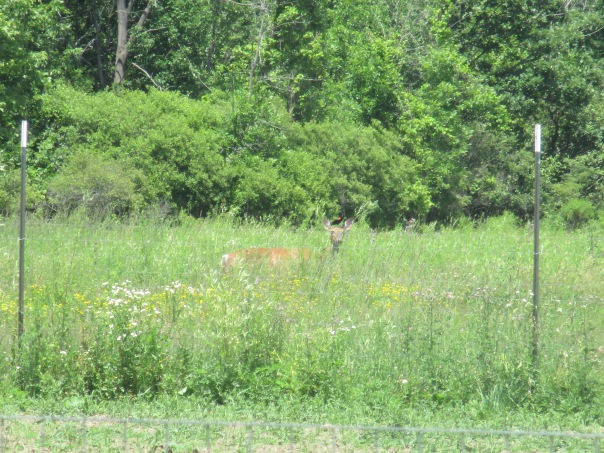
As we walk toward the field I will look for deer grazing. This will be our best chance to see deer because Scout and Trooper will undoubtedly be with us and will frighten off any deer. The boys have been taught that they can only chase the deer as far as our property line and it has become a game for Trooper. I suspect if the deer ever decided to stay and play he would have a ball with them…but they don’t.

We may see one or two, we may see a mother with her baby(s) or we may see 20 or more deer grazing in the field. On a rare occasion we might witness a scene that feels like something out of a Disney movie. Like this red winged black bird that rides on the back or head of this deer.

IMG_2980

One day when Trooper was walking with me he scared the deer off. The blackbird that had been sitting on the back of the deer began diving at Troopers back, obvious angry at him. The bird never touched Trooper and because the bird was diving at his back he was oblivious to it and bird eventually flew off.

IMG_3283

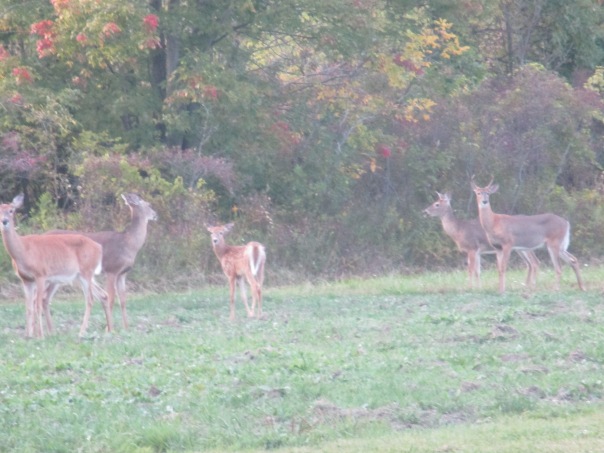
While the deer are beautiful to watch, are seemingly harmless and our guests get very excited to see them, we have come to see them as a nuisance.  We have invested much money, time and energy to protect our crops against deer. It seems that deer will eat or at least taste anything … except garlic.

When we first bought the farm and we asked a neighbor how he kept the deer from eating his garden he said “plant enough for you and plant enough for the deer.” While his advice sounded good in theory, we quickly learned that it doesn’t work. The deer apparently did not understand the concept; they would walk through the pumpkin patch and rather than eat just one or two whole pumpkins they would take a few bites out of many pumpkins. Thus we concluded that the best way to protect our plants, including young trees, is adequate fencing.

IMG_2935

Beyond the main garden the rest of our property is open fieled. The bright yellow flowers that are blanketing the field at this time are Bird’s Foot Trefoil. The first year we had the farm I notice one small patch of this plant growing in the field. It’s brilliant flowers caught my attention so I did some research to find what it was. Each year I have noticed more and more Trefoil. I suspect that as we cut the field in the fall we are scattering it’s seeds throughout the field. Trefoil is a legume that is used for animal forage, cut for hay, or planted to prevent soil erosion.  https://plants.usda.gov/factsheet/pdf/fs_loco6.pdf One thing we have discovered, that is not mentioned in this USDA fact sheet, is that honey bees like it. This in itself is enough for me to appreciate this plant.

The small white flowers tinged with pink are White Clover. https://plants.usda.gov/factsheet/pdf/fs_trre3.pdf  This is another plant that we highly value as the honey bees feed heavily on the blossoms. While we did not plant the clover in the back field, we have planted a mix of clover and grass seed in areas that we have landscaped. Clover is a nice addition to lawn areas as it can be mowed and it will grow back, and even blossom, repeatedly throughout the summer. It is also nice to walk on barefoot, and we have noticed that it seems to crowd out other unwanted plants like thistle.

IMG_2945

Young Spruce trees line the East and North sides of our property. We began planting these in our second year here. We purchase the 12″ to 15″ seedlings and keep them in a nursery area for one or more seasons to give them time to grow and develop roots and branches, then we transplant them around the farm. Most of these were planted in 2012.

IMG_2941

Canadian Thistle grows sporadically throughout the field and other places on the farm. We mostly consider this plant a menace despite the pretty purple flowers that also have a lovely fragrance, their only saving grace is in the fact that the honey bees like them.

IMG_2943

This white flower with feathery leaves is Yarrow  https://draxe.com/yarrow/ . I have noticed Yarrow growing in various areas on the farm over the past few years but this past year was the first time I noticed it in the back field. According to the above article yarrow is both a culinary and medicinal plant. I not sure why I have not harvested any yet.

IMG_2937In the photo above the Timothy Hay is somewhat camouflaged amongst the other greenery, but if you look toward the top of the photo just left of center you can see Timothy’s long thin seed heads that are a lighter green. Small patches of Timothy are scattered throughout  the field and each year I notice a little more. As we walk past the Timothy I will likely pull on one of the seed heads and as I do the seed head along with the top portion of the stem will slide out of the lower part of the stem. I will put the stem in my mouth and you will no doubt think the I am a hick. I will then pull a second one and offer it to you explaining that Timothy is the best weed for chewing. The end of the inner stem is soft and juicy and even a bit sweet. I lightly chew the end for a while before discarding it later along the way.

IMG_2954

Along the West side of the field is a line of trees that runs the full length of the property and separates our property from the neighbors next to us. The tree line is composed of mature trees, mostly Oak, Maple, Ash, and Hickory, along with various bushes and shrubs and vines that makeup the undergrowth. Unfortunately, the Ash trees in Michigan have fallen prey to, and are being killed off by the Emerald Ash Borer, thus we have cut down nearly all of the dead Ash trees to use for firewood.  As we cut trees down we are also planting new trees. In the above photo you can see the large dead Ash tree to the right and the young Maple that we planted a couple years back in the center foreground. You may also spot some Timothy growing there. Yep, it’s okay to pull one to chew. I knew you would find them as irresistible as I do. 😉

IMG_2972

As we circle back around we are now at the West end of the main garden. This is where we moved our Blue Berry Patch to. Having been in a different location for several years we weren’t sure how well the bushes would adapt to this new environment. They have seemed to do well and while we no longer worry about the deer eating them since they are in the fenced area, we still have to protect the fruit from birds, thus the netting over them.

Well, my friend, thank you for spending this time with me. I hope you enjoyed our walk in the field. If you aren’t ready to leave feel free to hang around and enjoy some more of our farm. You can do so by clicking on the following links.

https://donteatitsoap.com/2017/06/28/pond-pictures-relax-and-enjoy/

https://donteatitsoap.com/2017/08/12/gone-fishing/

https://donteatitsoap.com/2017/05/25/five-hives/

https://donteatitsoap.com/2017/09/05/our-harvest-picnic/

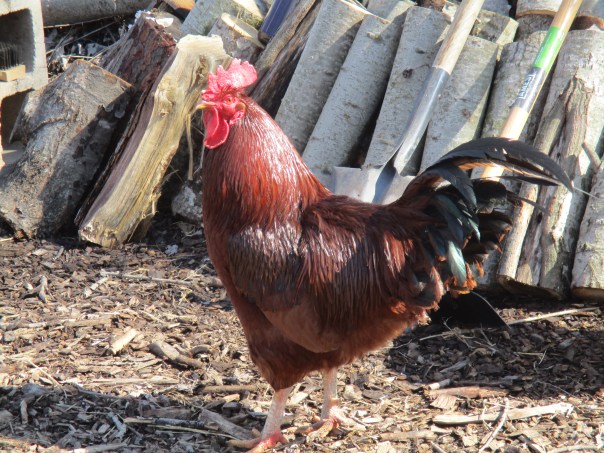
https://donteatitsoap.com/2017/05/22/this-season-on-chicken-tv/

https://donteatitsoap.com/2017/05/31/a-beautiful-monday/

and if you would like to return you can always do so by following my blog. Please feel free to leave your questions and comments below as two sided conversations are much more fun.


Rescue Rooster

We’ve been raising chickens on our farm since 2013. Having a free range flock of egg layers was one of our priorities when we bought the farm and everyone that knows us knows how much we love our chickens. You can read some of my previous posts about chickens here https://donteatitsoap.com/category/chickens/ .

Ever since we put our first flock of chickens in the coop our lives have revolved around chickens. Every morning without fail, we (nowadays my husband) open up the coop as the sun is coming up, and provide fresh food and water for the flock. On days that he or we are not working at the farm it is necessary to make at least one, but usually two, midday runs to the farm to check on the chickens. Our presence helps to deter predators. Every evening, after doing a beak count,  the chickens are closed in the coop for the night. If any chickens come up missing a search ensues, sometimes resulting in finding that a hen has gotten into one of the fenced in gardens and can’t find her way out, or one has decided to roost in a tree for the night. Other times we have found that, sadly, a hen has fallen prey to a hawk or a fox, and some times they just disappear with out a trace.

Our vigilance has been rewarded with being able to maintain a flock of happy, free range, egg layers, who provide us and others with delicious, healthy, farm fresh eggs. The insect control and entertainment they provide are supplementary benefits.

One thing that we have learned over the years is that while it may be a good idea to keep a rooster to protect and service the flock, having more than one rooster causes disharmony and stresses the hens. Thus we have agreed to only keep one rooster.

IMG_2346
Meet Cocky

Earlier this year I was talking to my dad on the phone and he told me that he had picked up a statue of a rooster that someone was getting rid of. Destined for a dumpster, it was tattered and warn, but since it was not broken dad figured he could clean it up, give it a new coat of paint and bring it back to life-like. He thought this rooster would be a nice addition to our farm. I didn’t tell my husband about the gift dad was planning to give us, because I think surprise gifts are always better.

One day in August when dad stopped by to pick up some eggs and honey I carried the bag to his car and as he put the bag in the back, he took out the life-size rooster statue and handed it to me.  He had done a nice job at repainting it and not only was it as big as a real rooster, it was at least as heavy as a full grown bird.

IMG_3429
Our Rescue Rooster “Jim”


I held the statue tucked into one arm and supported by my other hand, much like I would hold one of our chickens, as dad and I stood by his car talking. I noticed my husband driving up and was happy that dad would be able to present the gift to him as well. As my husband drove closer I could see that he was shaking his head adamantly “No”. I was trying to figure out what he was upset about as he got out of the van and from across the street announced, in no uncertain terms, “it’s not staying!” I couldn’t understand his reaction and as he walked toward us I quickly explained, “dad found this rooster statue and restored it for us.” I thought that he was being rude and going to hurt my dad’s feelings.  About the same time I got the word “statue” out of my mouth my husband had walked close enough that he could get a good look at it. “Oh, it’s not real!” he exclaimed laughing in relief. Dad and I joined in the laughter as my husband explained that from a distance he thought it was a real rooster especially because of the way I was holding it.

Our rescue rooster now resides high atop the oak entertainment center in our living room. (We have kept our agreement of only one rooster at the farm.) A few nights ago my husband and I were laughing about the rooster’s arrival and my husband decided that since we hadn’t given the rooster a name yet and it will always be reminder of the unintended prank my father played on him, the roosters name would be “Jim” (my dad’s name).


The Soap is Curing

I am sure anyone who makes cold processed soap will agree that the hardest part about it is waiting for the soap to cure.

Maybe I should backup a step for anyone not familiar with soap making. There are basically three methods that can be used for making handcrafted soaps. There is the melt and pour method which involves buying a premade base soap and melting it to add ingredients such as fragrances and colorants then remolding it perhaps into pretty or cute shapes. The other two methods are hot process and cold process. Both of these methods involve mixing lye with liquid and oils. With hot process, once the ingredients are combined the soap is heated in order to speed up the chemical reaction, known as soaponification, which must occur in order for the soap to be safe to use. This soap can be ready to use in a matter of hours. Cold process soap, on the other hand, is poured into the mold after the lye/liquid is mixed with the oils. While it can usually be taken out of the mold in 24 to 48 hours it needs to cure for several weeks while the soaponification takes place. Many factors can effect the speed which soaponification takes place including the soap recipe, the size of the soap bars and the temperatures in which the soap is curing. I allow my soaps to cure for a least six weeks and have almost always found this period to be sufficient.

I have several batches of soap in various stages of curing right now including the soap I made a few days ago by request https://donteatitsoap.com/category/lard-soap/ I honestly found it difficult to make that batch of soap because it was such a simple recipe. It lacks the creativity and experimentation aspects that I find so challenging and fun. While it was very tempting to add extra ingredients I restrained myself because this, three-ingredient, soap was what the person who requested needs.

Some of the other soaps that I have curing have allowed me to be more creative so I will tell you about those. Both the Sweet Dandelion and Coffee soap that I made a while back are cured and ready to use. I have made both of these recipes in the past and they are both favorites.

This time when I made the coffee soap I decided to experiment with it. I have been having some success at getting light fragrances and or colors in my soaps by infusing herbs into the oils. I wondered if this would work for coffee as well. In the past when I have made coffee soap I used brewed coffee for the liquid, I also added coffee grounds. This time in addition to using brewed coffee I added the coffee grounds to my oils. I knew that in order to release the oils from the coffee grounds the coffee would need to be heated much higher than I normally heat my soap oils. I put the coffee grounds into my oils and heated them about 190 degrees Fahrenheit. I then let the coffee infused oils cool.  As usual I mixed my oils with my lye/liquid (brewed coffee) when both were cooled to about 100 degrees Fahrenheit.

IMG_3461
Coffee Soap

The coffee infused oils gave the soap a dark, rich coffee color but the fragrance that I had hoped for is still largely absent. I have since read that the optimal temperature for brewing coffee is between 195 and 205 Fahrenheit so next time I will heat it just a little bit more.

I have had positive feedback from a few people who have used this soap. Comments were things like “it’s a really nice soap” and “I really like it” and my sister who called me yesterday said “I love the coffee soap” and she found it to be “refreshing”.

Among the other soaps that are curing is a completely new recipe. I decided to try this back in the summer when we were harvesting our beautiful cucumber crop. I know that cucumber is often used in skin care products so I wanted to give it a try. I don’t usually make a lot of soap during the summer so I pureed a couple of cucumbers and put them in the freezer until I was ready to make the soap.

About 5 weeks ago I was ready to use the cucumber puree in my soap but I wondered what ingredients would pair well with the cucumber. The most common way we eat cucumbers is as pickles but for more than one reason that doesn’t work for soap. It took me a while to figure it out but I eventually decided to try yogurt. Since milk based soaps are known to be gentle and creamy I though yogurt could add this as well. I also wanted to add an herb to this soap so I decided to infuse my oils with rosemary that I had harvested from our garden. I didn’t want to leave the rosemary leaves in the soap so I put them in a teabag then placed the teabag in the oils as I heated them. I again brought the temperature up higher than I would normally heat them for making soap in order to draw out some of the rosemary properties. When adding the cucumber puree and yogurt I knew that they should be counted as liquid. Since I didn’t know how they would react to being mixed directly with lye I decided to add them later in the process. In order to do this I discounted the amount of water I was mixing with the lye. I decided that the combination of cucumber puree and yogurt should equal 1/3 of my total liquid, I divided the amount of water my recipe called for by 3. I then measured my cucumber puree and added enough yogurt to bring this mixture to 1/3 of my total liquid. I set that mixture aside then measured the other 2/3 water and added my lye to it.

Once the lye/liquid and the oils cooled to around 100 Fahrenheit I removed the rosemary from the oil then I mixed the lye/water with the oils. I blended this mixture until it came to a light trace (started to thicken) then I mixed in the cucumber/yogurt mixture. I continued to mix until the mixture had come to a full trace ( the consistency of a thick gravy) then I poured the mixture into the molds. I am excited that this soap will be ready for testing this week.

I don’t have a formal testing process. It basically goes like this – I use the soap first. I pay attention to it’s properties – hardness, creaminess, lather, does it rinse off well, does it leave my skin feeling soft or dry, is there any scent. I then give my husband a bar to use and get his opinion. With new recipes I generally like feedback from a couple more people, so a friend or family member who stops by when I have a new soap ready will likely be given a bar to try with the condition that they provide me with honest feedback about the soap. I’ll be sure to let you know how this soap turns out.

I do have one major concern about this new recipe with cucumber, yogurt and rosemary.Maybe you can help. The  problem is what the heck do I call it? You can leave your suggestions and any other questions or comments about this post in the comments section below.

Thanks for reading.

🙂 until next time.